OAuth 2.0 - Auth0
OAuth 2.0 with OpenID Connect with Auth0 provides the ability to use Auth0 as the OAuth vendor and have users login before accessing a web flow in an application.
Creating an Auth0 Integration for your app
The following link will provide all of the necessary steps for creating an Auth0 Integration: Open ID Connect Protocol. This is required to obtain the Client ID of the integration as well as the Domain.
When asked for a Redirect URI, add one of the following Redirect URIs, depending on where your Org is based.
Redirect URIsUS Realm
https://us.api.prod.airkit.com/internal/session-gateway/oauth/callbackEU Realm
https://eu.api.prod.airkit.com/internal/session-gateway/oauth/callbackAP Realm
https://ap.api.prod.airkit.com/internal/session-gateway/oauth/callback
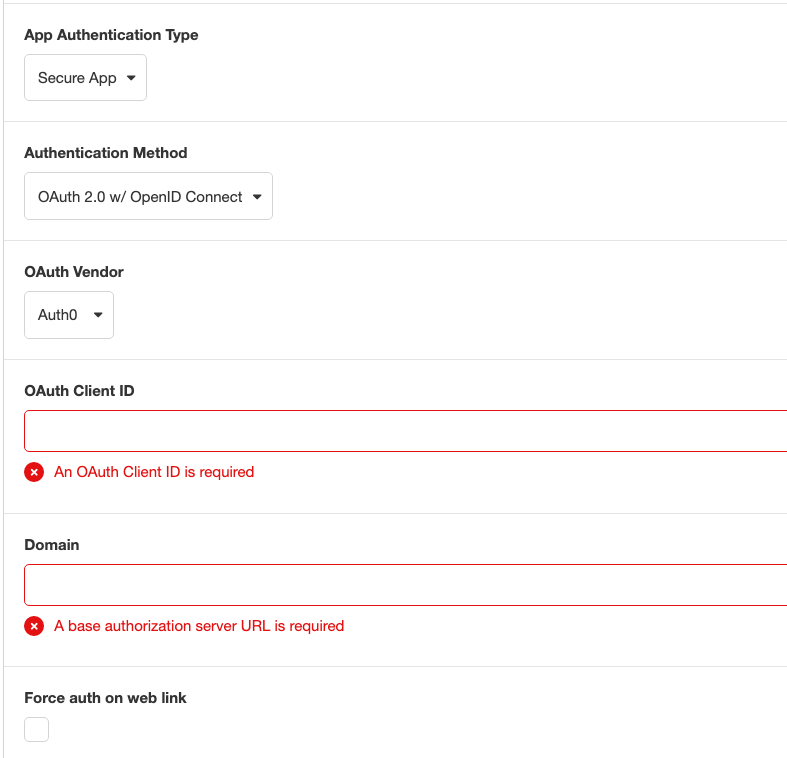
Configuring OAuth in the App
Access your app, go to Configuration Builder > Global and follow these steps:
- From the App Authentication Type dropdown, select Secure App
- In Authentication Method, select OAuth 2.0 w/ OpenID Connect
- As OAuth Vendor, choose Auth0
- Enter your OAuth Client ID and the Domain
- Save your app
Authentication Success
After setting up you OAuth authentication, go to Connection Builder and click on the On Authentication Success Event.
The “On Authentication Success” event will run when the user is authenticated. On this event, there is the event namespace where you can access data about the user.
event.attributesIncludes data such as:
- Picture
- Name
- Locale
event.nameIdnameId refers to the user’s email address they authenticated with.
To access this data and store it in a session variable, In the Inspector section, click on the ‘+’ icon under Actions and add two Set Variable actions from the Data options to get the attributes of the users that signed into the app.
Updated 4 months ago