Texting Journey Links
This guide discusses how to build a Chat Bot that replies to an incoming text with a Journey Link. A Journey Link is a unique URL that takes users to a Web Pages linked to their specific Journey. Replying to incoming texts with a Journey Link automates the process of deflecting incoming text messages by linking the sender to a preexisting Web Flow.
This is a simple and common use case for the tools Airkit provides to send Journey Links via SMS, but it is certainly not the only use case. Journey Links can be included in any text sent by a Chat Bot, which makes it possible to craft long, intricate Journeys along branching paths dictated by input given to web apps and Chat Bot decision trees alike.
Prerequisites: A Journey that starts when the user clicks a link and an attached Web Flow.
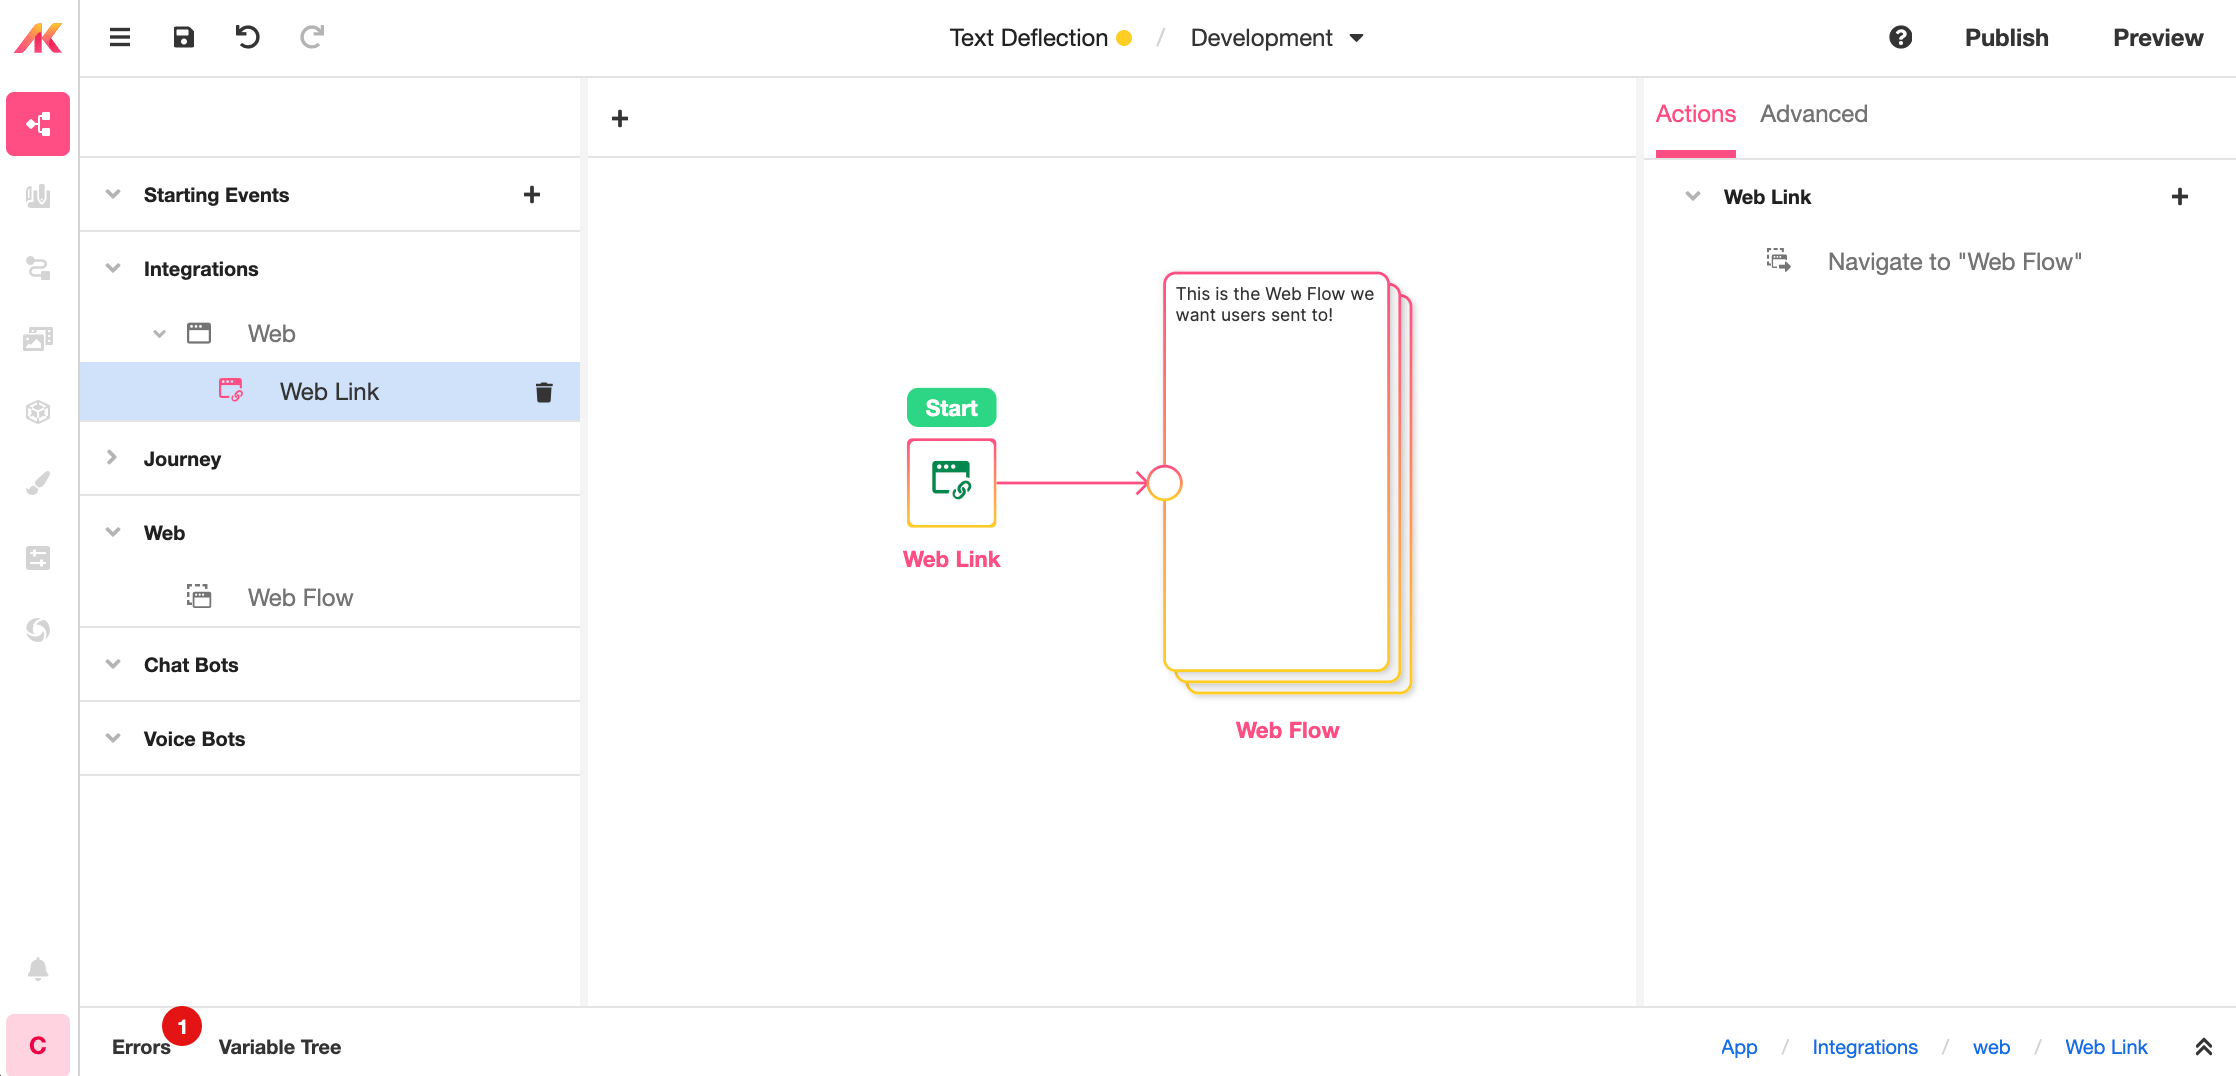
You should have access to a basic Web Flow that begins when a user clicks a link. This should look something like the following Journey Builder screenshot. Note that the given Journey is extremely simple – the Journey begins with a web link and consists of a single Web Flow, designated "Web Flow" – but this does not need to be the case. The relevant web app can contain any number of Web Flows or Events.

Step 1: Add 'Sends a message' as a Starting Event and connect it to a Chat Bot
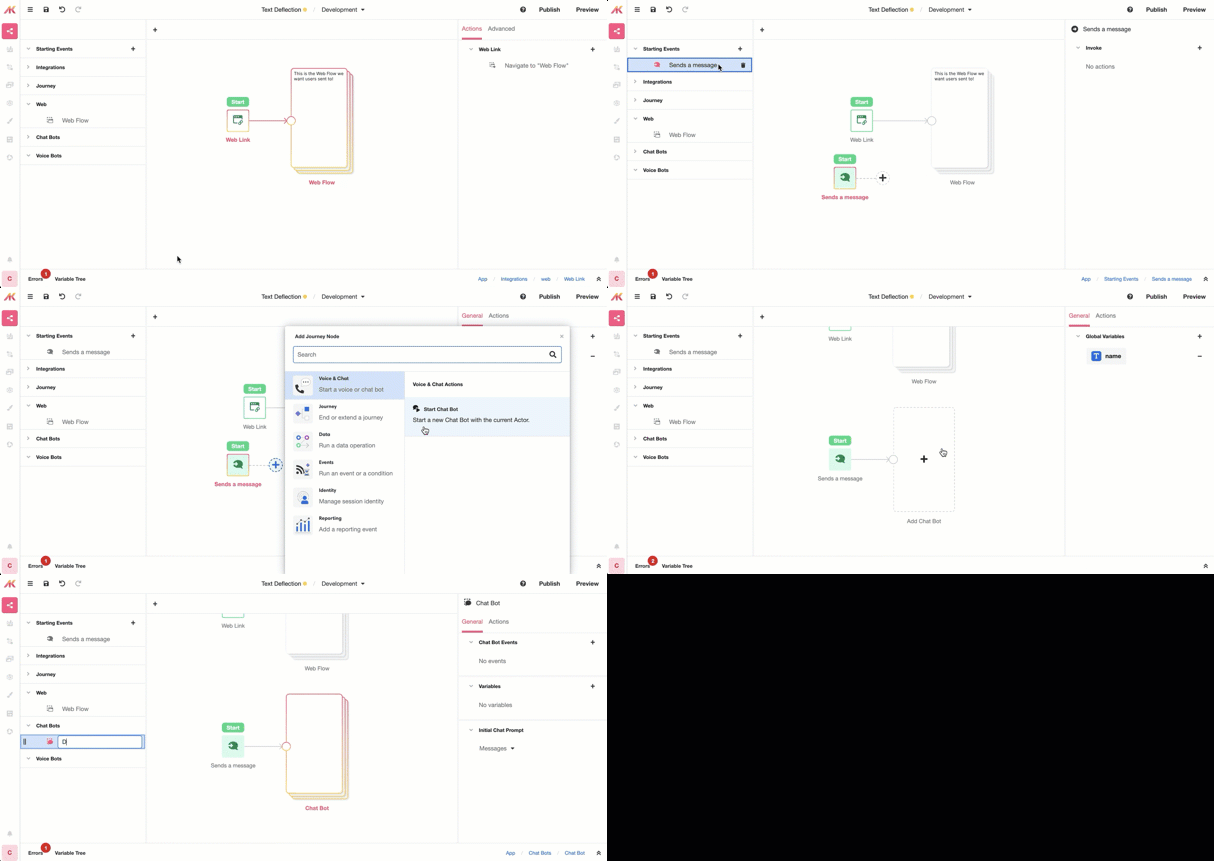
Once you have your web app built out, toggle over to the Journey Builder and add another Starting Event by directing your attention to the Tree, clicking on the '+' icon to the right of Starting Events, and selecting Sends a Message from the resulting menu. This will provide a new means for a user to be begin their Journey through this app – that is, now users can begin their Journey through this app by sending a text message as well as by clicking on a link. Connect this new Starting Event to a Chat Bot and label it 'Deflect Text':

Step 2: Build a Chat Bot that sends a Journey Link to incoming texts
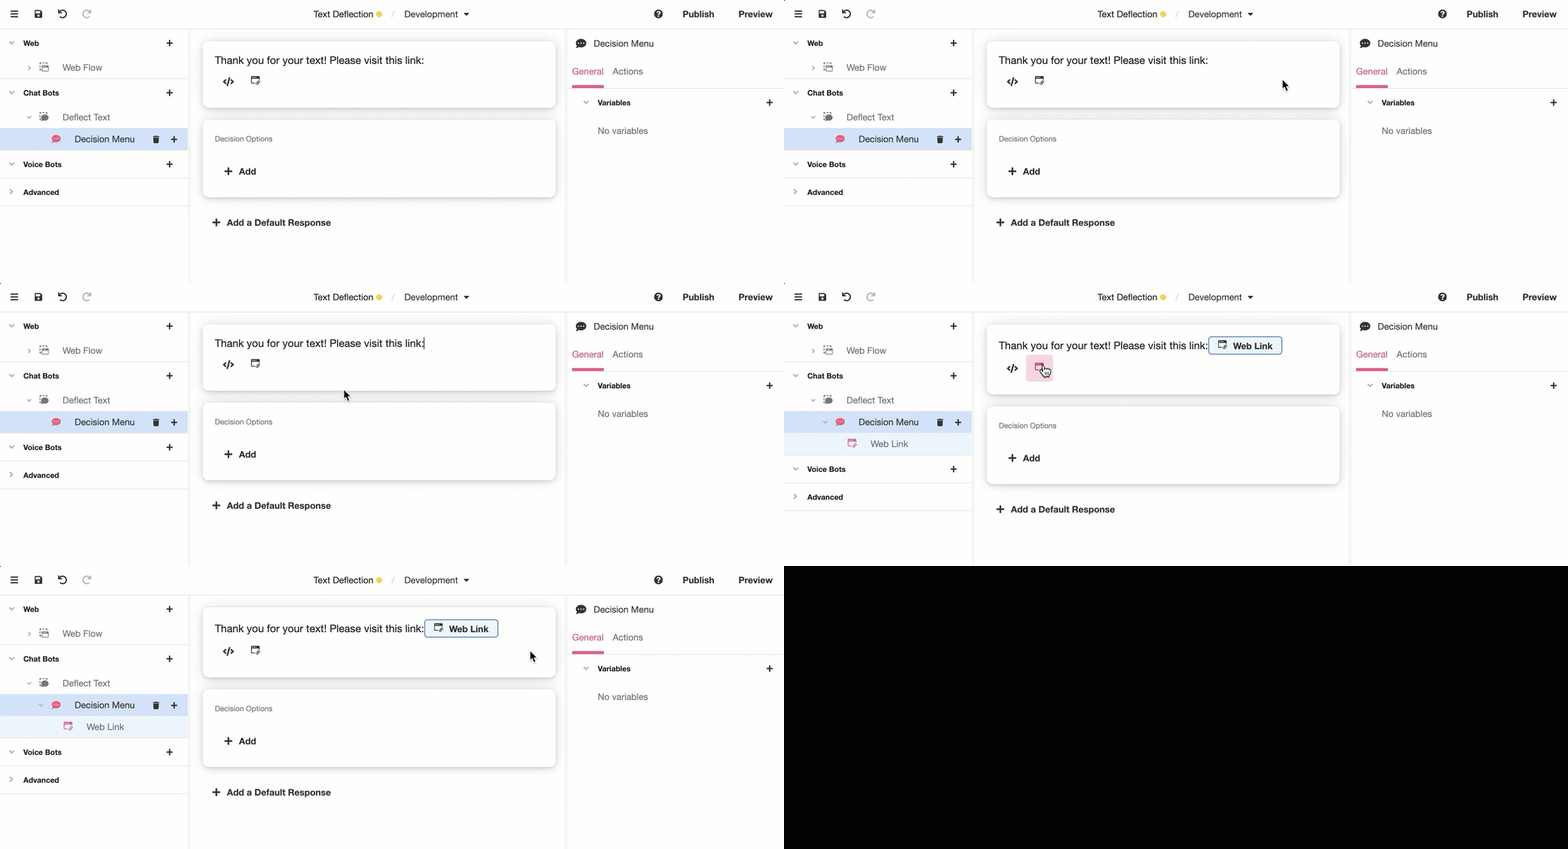
Toggle over to the Chat Bot Builder and access the Chat Bot you just built. Create a Decision Menu and add a Web Link to the outgoing text by clicking on the 'Web Link' icon:

Step 3: Designate the Web Flow to which the Journey Link directs
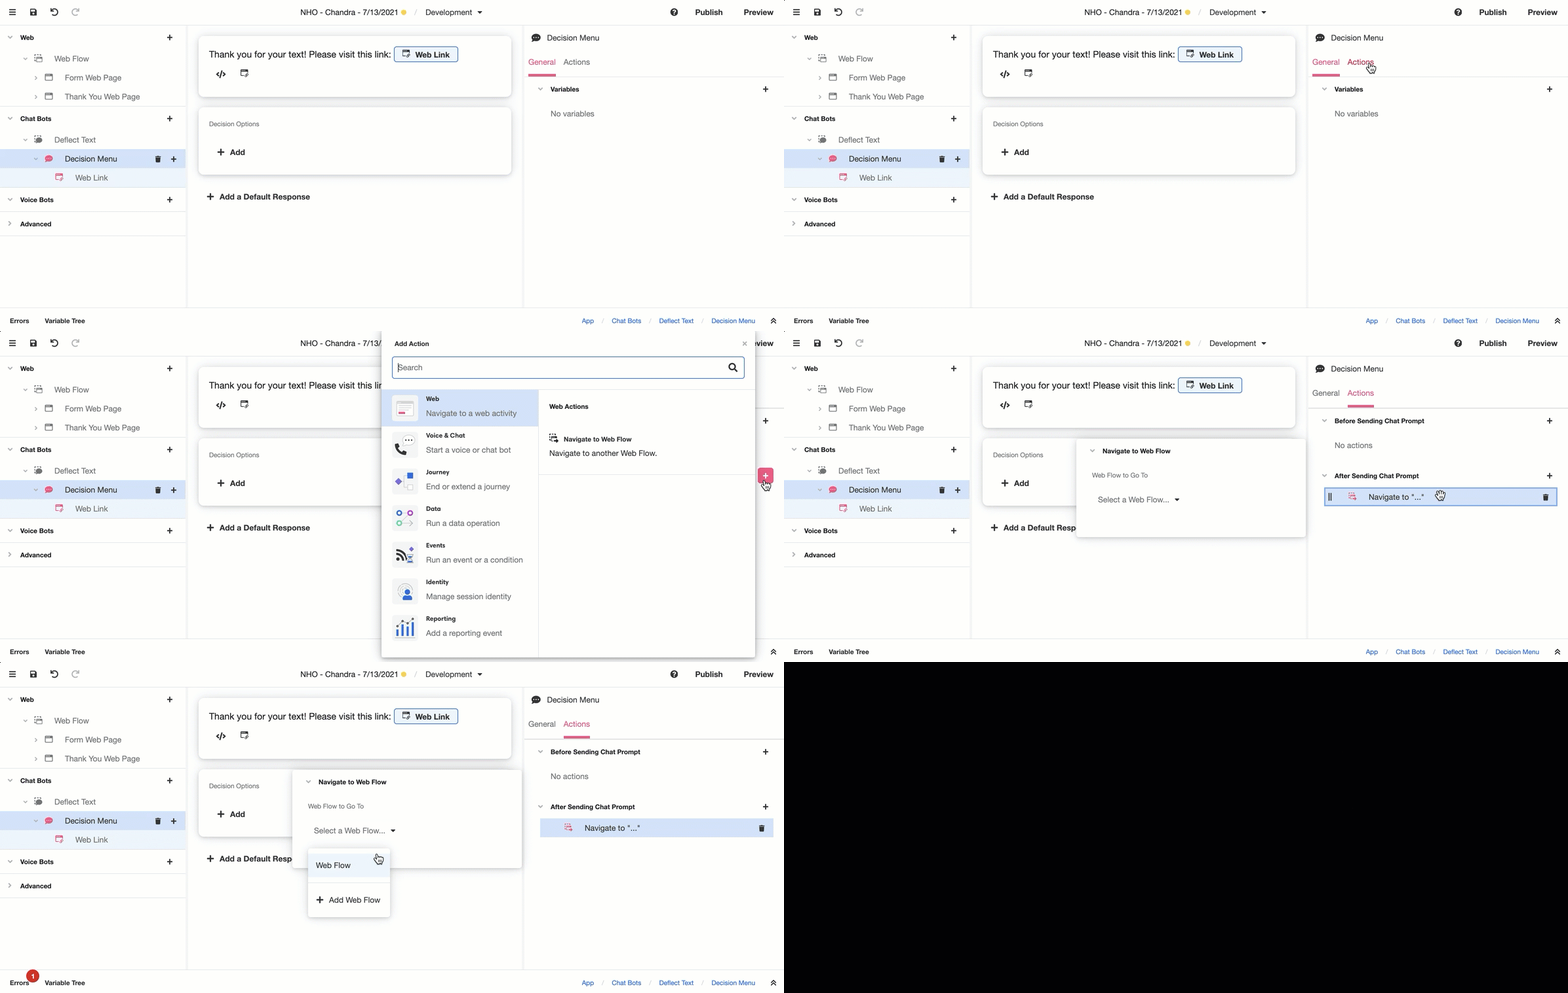
Open the Actions tab in the Inspector and click on the '+' icon to the right of After Sending Chat Prompt. Select Navigate to Web Flow from the pop-up menu and then select the Web Flow you want to direct users to upon clicking the link. In the following example, this Web Flow is designated "Web Flow" and it is the only available Web Flow to select:

Why is it required to specify which Web Flow the Journey Link sends users to?
By default, when a Journey Link is sent via SMS, it directs the recipient to the Web Flows they were viewing when last visiting the web portion of their Journey. This makes it easy for users to pick up where they left off without needing to slog through material they've already seen or fill out redundant information repeatedly. However, when a Journey begins via incoming text message, there is no such Web Flow because the user has not yet viewed any Web Flows, and so it is necessary to explicitly declare which one they will first be sent to.
Test it out by emulating your newly dual-channel app!
You can see how you app will behave if deployed (and check to make sure it's functioning as intended) by clicking on the App Preview button to the upper right of the Studio.
To deploy your app and test how it works in the wild, check out Connecting Your Twilio Numbers To Airkit and Publishing Your Application.
Updated 3 months ago