Azure AD B2C
Journey's can be authenticated using Azure AD B2C as an OAuth vendor and can require users to login before accessing a web flow in an application.

This document will walk through authenticating a Journey using Azure AD B2C using Google as the identity provider. For additional information on setting up other identity providers in Azure AD B2C and Airkit see here.
Pre-requisites
Authenticating a Journey using Azure AD B2C using Google as the Identity Provider
Register a Web Application in Azure AD B2C
To register a web application in Azure AD B2C, follow the steps outlined in this document.
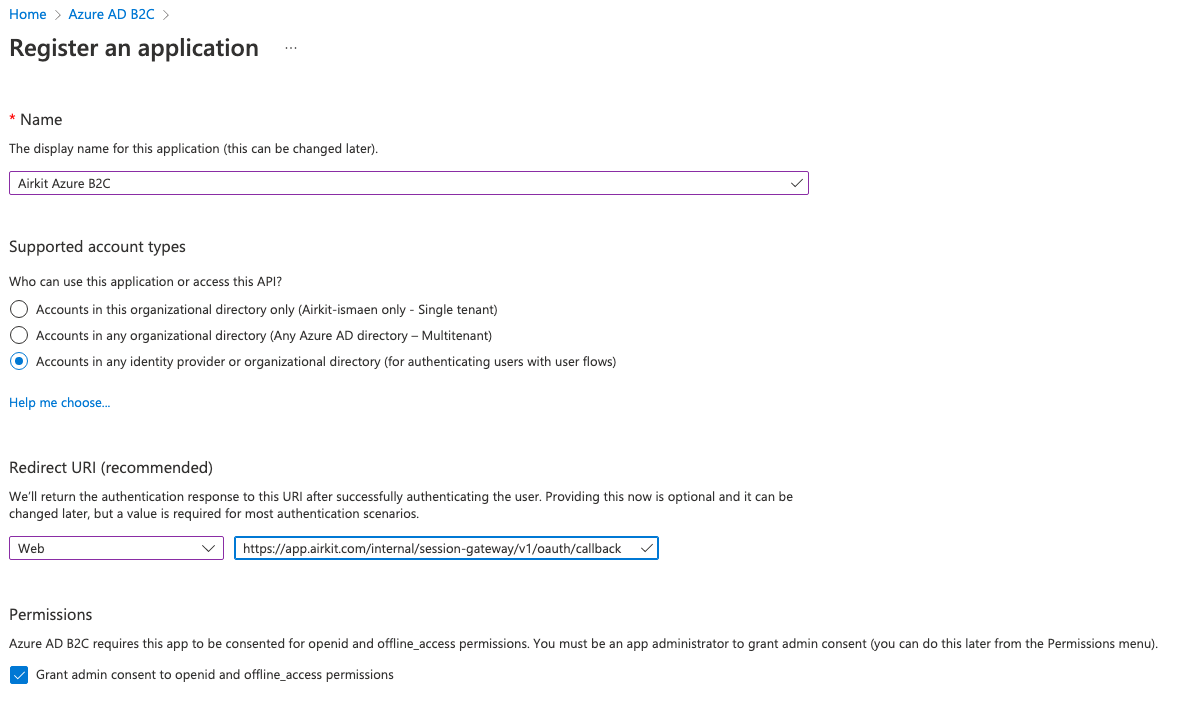
The one step that is different is using the following Redirect URI:
Redirect URIhttps://{base-domain}/internal/session-gateway/v1/oauth/callback
The {base-domain} can be found in Settings. For example, in the following screenshot, the base domain would be app.airkit.com.

Once the web application is registered, take note of the client ID, as this will be needed in a future step.
Set up sign-up and sign-in with a Google Account
To set up sign-up and sign-in with a Google account, follow the steps outlined in this tutorial. After creating the Google application and configuring Google as an identity provider, you will need to add the Google identity provider to a User Flow.
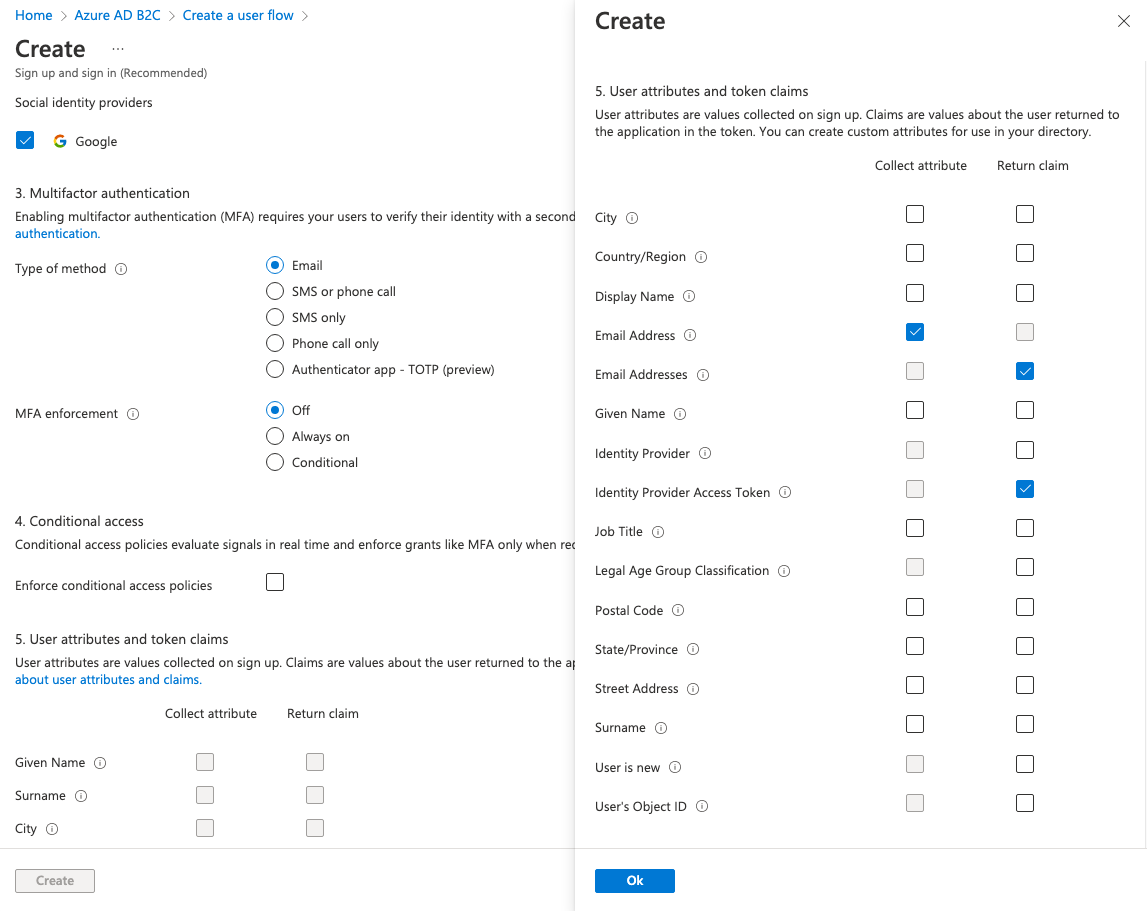
When creating the User Flow, there are some additional steps needed in order for it to work with Airkit. Under User attributes and token Claims, the following attributes and claims are required:
Collect attribute
- Email Address
Return Claim
- Email Addresses
- Identity Provider Access Token
Configure Authentication in Airkit
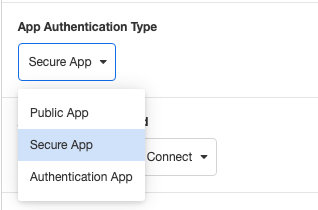
After setting up sign-up and sign-in with Google in Azure AD B2C, go to Settings in the Airkit App and change the App Authentication Type to Secure App.
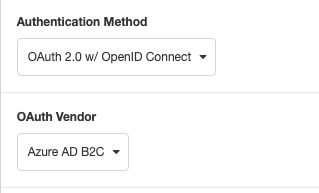
Then select OAuth 2.0 w/ OpenID Connect as the Authentication Method and choose Azure AD B2C as the OAuth Vendor.
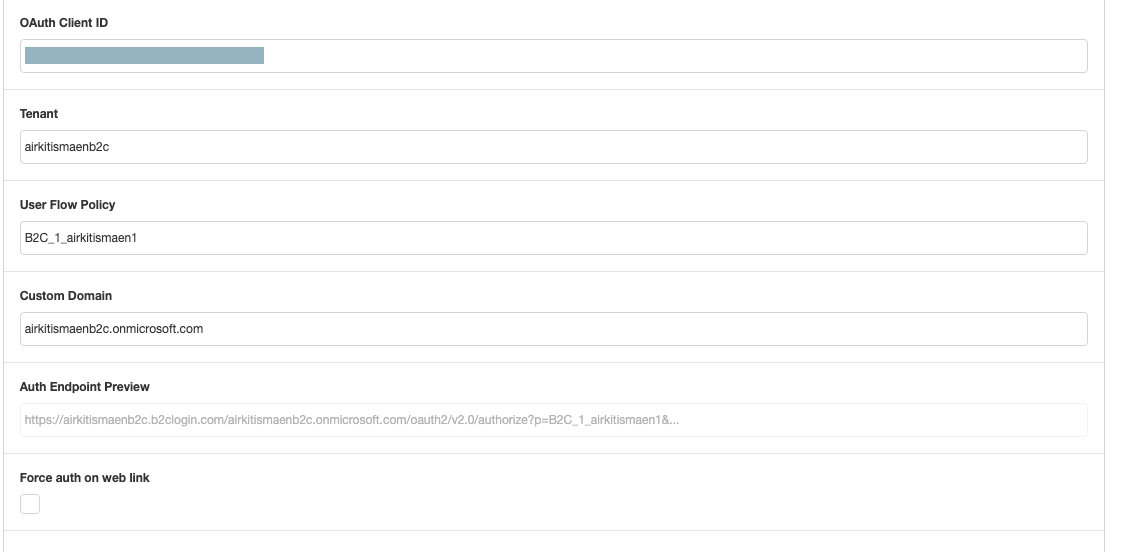
Next, fill in the following based off of your Azure AD B2C configuration.
OAuth Client ID (Required)
- The application (client ID) of the web application that is registered in Azure
Tenant (Required)
- The name of the Azure AD B2C tenant
User Flow Policy (Required)
- The name of the User Flow that was created.
Custom Domain
- The domain name of the Azure AD B2C tenant.
Force auth on web link
- Require authentication each time the web link is accessed.
Then, save your app and Publish and test out the web link to see if you are asked to authenticate.
Authentication Success
After setting up you OAuth authentication, go to Connections Builder and click on the On Authentication Success Event.
The “On Authentication Success” event will run when the user is authenticated. On this event, there is the event namespace where you can access data about the user.

To access this data and store it in a session variable, In the Inspector section, click on the ‘+’ icon under Actions and add a Set Variable action and set it to a property in the event namespace.
Updated 4 months ago