Scheduling and Follow-Up App
Part I - Setting Up the Journey
This tutorial covers how to build a web app that collects contact information from users, prompts them to schedule an appointment, and then invites them to submit feedback after their appointment is over. Throughout the process, it will schedule and send a variety of reminder and follow-up Notifications, all of which are TCPA compliant. Check out this tutorial if you want to learn more about:
- Digital scheduling
- Timers and reminders
- Automatic outreach and TCPA compliance
- Creating and managing multi-Step Journeys
This tutorial assumes some basic familiarity with the contents of Your First App (A Simple Form). If you haven't gone through that tutorial yet, we recommend you do so before proceeding.
Here are the parts of the Airkit platform that you will be working with:
- Journey Builder: Defining and managing the overarching Journey
- Web Flows Builder: Creating the UI
- AirData Builder: Storing and structuring data
- Connections Builder: Querying AirData
- Schedules Builder: Defining potential appointment times
- Notifications Builder: Writing outgoing Notifications
- Variable Tree: Managing local variables
For a demonstration how this application will work once we're finished, check out this video:
Defining the App Journey
Create a new, blank app from the Console and click Edit in Studio to start building. When you first access the app, you’ll land on Journey Builder.
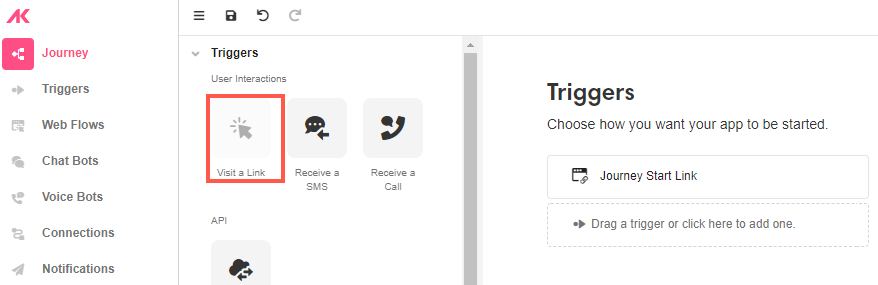
- Since we are going to create a Journey that users access through a link, drag the Visit a Link interaction to Triggers.
-
In Journey Steps, we are going to add two steps:
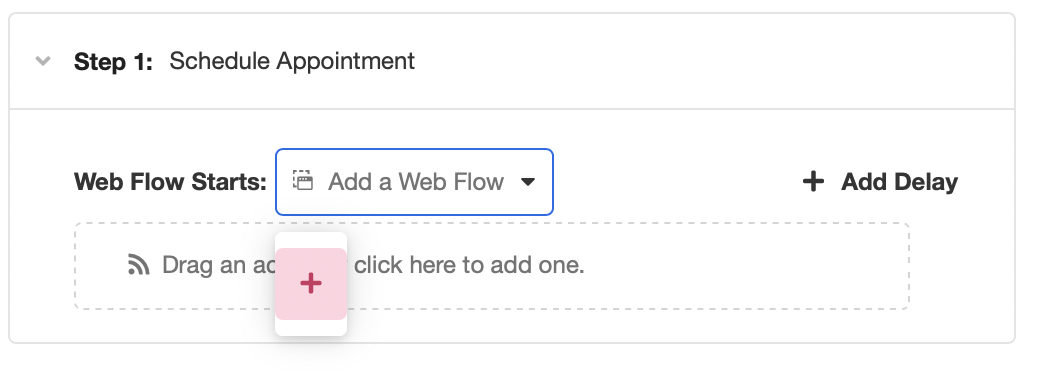
- Rename Step 1 to “Schedule Appointment”. This is the Step in which we are going to collect contact information from users and prompt them to schedule an appointment. In Web Flow Starts, select the '+' icon to add a new Web Flow:
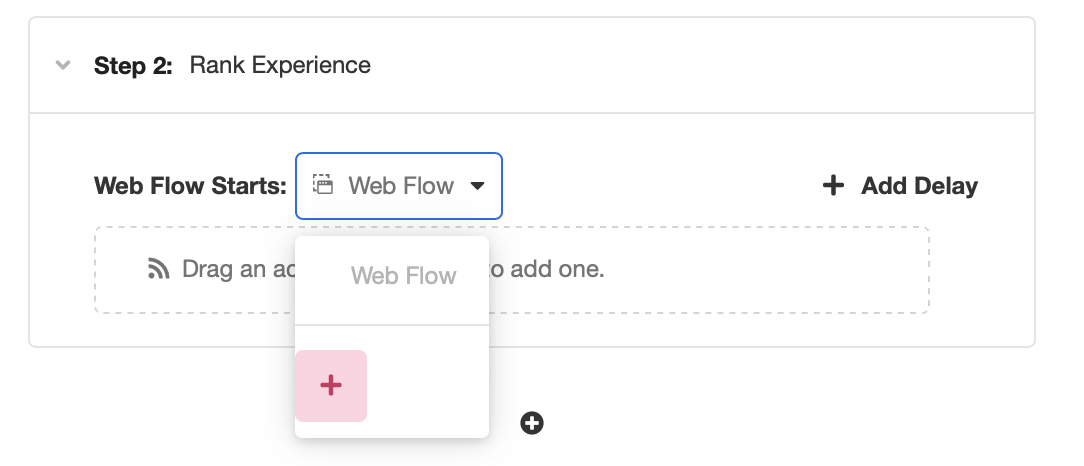
- Add a Step 2 by clicking on the '+' icon underneath Step 1. Rename it to “Rank Experience”. This is the Step during which we will invite users to submit feedback following their appointment. In Web Flow Starts select the '+' icon to add another new Web Flow:
- Go to Web Flows Builder and rename your newly-made Web Flows such that:
- Web Flow becomes Capture Customer Info
- Web Flow 1 becomes Collect Feedback
- Click on the ‘+’ icon next to Web Flows in the Tree, and add a new blank Web Flow. Rename it to “Schedule Appointment”. Then drag and drop it between the other two Web Flows in the Tree:

You've now created a framework for a multi-step Journey! Step 1 will consist of two Web Flows: the first will collect basic user information that can be used to establish additional communication channels, and the second will prompt users to schedule an appointment time. Step 2 will contain only a single Web Flow, which will allow the user to submit feedback after the appointment is over.
Save your progress and get ready to finalize the first Web Flow of your application: the one that collects users' contact information.

Updated 3 months ago