Create a Zendesk Ticket
This tutorial will guide you through the process of automatically creating a ticket in Zendesk from your application.
Connecting your Zendesk account
In the Console, go to Integrations > Connected Accounts and make sure to connect your Zendesk account to Airkit.
Then, once in your application, go to Settings > Integrations, add the Zendesk adapter in Name and select the connected account you have just created.

Building the application’s UI
In Web Flows Builder add a Web Flow with two Web Pages and follow these steps:
-
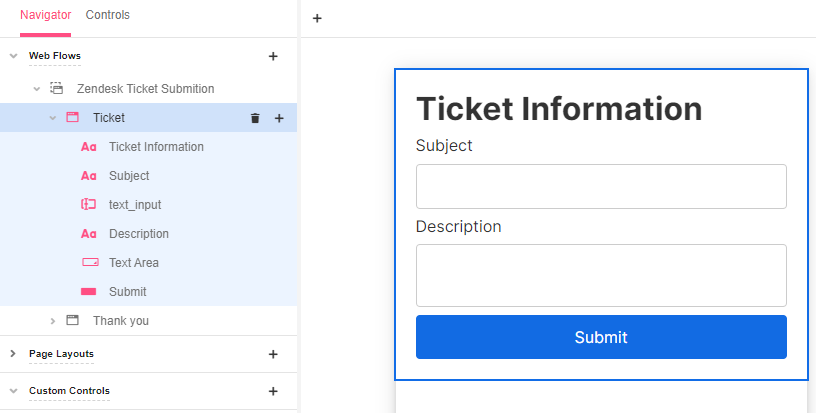
Rename the first Web Page to “Ticket” and the second one to “Thank you”.
-
To the Ticket Web Page, add a Label Control for the heading asking the user to enter the ticket details. You can choose the headingLarge Variant.
-
Then, add a Text Input and a Text Area Web Controls as well as a Label for each of them. One of the labels will indicate the user to enter the subject of the ticket, and the other one its description.
-
Then, add a Button Control and rename it to “Submit”.
-
Finally, double click on the auto-created Variables to give them a more transparent name:
subjectanddescription.

- With the “Submit” button selected, go to Actions in the Inspector section and add a Navigate to Web Page action. Select the Thank you Web Page from the dropdown.

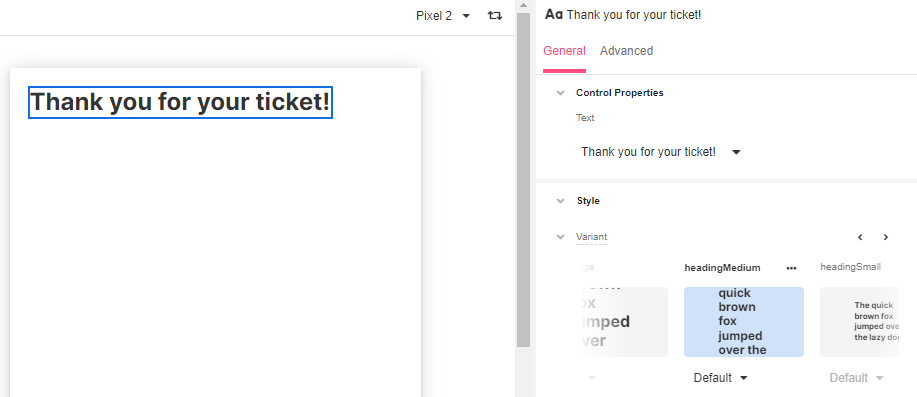
- Now go to the Thank you Web Page and add a Label Control to enter the thank you message. You can use a headingMedium Variant.

- Save the app.
Submitting the ticket through a Data Flow
Go to Connections and add a Data Flow. Rename it to “Create Zendesk Ticket”. Then, in Start, add two Inputs of type Text, one for subject and one for description.

Then add the Zendesk Data Operation.
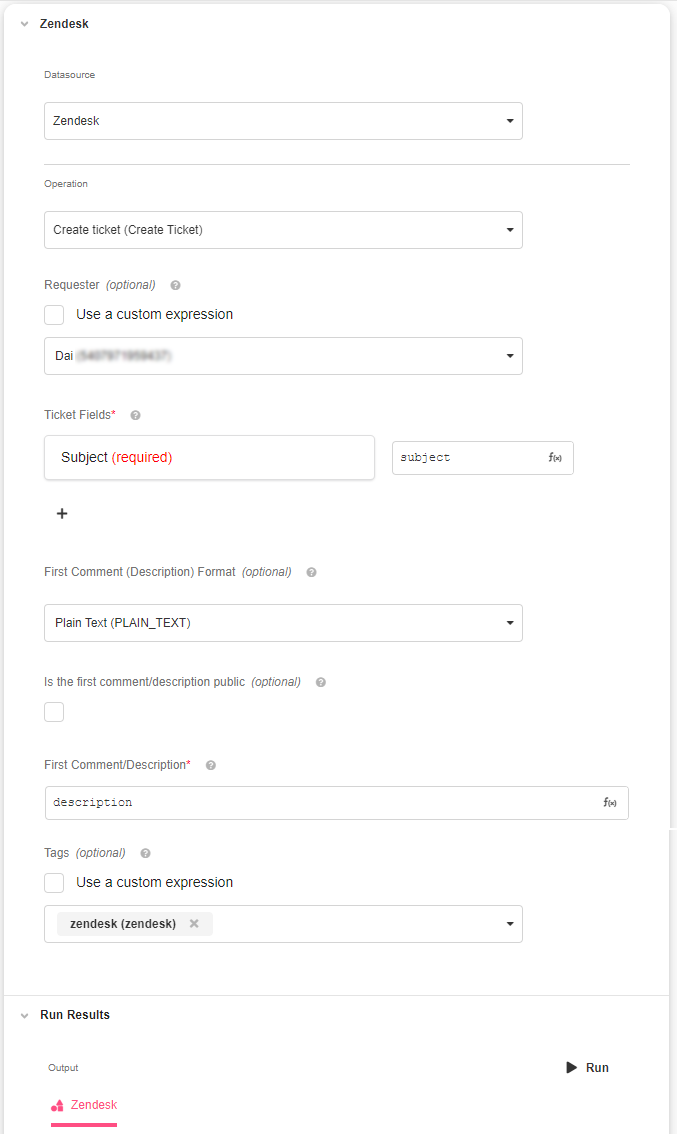
In Data Source, select the integration and in Operation, choose Create ticket (Create Ticket). Then select a requester and in Tickets Fields > Subject enter the subject variable. Choose the description’s format and enter the description variable in First Comment/Description. You can also include tags.
To make sure the Data Operation works as expected, click on Run and test it.

Hooking up the connection
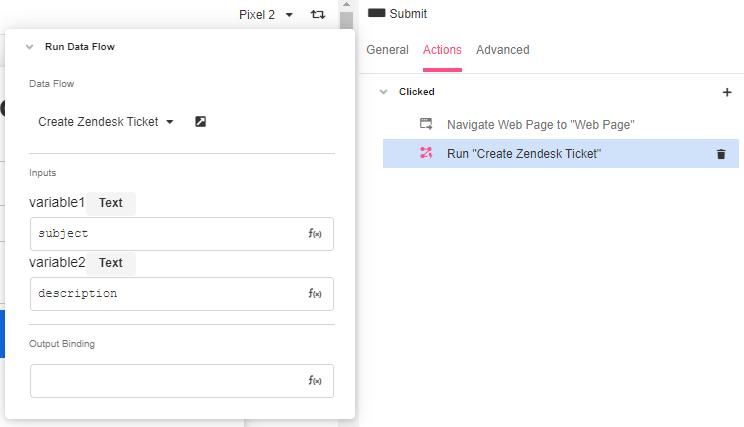
Go to Web Flows Builder and select the Ticket Web Page. Add the Run Data Flow action to the Submit Button and enter the subject and description Variables for the Inputs.

This way, when users click on the button, the Zendesk Data Flow will run, thus creating the ticket in Zendesk before moving to the Thank You Web Page.
Check your Zendesk instance to make sure the ticket was created.
Updated 4 months ago