Customizing Schedule Availability
This guide walks through the process of how to create a Scheduler Web Control that is tied to a custom Availability Schedule. The principles covered in this guide make it possible to create apps that automate appointment scheduling in a wide variety of contexts, from rescheduling deflected calls to organizing in-person meetings.
Step 1: Build out the UI
Begin in the Web Flows Builder and add a Scheduler Web Control to a Web Page. Note that, in our example, the relevant Web Page ("Scheduler Web Page") is not the only one in the Web Flow. There is another Web Page ("Thank You Web Page") that has already been built out; as part of the process of finalizing this application in step 5, we will program it to navigate to this other Web Page upon a user selecting an appointment time:

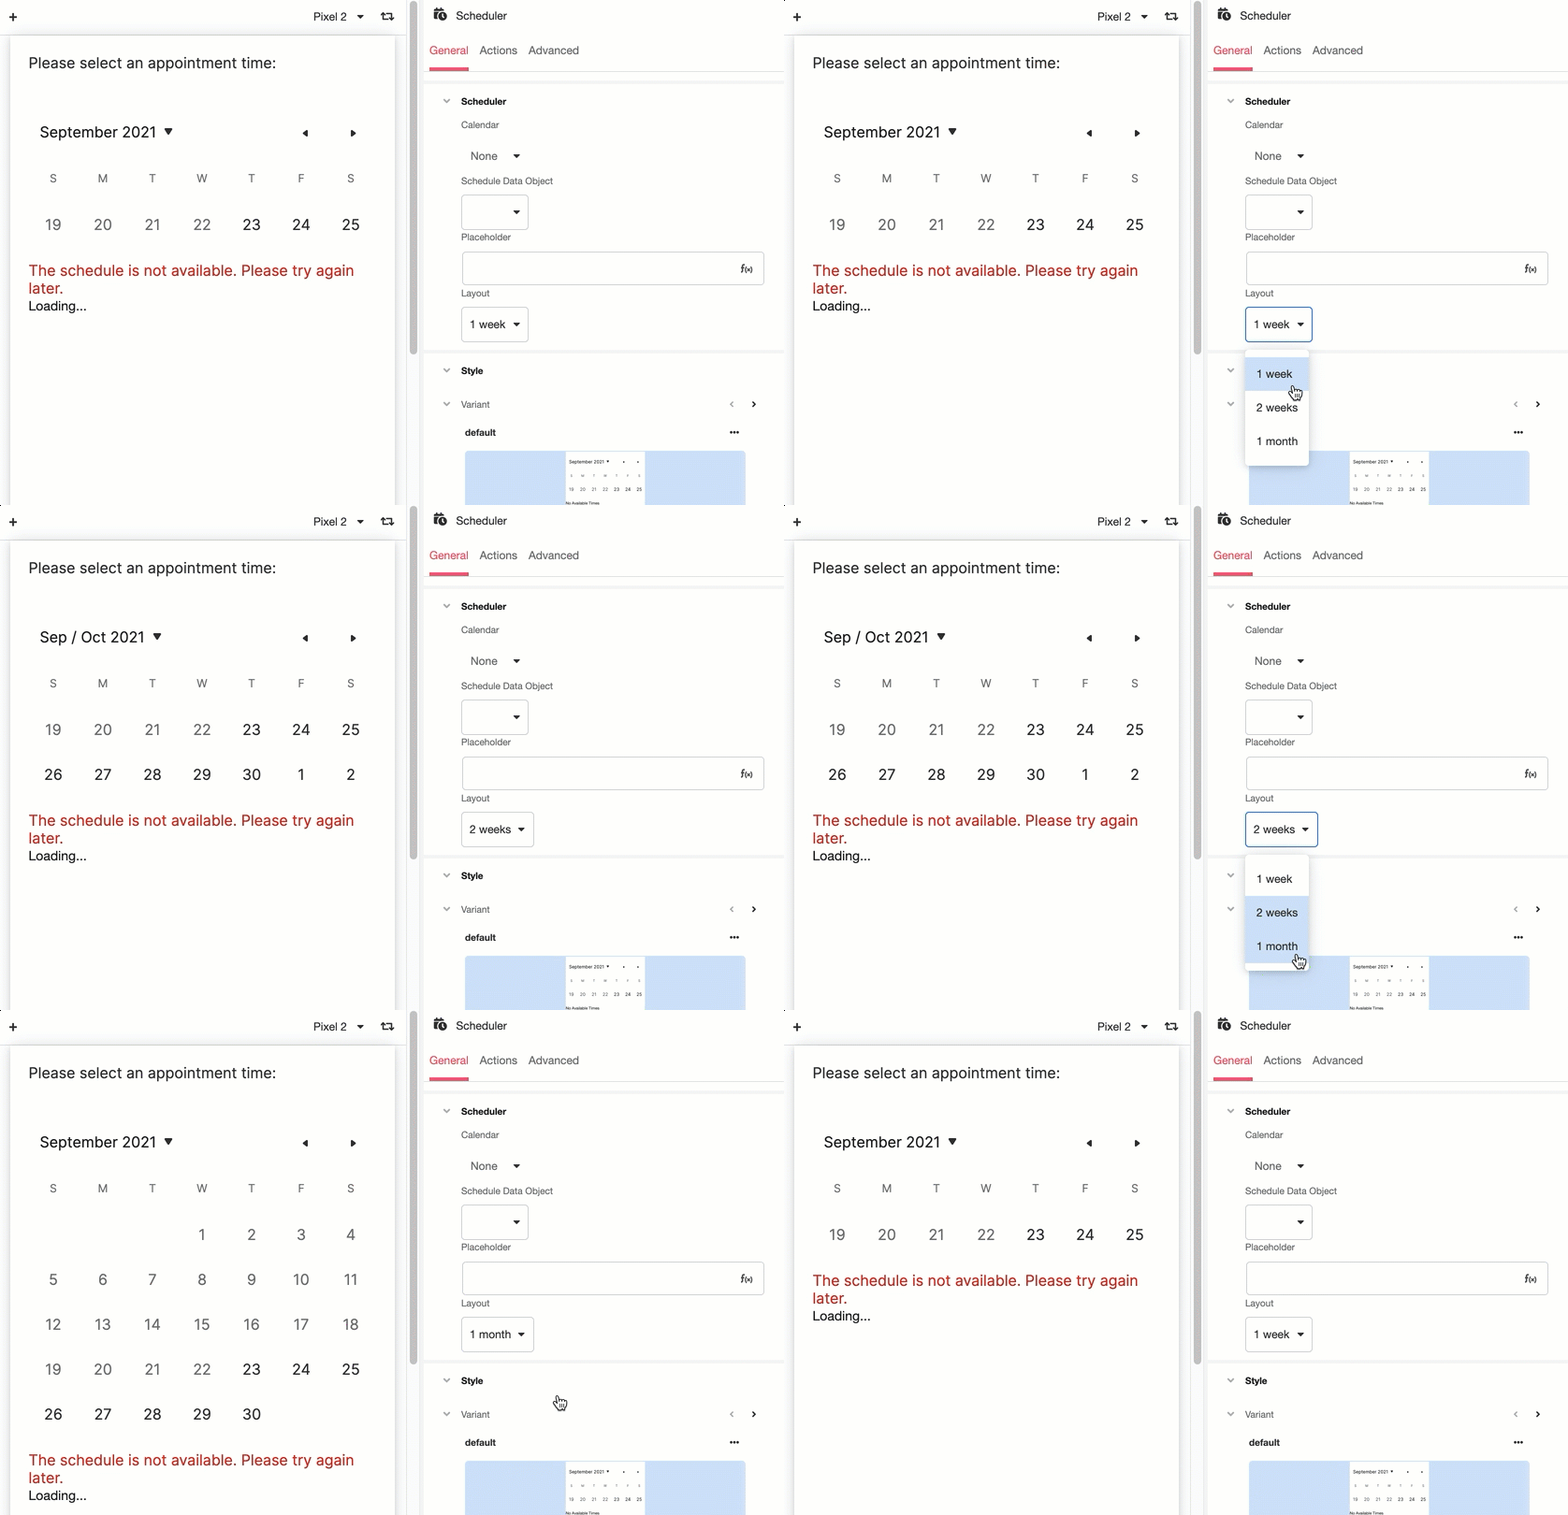
When this new Scheduler Web Control is selected, the Inspector will display the properties of the Scheduler Control under the General Tab. Under Scheduler, this contains a dropdown menu designated Layout, which makes it possible to select the layout of the calendar on display. Choose a layout that serves your needs and fits into the UI of the rest of the Web Page:

There are two other dropdown menus under Scheduler Properties: Calendar, and Schedule Data Object. In order for the Scheduler Web Control to function as intended, values must be selected for both. Options for selection are defined and edited in the Schedules Builder and AirData Builder respectively, as covered in steps 2 and 3 below.
Step 2: Designate which blocks of time are available for appointments
Toggle over to the Schedules Builder. This is the Builder that provides the tools to create create and modify the Availability Schedules that can be connected to Scheduler Web Controls. Availability Schedules are made by combining different Time Slots, which are also defined in Schedules Builder.
Out of the box, Airkit comes with several Time Slots and Availability Schedules already defined; these are built around TCPA compliance, and using them makes it easy to create TCPA-compliant apps without needing to personally account for each detailed regulation.
It's also possible to create custom Time Slots and Availability Schedules. This step will walk through the process of creating a new Time Slot and combining it with an out-of-the-box Time Slot to create a new Availability Schedule.
Creating Time Slots
New Time Slots are created by clicking on the '+' icon to the right of of the Time Slots branch in the Tree:

Each Time Slot is designated by a unique name. To change the name of a newly-created Time Slot, double click where it appears in the Tree. Designate the new Time Slot "Time Slot - nine to five":

Time Slots are edited in the Inspector. Under Recurrence are the tools needed to define the blocks of time that will be associated with the Time Slot. Block off time from 9am to 5pm and repeat this daily, starting on September 24 2021, then split each block of time into one-hour increments:

Under Capacity is an input box which defines limitations on the number of appointments that can be made at an individual appointment window before it is no longer available to schedule further appointments. Set it so that each appointment window can accommodate no more than two people:

Under Date and Time Settings is a dropdown menu that sets the timezone that the Time Slot will use as a base reference. Keep the timezone selected for use by default: "America/Los_Angeles".
.gif)
It is also good practice to write a short description of newly-made Time Slots under Description. This is not required, but it is recommended in order to make the intended use cases more explicit.
Best Practices for Time SlotsCreating clear and intuitive descriptions of each new Time Slot is particularly important because changes made in the Schedules Builder differ from changes made in most other Builders in that they do not only effect the app being immediately edited, they will be applied to all apps stored in their Organization. Take particular care when editing existing Availability Schedules or Time Slots, as the app being edited might not be the only one impacted by your changes.

With the Time Slot finalized, it can now be used create an Availability Schedule.
Creating an Availability Schedule out of Time Slots
New Availability Schedules are created by clicking on the '+' icon to the right of of the Availability Schedules branch in the Tree:

Each Availability Schedule is designated by a unique name. To change the name of a newly-created Availability Schedule, double click where it appears in the Tree. Designate the new Availability Schedule "Availability Schedule: 9 to 5 + TCPA":

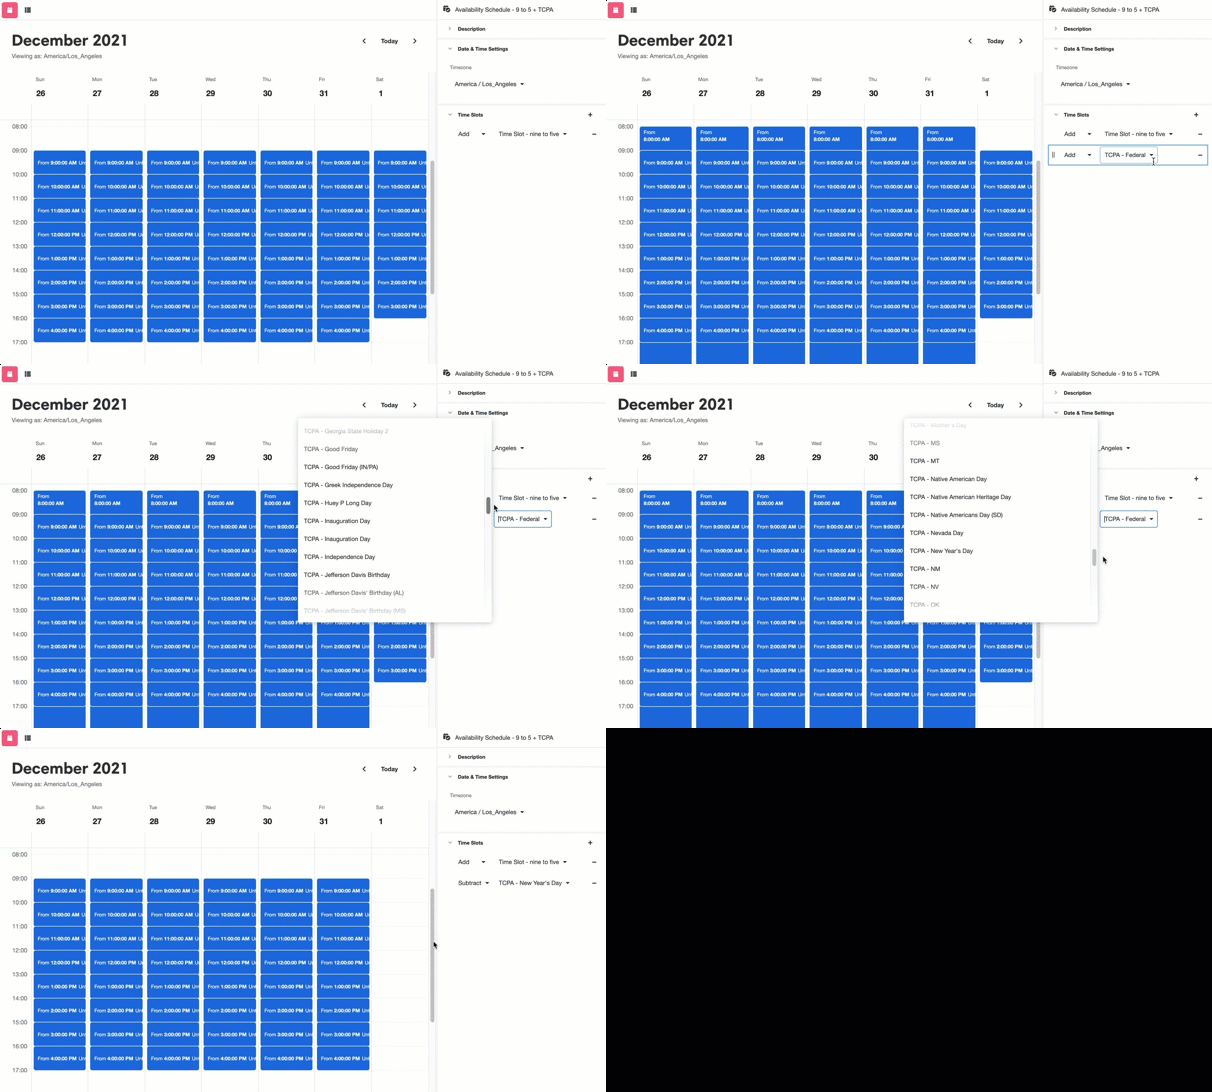
Add a Time Slot to the newly-created Availability Schedule by clicking on the '+' icon on the upper right of the Time Slots section in the Inspector. Once added, a Time Slot can be selected from the rightmost dropdown menu that appears. Select the Time Slot made in the previous section, designated "Time Slot - nine to five". Note that to the left of this dropdown menu is another dropdown menu where "Add" is selected; to beginn by adding this Time Slot to the Availability Schedule, leave this as the default:
.gif)
"Time Slot - nine to five" designates blocks of time from 9am to 5pm (PST) every day, even on holidays. Let's say, however, that for the intended use case of this Availability Schedule, we don't want users to be able to make appointments on New Year's Day.
Use the arrows on the upper right of the Stage to view the week containing January 1st, New Year's Day. The '<' icon shifts the weekly calendar to the week before the one being displayed; the '>' icon to the week after:
.gif)
Viewing the first week of the year while making changes to scheduling availability New Year's Day makes it easy to see the results of changes as they are made.
Add another Time Slot and choose "TCPA - New Year's Day" from the dropdown menu of Time Slots. By default this Time Slot will be added to the first one. Select "Subtract" from the dropdown menu to the left of the Time Slot to remove all blocks of time given by this Availability Schedule that overlap with "TCPA - New Year's Day":

Once an Availability Schedule contains appointment windows in every desired time block (and none of the time blocks that aren't), check to make sure the details are correct.
Under Date & Time Settings, confirm the timezone in which your Availability Schedule will be displayed. Note that if this is different from the base timezone, the display will adjust accordingly:
.gif)
Under Description are the tools to write, access, and edit a description of the selected Availability Schedule; this is recommended to make the intended use cases more explicit. It's also possible to define a key to associate with the selected Availability Schedule; this key is a shorthand identifier that can be used refer to the Availability Schedule in an Airscript expression, and it is used to define, for instance, the optional calendarRestriction associated with a Scheduler Web Control.

Now the Availability Schedule is finalized, and it can be referenced not only by other Builders within this app but by other all apps within this Organization.
Step 3: Structure how data will be saved when a user makes an appointment
Toggle over to the AirData Builder and create a Schedule Object. This is done by clicking the '+' icon to the right of of the App Objectsbranch in the Tree and then selecting Add Schedule from the list of options that appears:

Double click on the Schedule Object you have just created in the Tree to rename it. Rename this Schedule Object "First Schedule":

Step 4: Finalize the Scheduler
Toggle back to the Web Flows Builder and inspect the Scheduler Web Control inserted in Step 1. Under Schedule Properties, select the Schedule Object you just made from the dropdown menu under Scheduler Data Object:
.gif)
Henceforth, when a user makes an appointment using this Scheduler Web Control, the information regarding that appointment will be automatically saved under the Schedule Object "First Schedule", which can be queried and called on in the same manner as any other App Object.
To allow the Schedule Web Control to schedule appointments based on the the appointment blocks defined by the Availability Schedule defined in step 2, select the Availability Schedule "Availability Schedule: 9 to 5 + TCPA" from the dropdown menu under Calendar:
.gif)
Providing user feedback upon an appointment selection
To create an intuitive user experience, it's a good idea to provide feedback upon the successful selection of an appointment. This section walks through how to do this by navigating users to a new Web Page and repeating their appointment time back to them. This is done by associating Actions with appointment section.
Actions associated with a Scheduler Web Control are triggered when a user selects an available block of time. This condition is designated as Value Changed because when a user selects an available block of time, the value of event.value changes to match the Schedule Object associated with the appointment. Due to the nature of variable scopes, this value of event.value will only be accessible to actions taken within the Scheduler Web Control.
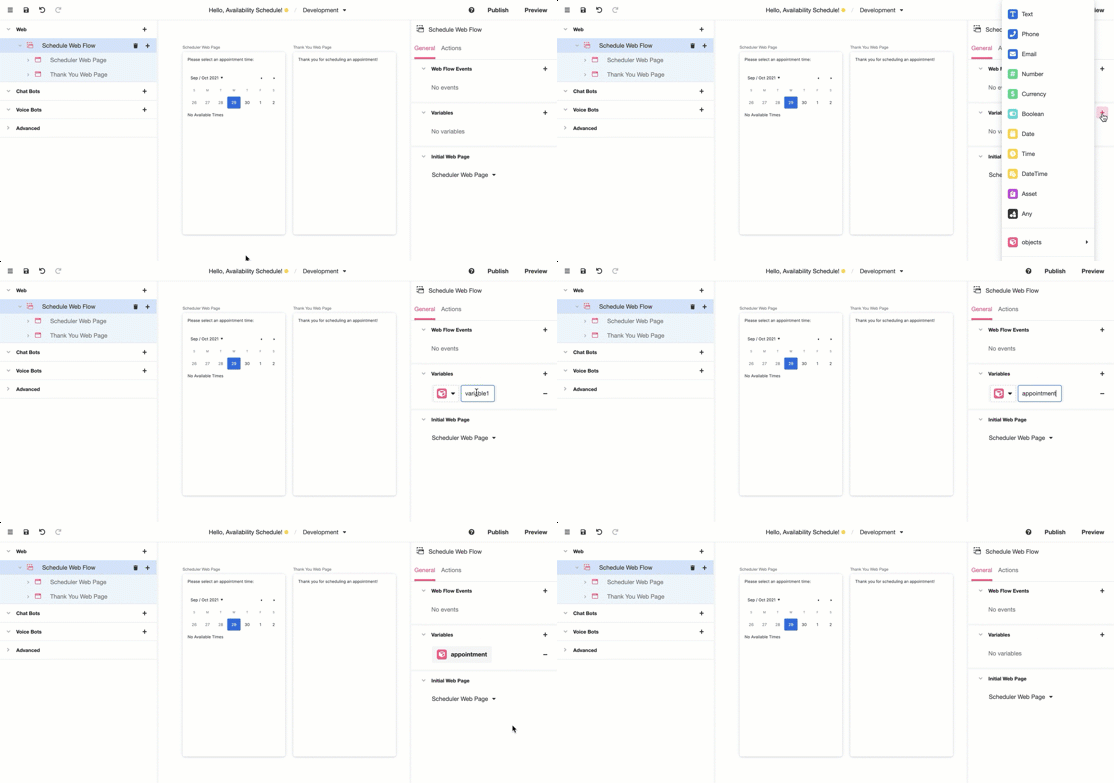
To save the value of event.value as a variable accessible to the rest of the Web Flow, go to the Tree and select the Web Flow under which the Scheduler is ultimately nested. Under the General tab in the Inspector, add a new variable to be managed at the Web Flow-level. This variable will be given a value formatted like a First Schedule object. Name this variable appointment:

Return to the Scheduler Web Control and toggle over to the Action Builder in the Inspector:

Add a Set Variable Action and use it to set the Web Flow-level variable appointment to the working value of event.value:
.gif)
Then add a Navigate to Web Page Action and set it to navigate to "Thank You Web Page":
.gif)
Now when a user successfully makes an appointment, they will be taken to another Web Page, which will have access to the variable appointment, now containing a Schedule Object that stores all relevant information pertaining to the selected appointment. The value of appointment can be called on in a Label Web Control to confirm the user's appointment time within the "Thank You Web Page".
Select "Thank You Web Page" in the Tree and add a Label Web Control. Under the Text Control Property in the Inspector, type following string:
"Thank your for scheduling an appointment for {{
 FORMAT_DATETIME(
  appointment.start_time,
  "MMMM Do, YYYY h:mm A z",
  "en-US",
  "America/Los_Angeles"
 )
}}!"
This string uses double curly brackets to designate the Airscript function FORMAT_DATETIME, which takes the DateTime given by appointment.start_time (recall: the appointment variable contains a Schedule Object, and Airscript uses dot notation to access object attributes) and converts it into a user-friendly string. For more on how the returned string is customized, check out the reference documentation on FORMAT_DATETIME.
In the Studio, this will appear as follows. Note that the Airscript function is not displayed in the Stage, though the rest of the string is. Airscript inserted into labels in this way will not run until it has access to user input, either through the app being published or through the app being emulated using the Preview Button:

Now, when a user selects an appointment time, they will be taken to Web Page that confirms their appointment time, making it explicit exactly which appointment window they have selected.
Step 5: Preview
Once you've finalized the Scheduler, Preview it to ensure it functions as intended. Any appointments made should be reflected in AirData, saved under the Schedule Object built in Step 3. Note how the contents of the "Thank You Web Page" change to reflect the selected appointment:
.gif)
Optional Bonus Step: Enforce holidays and hours according to full TCPA regulations
The Availability Schedule made in the above example ("Availability Schedule: 9 to 5 + TCPA") restrict scheduling based on TCPA regulations. The only holiday it accounts for is New Year's Day, and if it doesn't allow appointments to be made outside the allowed window, that's happy coincidence rather than active enforcement.
It's technically possible (if time-consuming and error-prone) to match TCPA regulations by subtracting all relevant Time Slots from a custom Availability Schedule, but this is not recommended. Best practice is to use a pre-configured TCPA Availability Schedule to define a calendarRestriction.
Recall, as established in Step 2, that every Availability Schedule has an associated key, which can be accessed by inspecting the relevant Availability Schedule in the Schedules Builder. This includes the pre-configured TCPA Availability Schedules.
Use the key to the TCPA Availability Schedule associated with the relevant locale to define a calendarRestriction. This is done while inspecting the applicable Schedule Web Control in the Web Flows Builder. The following example restricts scheduling within the windows of time allowed by TCPA restrictions in Los Angeles, CA. This corresponds to the TCPA Availability Schedule "TCPA - CA - America/Los_Angeles", itself associated with the key "TCPA-CA-America/Los_Angeles". Note that, to be correctly parsed, the entered key must be written with quotation marks around it:

Once defined in this way, the TCPA Availability Schedule will restrict what blocks of time can be selected within a Scheduler. Only blocks of time encompassed by the Availability Schedule specified in calendarRestriction – and thus only blocks of time that are TCPA compliant in the chosen locale – will be available for users to select.
For more on how to make full use of calendarRestriction, check out Best Practices for calendar and calendarRestriction.
Updated 3 months ago