Email Notification Basics
Email Notifications provide a simple way to send emails to the Actor.
To send an email to someone other than the Actor, you will need to use a Data Operation rather than a Notification. For more on this, see Sending Emails by Data Operation.
Like all Notifications, Email Notifications provide one-way outreach. There is no way to parse replies to Email Notifications. However, Email Notifications can still be used as calls-to-action. For instance, an Email Notification might contain a web link that recipients can click on or a reminder to prepare for an upcoming appointment.
How are emails handled in Airkit?Emails get routed through Amazon SES and do not sit on Airkit servers. Mailboxes are also not hosted by Airkit and receiving emails are the responsibility of the mailbox owner. For more information see App Security FAQ.
Once an app is in production, is there a way to check on the status of the sent emails?The status of outgoing emails sent from all Apps within an Organization can be found in the Console, in the Email tab when examining an application under App Health. This provides insight into important information such as which and how many emails bounced, which and how many emails were marked as spam, and which and how many emails were delivered successfully. For more information, see Console.
Creating an Email Notification
Email Notifications are created in the Notifications Builder.
New Notifications can be created by clicking on the '+' icon to the right of the Notifications section of the Tree, which provides the options to choose the type of Notification to create. Select Email Notification:

An Email Notification consists of a subject and a body, both of which are defined in the Stage.
Subject
The Subject is the string that will appear in the subject line when the Email Notification is received. Defining the Subject is done in an expression editor that accepts Airscript. This means that while the Subject can be generic and hardcoded, it can also use previously-collected user input to generate customized Subjects.
To hardcode a string, simply type the desired Subject between quotation marks, like so:

To insert an Airscript expression, place it inside of double curly braces. Note that the Notifications Builder has access to all Global-, Profile-, and Theme-level variables.
For instance, say the name of each user is saved as a global variable accessible under session.name. Referencing this variable within a simple Airscript expression makes it possible to personalize the Subject:

For more on Global-, Profile-, and Theme-level variables, see Variable Scopes. For more on writing Airscript expressions, see Airscript Quickstart.
Body HTML
The Body HTML section is where the email body is defined. The expression defining the email body will be parsed in HTML, though it can also access Airscript expressions.
To insert an Airscript expression, place it inside of double curly braces. Note that the Notifications Builder has access to all Global-, Profile-, and Theme-level variables. For more on Global-, Profile-, and Theme-level variables, see Variable Scopes. For more on writing Airscript expressions, see Airscript Quickstart.
Sending an Email Notification
Once a Notification is created, it can be sent:
- via the Send Email Action, or
- as a direct part of the Journey by incorporating them into the Journey Builder.
Where are outgoing Email Notifications sent?
Outgoing Notifications are sent to the Actor.
An Actor represents any individual who goes through an application flow. Actors are identified by their contact information, such as their phone number or email address. Once the relevant contact information is associated with an Actor, Notifications will be sent directly to the Actor via their established accounts. Tying contact information to an Actor is done via Initializing the Actor, which must be done before Notifications can be sent.
For a deeper dive into conceptualizing Actors, see Actors. For a step-by-step walkthrough of how to initialize the Actor, see Conversations with Actors.
Where are outgoing Email Notifications sent from?
Outgoing SMS Notifications are sent from the first email associated with the application, which is defined in Settings. For more on how to associate email addresses to Airkit, see Connecting Email Addresses.
Sending an Email Notification as an Action
Email Notifications can be sent via the Send Email Action, which can be included in any Action Chain after the Actor has been initialized with a valid email address saved to actor.email.
To Initialize the Actor:
- Determine the Actor's email address and make sure it is formatted according to the Email Data Type. Use the Set Variable Action to tie this value to
actor.email. - In the same Action Tree in which
actor.emailwas declared, follow its declaration with the Initialize Actor Action to initialize the Actor.
To send a Notification:
- Add the Send Email Action to any Action Chain fired downstream of Actor Initialization. Select the Email Notification you want to send from the associated dropdown menu.
- If you want to schedule an Email Notification rather than send it immediately, you can use it in tandem with the Start Timer Action.
Sending an Email Notification as part of a Journey Step
Email Notifications can be sent directly as part of a Journey Step, by dragging and dropping them into the Steps displayed in the Journey Builder. This provides an easy way to manage emails that are a core part of your Journey Flow. However, in order to successfully send Email Notifications from a Journey Step, the Actor must first be initialized, which requires working in an Action Builder outside of the Journey Builder.
To Initialize the Actor:
- Determine the Actor's email address and make sure it is formatted according to the Email Data Type. Use the Set Variable Action to tie this value to
actor.email. - In the same Action Tree in which
actor.emailwas declared, follow its declaration with the Initialize Actor Action to initialize the Actor.
To send a Notification:
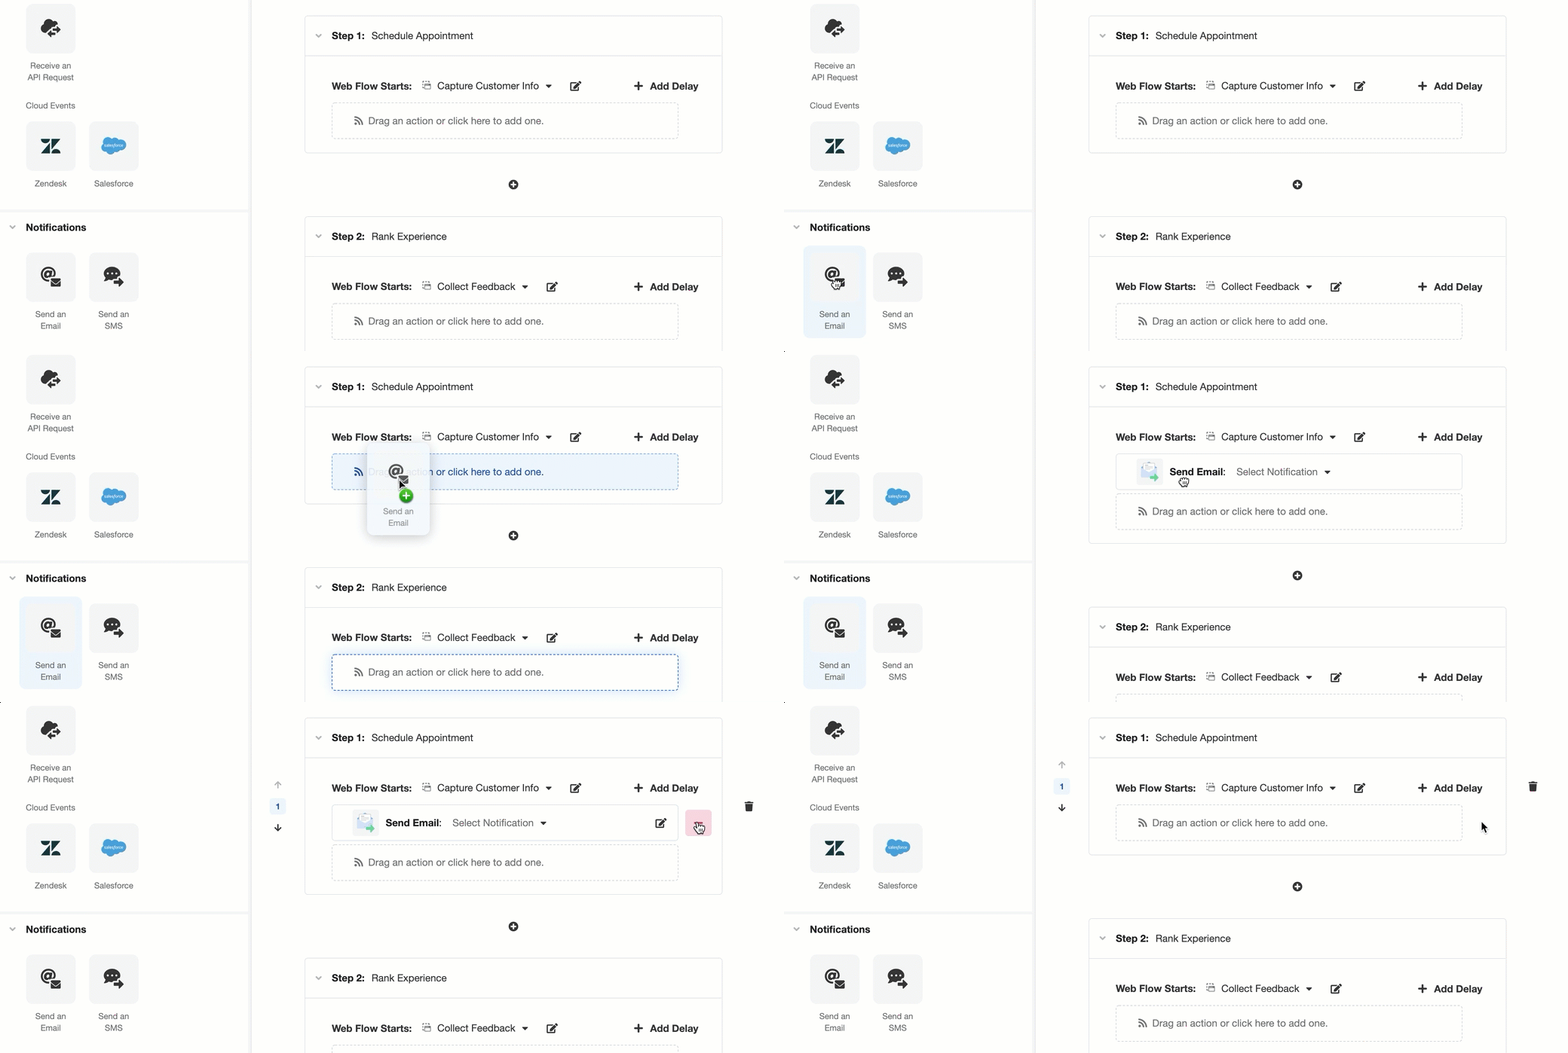
- Toggle to the Journey Builder. In the Notifications Section of the Tree, select Send an Email and drop it into the relevant Journey Step, under Drag an action or click here to add one.

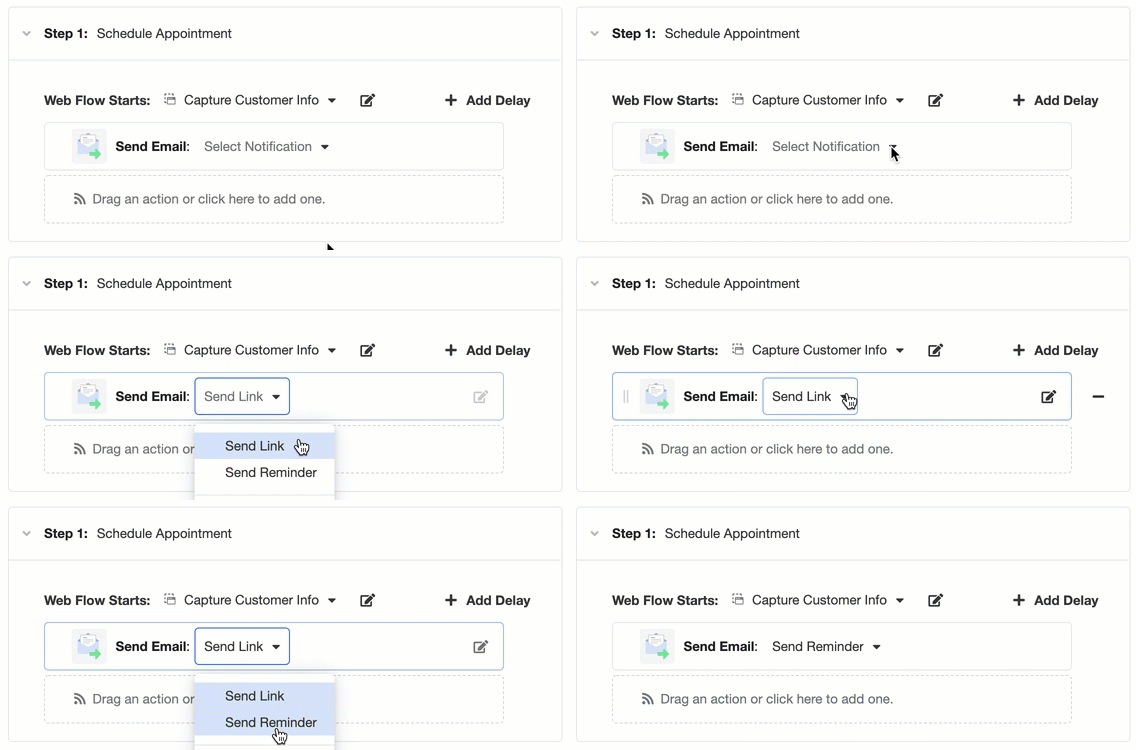
- Select the relevant Email Notification from the dropdown menu that appears.

This Email Notification will now send as soon as the Step begins.
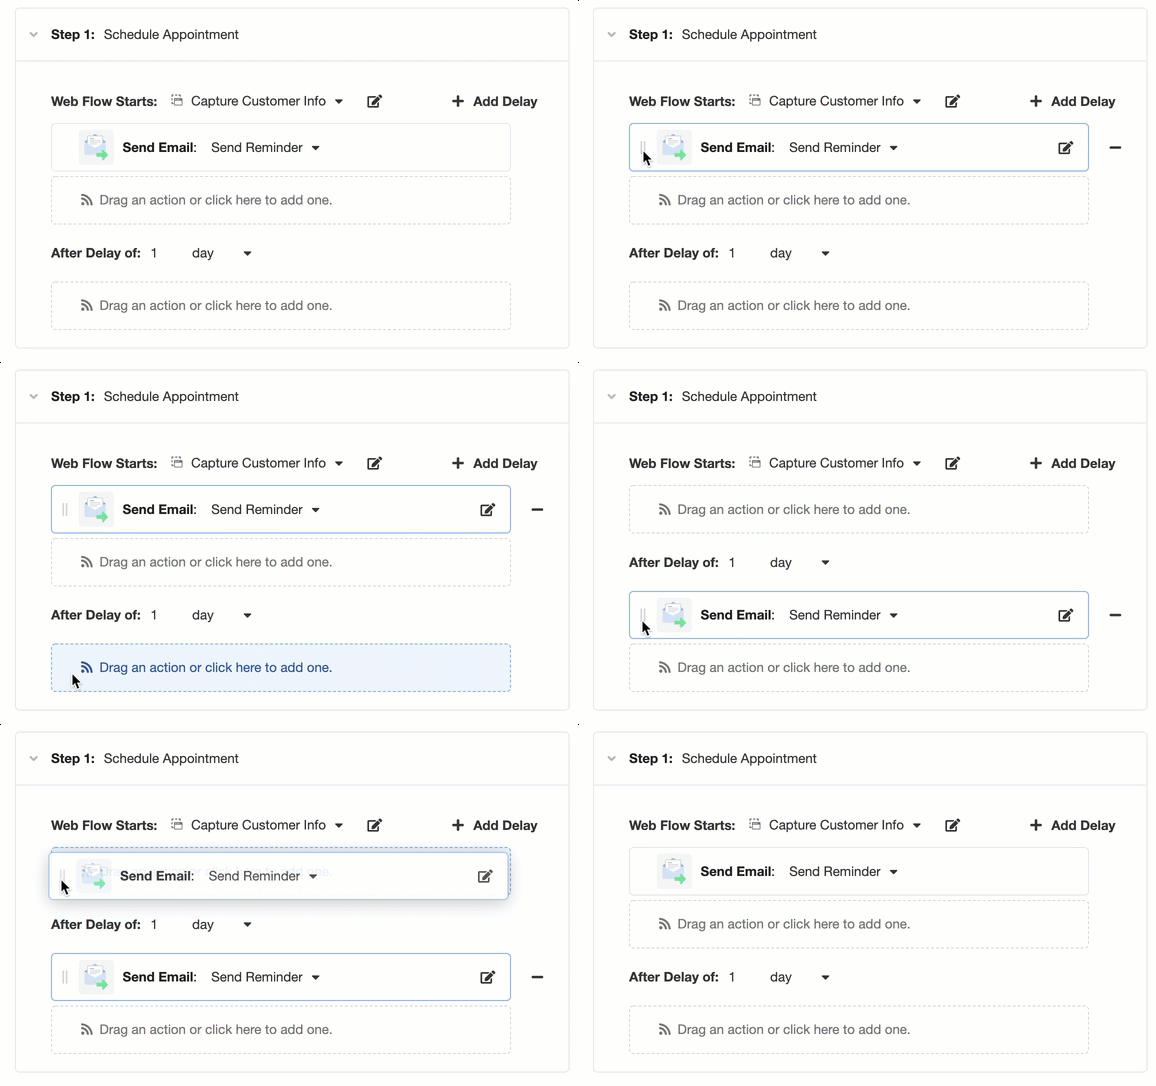
If you don't want the Notification to be sent at the same time the Journey Step begins, you can delay it by clicking on the Add Delay button:

Drag and drop the relevant Notification so that it rests under the delay:

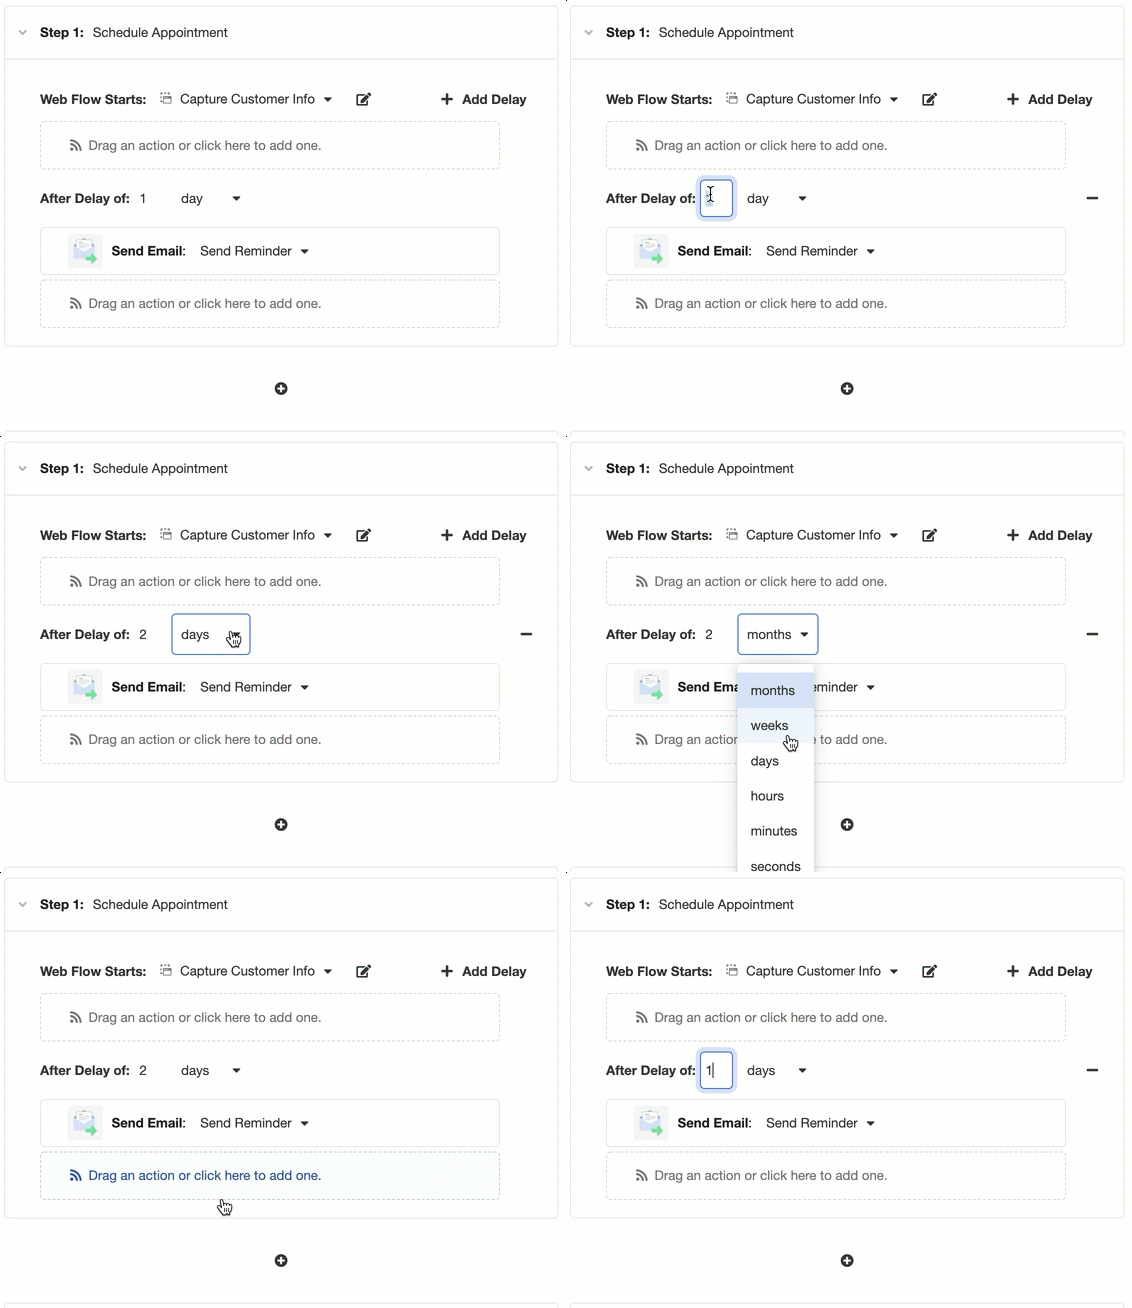
Modify the length of the delay by selecting units of time from the dropdown menu and entering the desired number of time units:

One Journey Step can be associated with any number of Notifications, scheduled to send after any number of delays.
Updated 4 months ago