Quickstart
Airkit is a CX automation platform that streamlines the process of building out digital customer experiences.
Here's how to get started!
Access the platform 🔑
Logging into Airkit
All of the tools required to build apps in Airkit are available on our browser-based platform.
- If you already have access to an Airkit account, you can sign in here.
- If your teammates have an existing Organization you want to join, someone with Admin permissions will need to invite you per the instructions given in Adding Users to Airkit.
Create an app and open it in the Studio 🛠️
Creating an app
Once logged in, you will be taken to the Airkit Console. This part of the platform allows you to configure application resources, connect external integrations, and access all applications that have been created within the relevant Organization. Upon first getting started, no such applications will exist.
Make your first application by clicking on the 'Create New' Button in the upper right corner.
Upon clicking this button, you'll be invited to select how you want to start building your application: from scratch, or with a template.
Templates are built around common Airkit use-cases, and using them can vastly speed up development time, particularly when building out long, complicated application flows. However, when first getting started, the additional layers of abstraction provided by templates can obscure the underlying tools. Peel away those layers of abstraction and start with a blank app by selecting the 'Create blank app' box.
Clicking on this box takes you to a screen that provides an overview of the application.
Naming the app
Rename this application by clicking on the edit icon that will appear next to the default name ("Untitled App"):
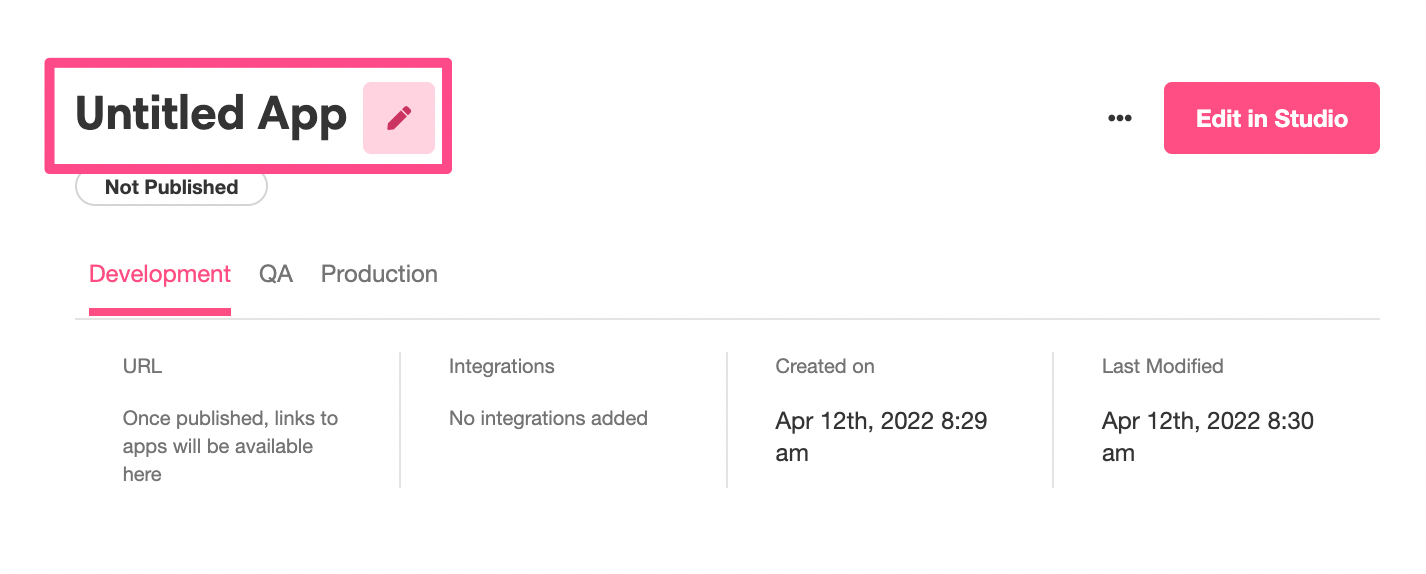
Each app stored within an Organization requires a unique name.
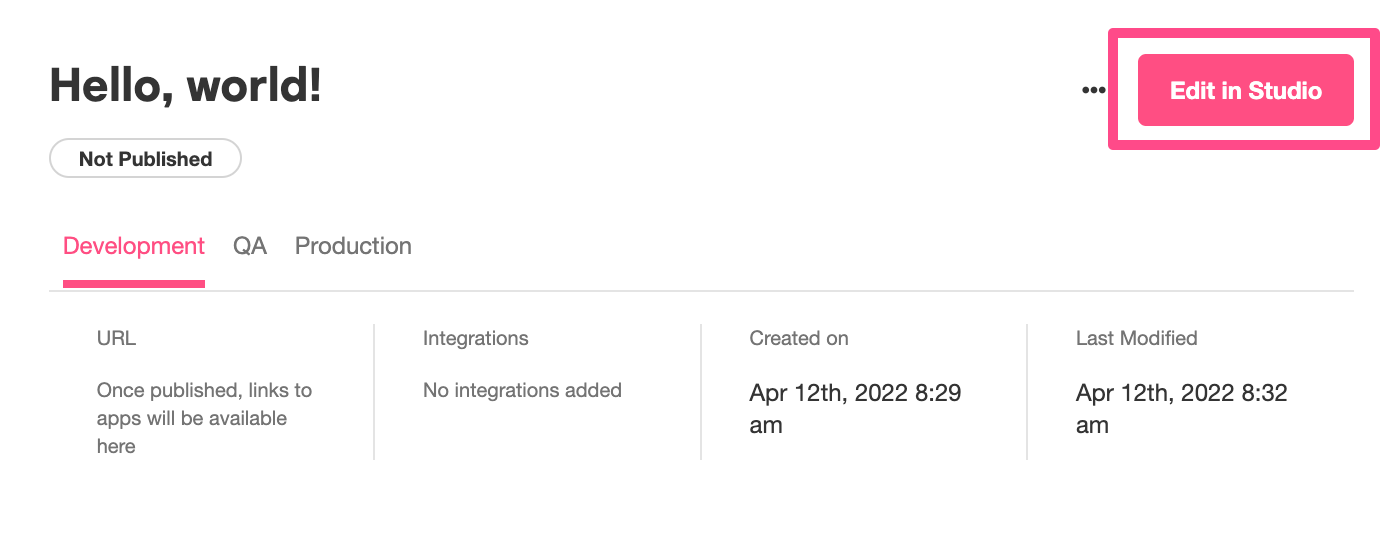
Opening the Studio and editing the app
Once you've named your application, click on the 'Edit in Studio' button to the upper right of the screen to begin building out your app:
Define how digital Journeys begin
Upon creating an app, you will first land on Journey Builder in the Studio. This is where you'll outline the intended flow of the application and define how your digital Journeys begin.
- To build an application that is triggered by a user clicking a link, drag the Visit a Link icon from Triggers > User Interactions on the left side of the screen to Triggers in the Stage on the right.
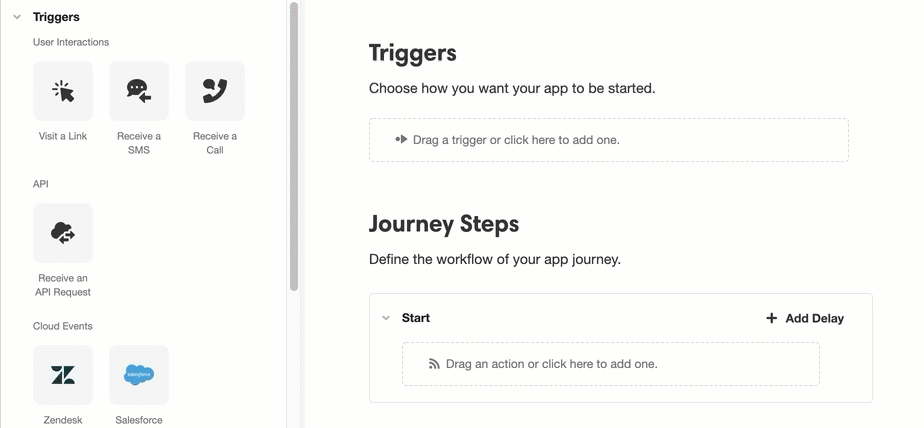
- Under Journey Steps, turn your attention to the Step 1 box. In Web Flow Starts select the '+' icon. This defines the Web Flow that users will be directed to upon clicking the Journey Start Link.
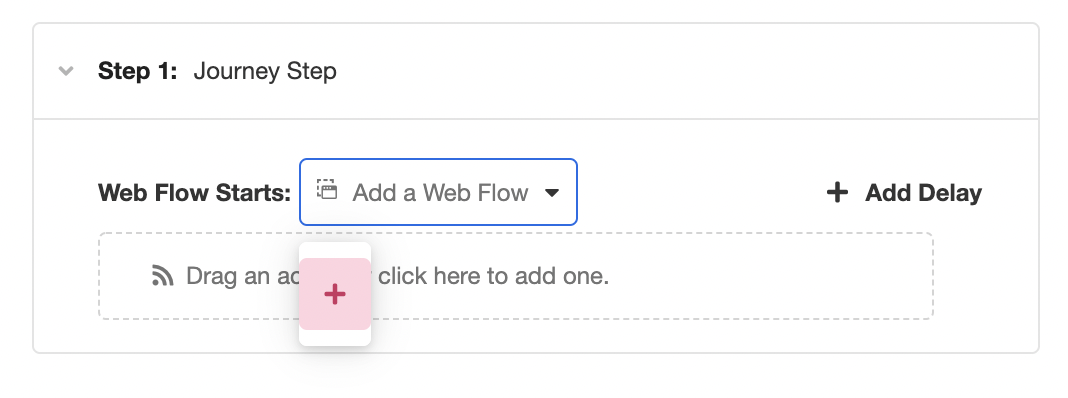
You've now set up an entry point for your application and defined a Web Flow for it to lead to!
Save your work frequently, so you don't have to worry about losing progress by accident! Click the Save icon on the upper left of the Studio, or use the usual keyboard shortcuts: CMD + S or CTRL + S.
Build the UI
After creating an entry point for your application and defining the Web Flow that it links to, you'll want to build out the UI that users will see upon clicking the link.
- UI components are laid out and styled in the Web Flows Builder. To toggle to the Web Flows Builder, turn your attention to the Builder Bar on the far left of the screen and select Web Flows.

The Web Flows Builder is laid out as follows:
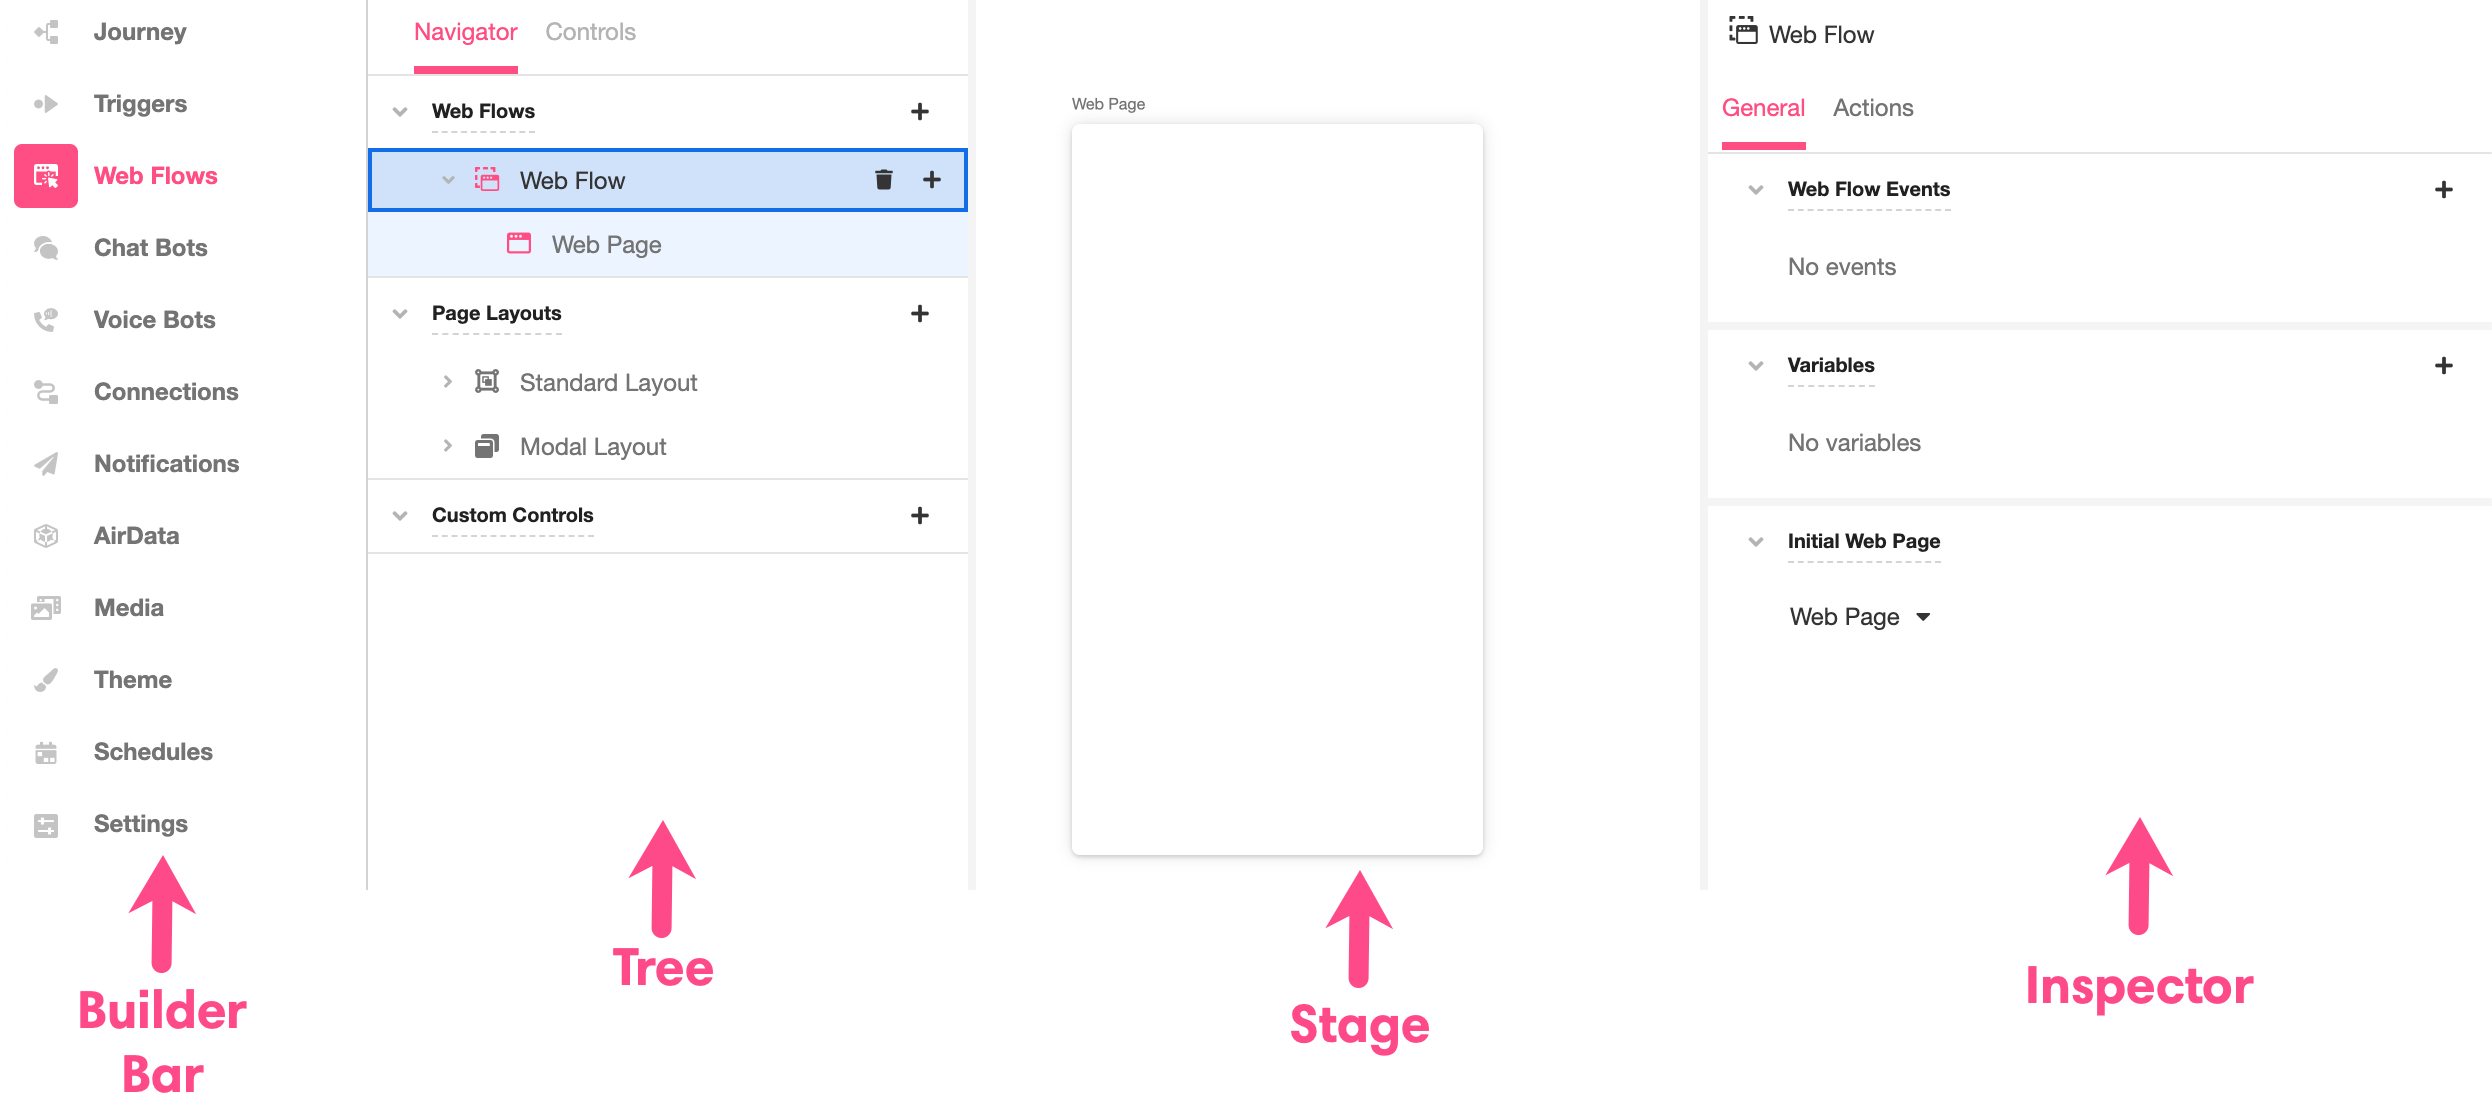
- Under the Web Flows section of the Tree, you'll see the Web Flow created in the the previous section, still named "Web Flow". Web Flows are containers for Web Pages, which display UI components called Web Controls.
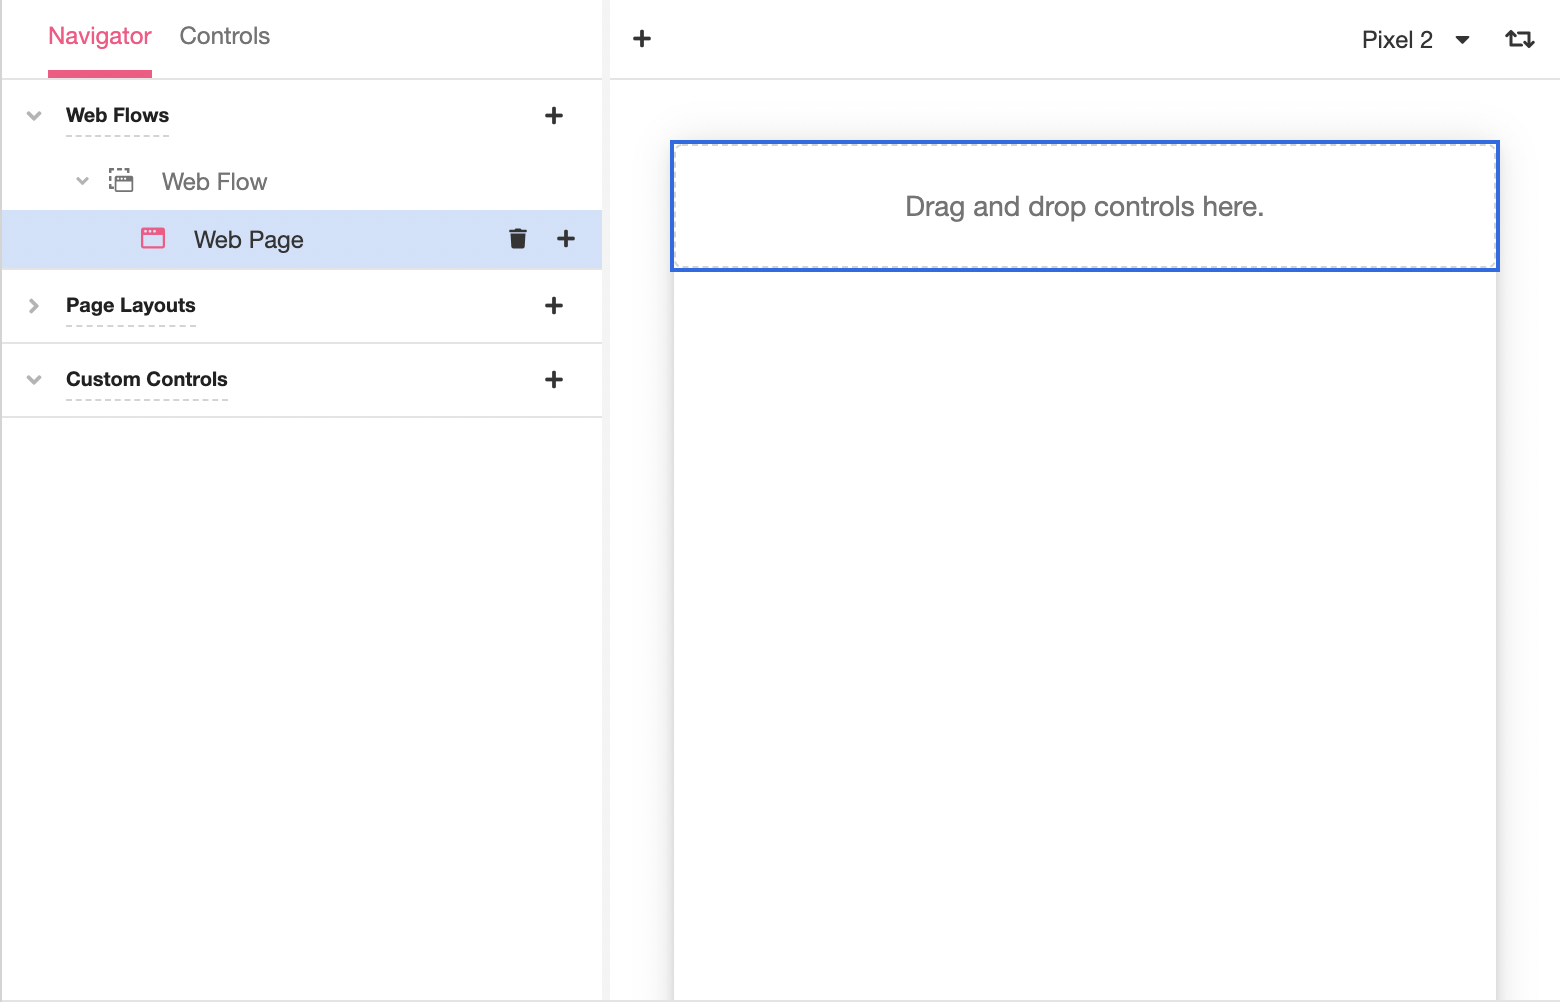
Click on the Web Page, named "Web Page", under the Web Flow. You will see the Web Page appear in the Stage:
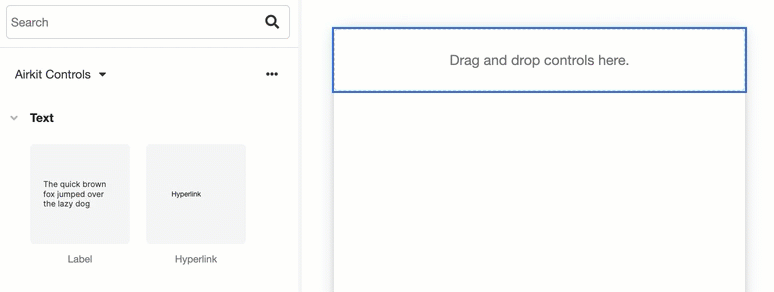
- To select Web Controls to drag-and-drop into your new Web Page, toggle from the Navigator Tab at the top of the Tree to the Controls Tab:

- Expand the Text section to view the Text Controls, including Labels and Hyperlinks. Drag-and-drop a Label into the Web Page, then double-click on the text the appears in order to edit it. Replace "The quick brown fox jumped over the lazy dog" with "Hello, World!"
If you prefer not to drag-and-drop Controls into your Web Page, you can also add Controls by clicking on the '+' icon to the right of the Web Page in the Tree and selecting the desired Web Control.
Preview your digital Journey
Previewing your application fully emulates everything you've built out so far, allowing you to test all components of your digital experiences.
To ensure your App Preview will emulate all components of your app build, you'll need to save your app before Previewing; if you don't, you will receive a reminder to do so upon clicking the Preview button.
- Click on the Preview button to the upper right of the Studio.

- Clicking on the Preview button will open up your App Preview in a separate tab. To emulate accessing your application by clicking on a link, click on the Web icon to the bottom right of the leftmost Previews Window:

Clicking on this icon simulates the process of starting a digital Journey by clicking a link. Note that the simulated Journey begins with the Web Flow defined in the Journey Builder, which begins with the Web Page you created in the Web Flows Builder.
Publishing
To publish your application, click on the "Publish" button on the upper right to the Studio. In the pop-up window that appears, click the "Publish" button. This will provide a Starting Link that can be used to navigate to the web experience that you just built out.
.gif")
The Starting Link automatically generated here uses Airkit's default domain. For more on how to create a white-label URL to link to your applications, see Publishing Your Application.
Congratulations! You've just built and published your first digital experience in Airkit.
What's next?
Now that you've been introduced to the Airkit platform, we recommend building a simple Contact Form as your first full-scale application.

After building your Contact Form, there's lot a lot more Airkit to explore! Here are some good places to get started:


Prefer to learn by building? 🛠️ Check out some of our long-form tutorials:


Updated 3 months ago