Authentication Apps and Secure Apps
Building Authentication Apps and using them to create Secure Apps
Sometimes, apps require users to be authenticated before they proceed through their Journey. While this authentication process can be built directly into the application flow itself, it's often useful to create the authentication process separately. This introduces modularity that makes the authentication process both easier to modify and possible to reuse.
In such cases, authentication is handled by its own app, the Authentication App. This application contains the flow by which users authenticate themselves.
An Authentication App can be used to authenticate users attempting to access any number of Secure Apps, the apps that require that means of authentication to access.
Should an Authentication App be used to authenticate multiple Secure Apps, allowing access to one Secure App will imply access to all the others. Reuse authentication processes mindfully.
When a Secure App requires authentication through an Authentication App, attempts to access the Secure App will redirect to the Authentication App and return to the Secure App only once authentication is complete.
Defining an Authentication App
To define an application as an Authentication App, go to Settings > Global > App Authentication Type and select Authentication App from the dropdown menu:
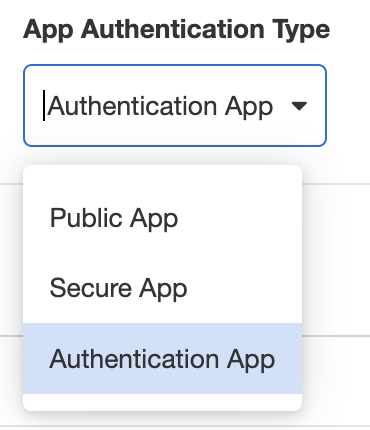
This allows the flow of this application to be used as a modular authentication process.
Within the application flow itself, authentication is completed via the Set Authentication Action. This Action sends a cookie to the user's device, granting them permission to view the associated Secure App until the cookie expires. The Cookie Expiration can be customized as part of the Set Authentication Action; see Set Authentication for more details.
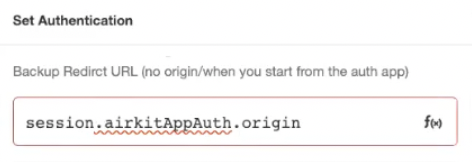
The Set Authentication Action also provides a means to define which application it secures. It expects a link to a Secure App. For the sake of modularity, we recommend using the variable session.airkitAppAuth.origin, which refers to the URL from which the user was redirected.
Once the Authentication App is published, it can be incorporated into the flow of a Secure App.
Defining a Secure App
To define an application as a Secure App, go to Settings > Global > App Authentication Type and select Secure App from the dropdown menu. This will reveal more fields, including the SAML field and the Authentication App Redirect Web Link field:
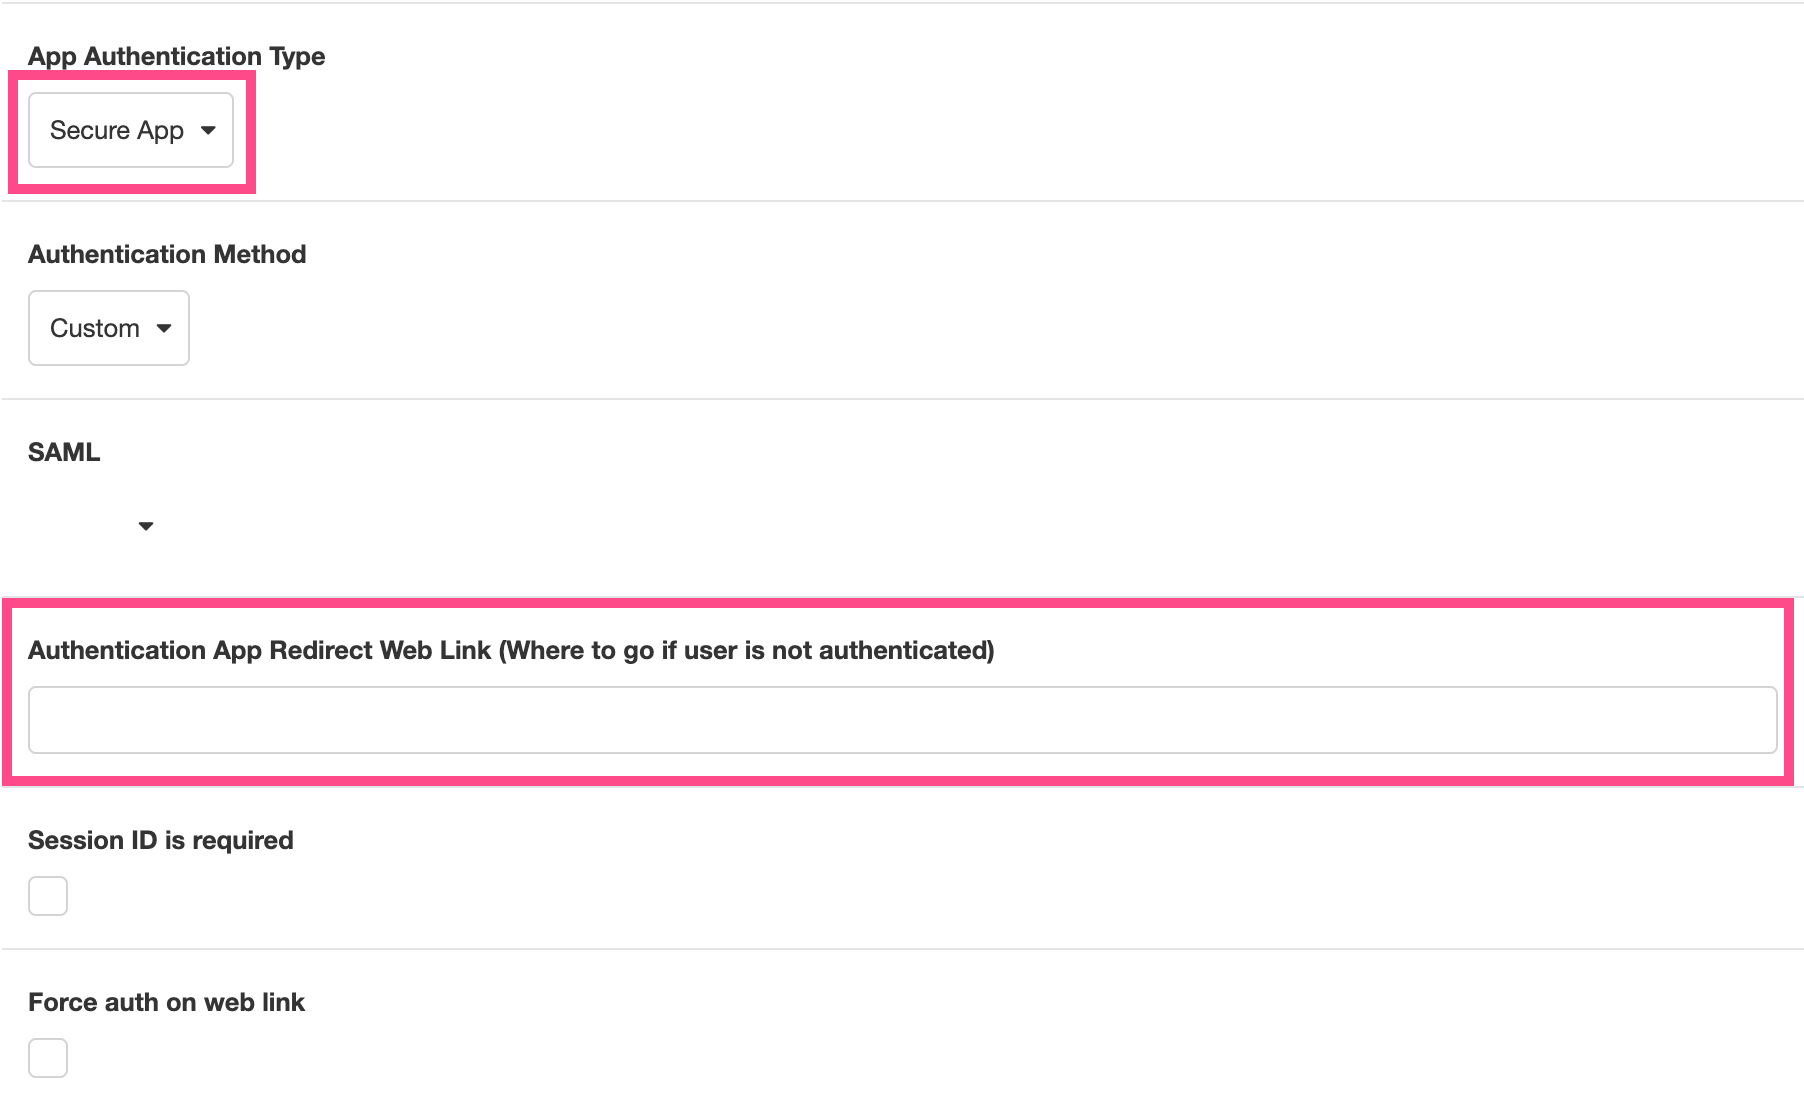
Set the Authentication App Redirect Web Link as the Starting Link to the Authentication App. Now, if a device tries to access the Secure App without the cookie provided by the linked Secure App granting them permission, the user will be redirected to the Authentication App. Upon successfully being authenticated via the Set Authentication Action, the user will will be returned to the Secure App.
Beneath this field are two checkboxes: Session ID required and Force auth on web link.
- If Session ID required is checked, login credentials will be tied to a Session, which means that each authentication token can only be used to access the Journey it was tied too. This prevents authenticated users from using the same authentication token to access multiple Journeys without additional authentication.
- If Force auth on web link means that accessing the web link will trigger a re-log every time the user navigates to the relevant Journey Link.
Triggering a Secure App
It's possible to create a Secure App that is triggered by clicking a link. In such cases, the user will be deflected to the Authentication App directly from the Starting Link, and this will be reflected in the value of the origin found under session.airkitAppAuth.origin.
However, this is not best practice. If a user is sent to the Authentication App directly from a Starting Link, there is no way to pass Journey-specific information, such as the Deployment ID, Session ID or Journey Link to the Authentication App. (See Linking to Sessions for more on the difference between Starting Links and Journey Links.) Consequently, there is no way to map or track Journeys from the Authentication App.
In order to pass Journey-specific information to the Authentication App, a Journey must be properly Triggered before deflecting unauthenticated users. This must be done explicitly, by Triggering the start of a Journey via App API.
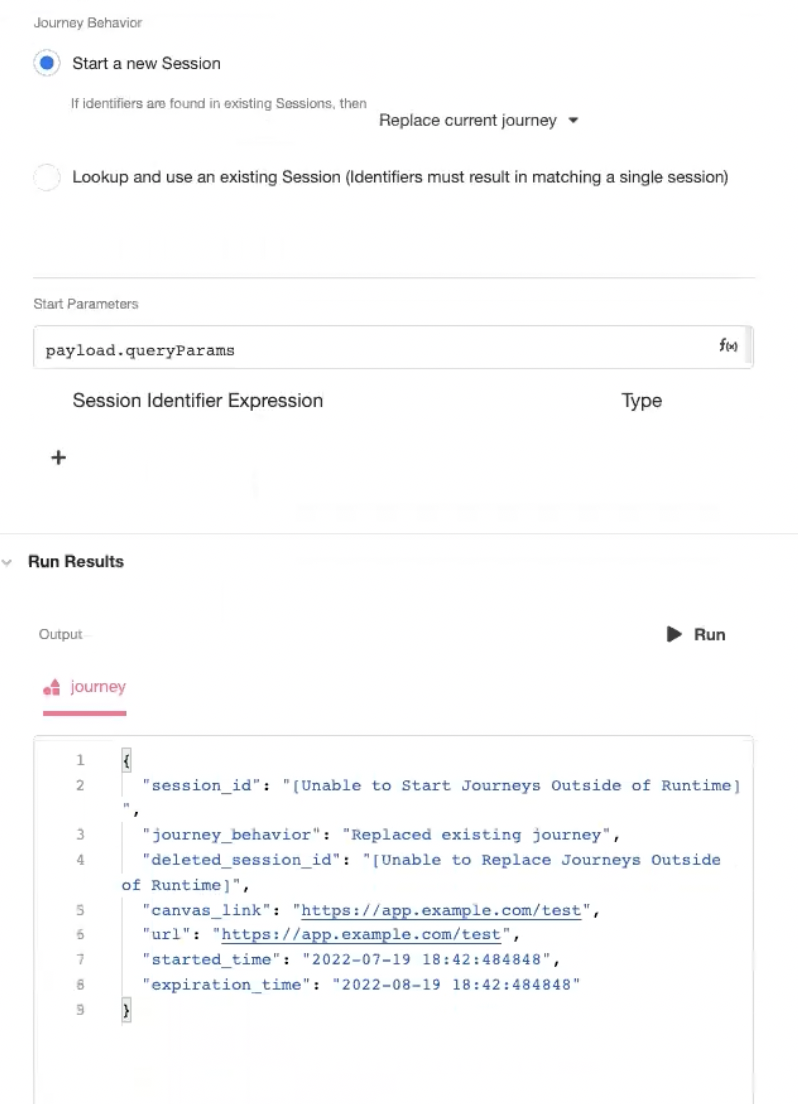
To do this, start by defining an App API as a Trigger. (See Building an App API for more information.) Designate a GET request as an endpoint, then use the Start Journey Data Operation downstream of that GET request to explicitly start a new Journey. If any query parameters were given, they can be passed into the Journey:
Once the Journey has been explicitly started, return a 302 redirect to the Journey Link.
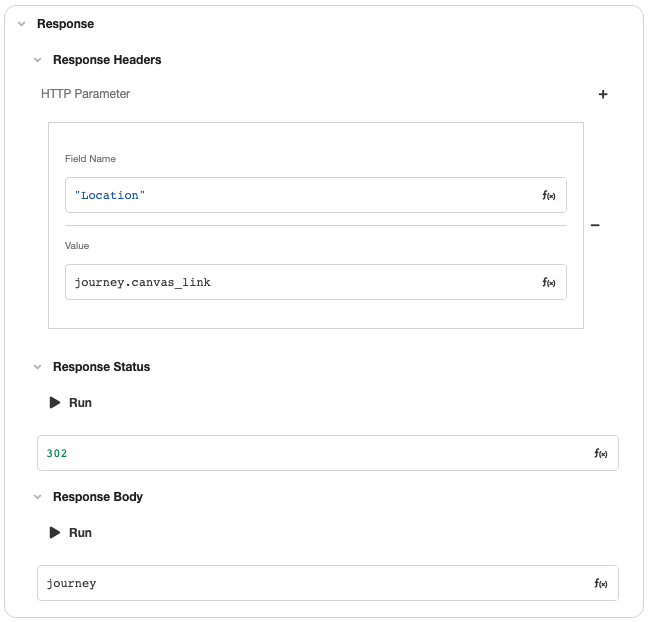
This explicitly begins a Journey before deflecting new users to the Authentication App, allowing the Secure App to pass along Journey-specific information, such as the Journey Link, Deployment ID, and Session ID, which can then be incorporated into the authentication process as needs-be.
These Journey-specific values can be found in the session namespace, under the airkitAppAuth attribute.
session.airkitAppAuth.origin- the URL that deflected to the Authentication App; in this case, the Journey Linksession.airkitAppAuth.deploymentId- the Deployment ID of the Journeysession.airkitAppAuth.sessionId- the Session ID of the Journey
Updated 3 months ago