JIT Provisioning for an Organization
This document covers how JIT Provisioning can be configured to automate the creation and management of user accounts granted access to your Airkit Organization. Managing user accounts in this way allows you to bring your own login providers to Airkit so that you can use existing protocols or authentication processes to manage users and roles in whatever way you see fit.
Enterprise FeatureThis feature requires an ENTERPRISE license. If you would like to enable this feature for your Airkit Organization, please contact your Airkit representative or contact [email protected].
What is JIT Provisioning?
JIT Provisioning (Just In Time Provisioning) is a SAML-based method used to automatically create a new account the first time an allowed user logs into the Airkit platform via a third-party identity provider. Using JIT Provisioning allows you to provision user accounts without managing and sending each user an invitation manually, because user accounts and permissions are handled by the identity provider directly.
To enable JIT provisioning, you must first configure SSO (Single Sign-On) between Airkit and your identity provider. Airkit is capable of configuring JIT Provisioning through any SAML IdP provider.
How to set up JIT Provisioning
Prerequisite
In order to configure JIT Provisioning in Airkit, the SAML Assertion Metadata must be generated from the Identity Provider (IdP) of choice. This will be used to share configuration credentials between the IdP and the Airkit platform, which serves as the Service Provider (SP). The IdP metadata usually contains the IdP certificate, the entity ID, and the redirect URL.
Airkit requires the Metadata File to be formatted as an XML file with the following fields:
<md:SingleSignOnService Binding="urn:oasis:names:tc:SAML:2.0:bindings:HTTP-Redirect"and/or<md:SingleSignOnService Binding="urn:oasis:names:tc:SAML:2.0:bindings:HTTP-POST"md:EntityDescriptortag withentityIDattributemd:IDPSSODescriptortagX509Certificatewith cert inside
JIT User Provisioning
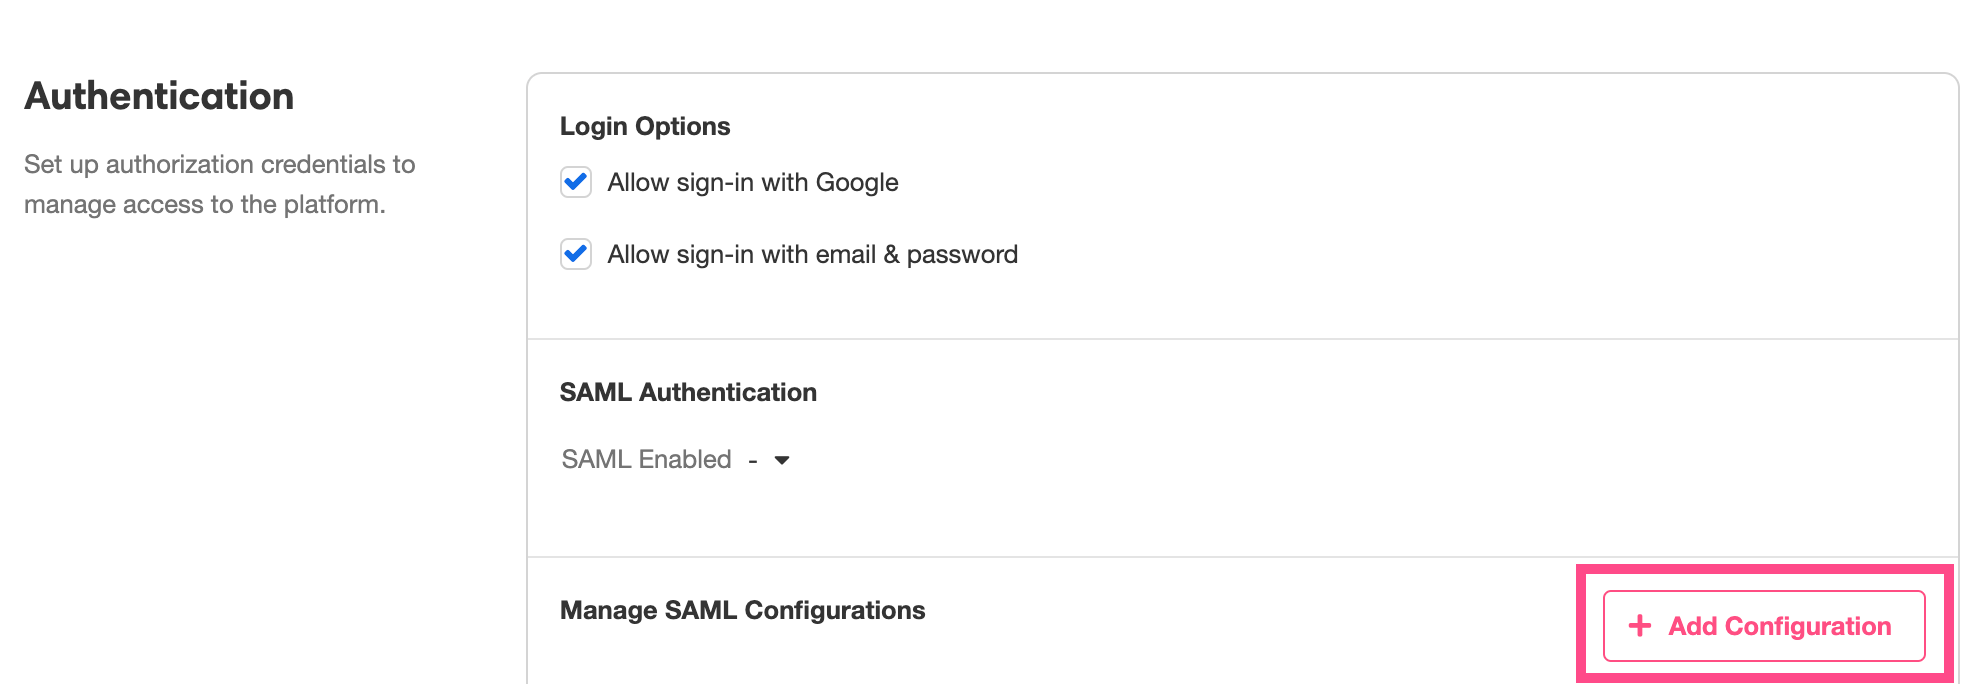
Within the Airkit platform, configuring JIT Provisioning is done under Console > Settings > Organization, in the Authentication section.
To upload the XML file from your IdP, click on the + Add Configuration button to the bottom right, and select the relevant SAML Metadata File as prompted:
To enable JIT Provisioning, turn your attention to the SAML Authentication subsection, select the relevant XML file from the dropdown menu to the right of SAML Enabled, and check JIT User Provisioning :
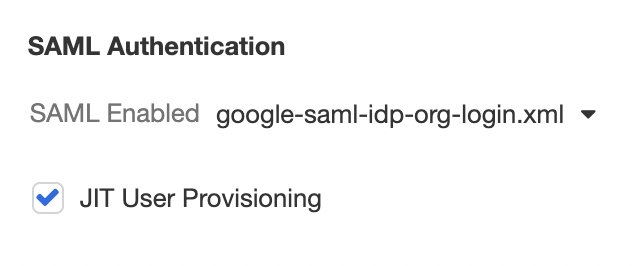
When this box is checked, Airkit will rely on the selected SAML provider to create and provision users within the platform. When new, allowed users attempt to log in to Airkit for the first time, they will instantly invoke the creation of their new account, rather than requiring an invitation.
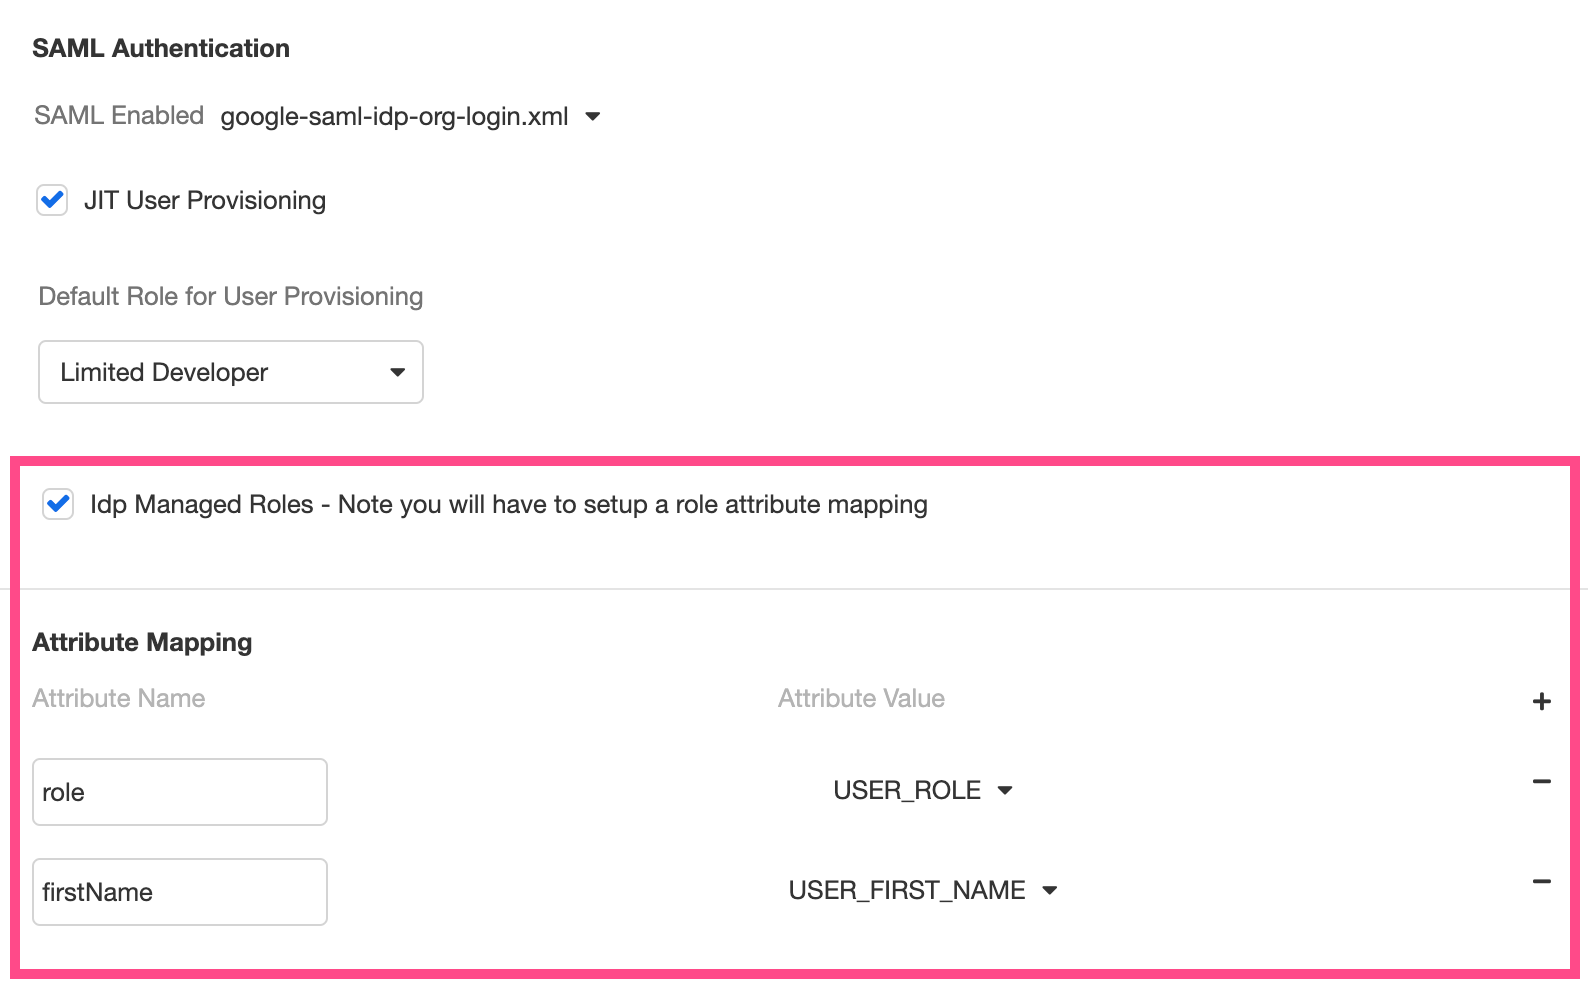
Upon checking the JIT User Provisioning checkbox, additional fields will appear, allowing you to configure how the user roles that will be assigned to provisioned accounts.
Setting User Roles
The Default Role for User Provisioning field, found directly under the checked JIT User Provisioning checkbox, allows you to select the default role that will be assigned to users as their Airkit accounts are created using JIT Provisioning. All existing roles, including custom roles, should be available for selection within the dropdown menu:
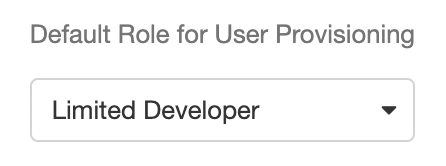
If no default role is selected, Airkit will default to assigning provisioned users the Agent role.
Setting User Roles Dynamically
The Default Role described above will assign all new users the same default role regardless of who they are, but it is also possible to manage roles via your IdP and thus set each user's role dynamically. To configure this, check the IdP Managed Roles checkbox.
When the IdP Managed Roles checkbox is selected, the SAML response from the IdP will be able to define each user's role, as well as other profile information, including their:
- First name
- Last name
- Display name
- Phone number
Profile information managed by an IdP will be referenced not only to accounts as they are provisioned, but to existing accounts as well: if someone's role is reconfigured in the IdP, the change in role will be reflected the next time they log into Airkit.
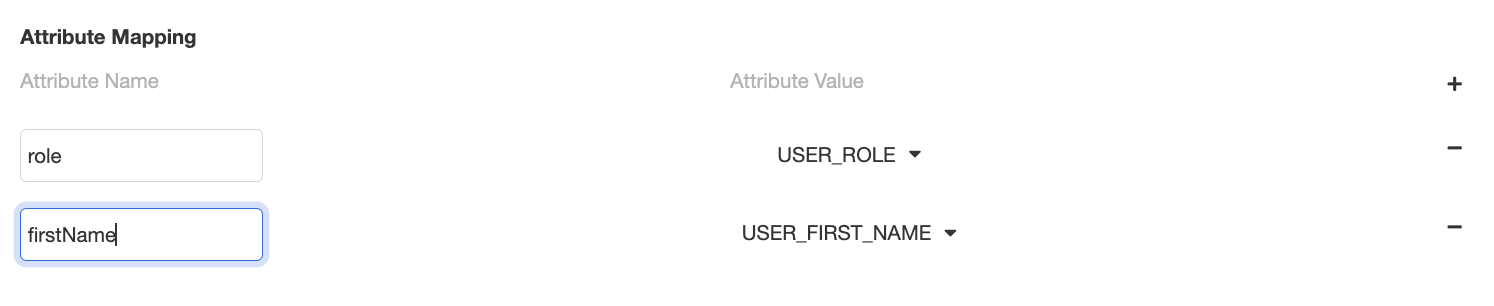
To define how profile information is defined by the SAML response, configure each relevant attribute in the Attribute Mapping section found immediately under the IdP Managed Roles checkbox:
If the SAML response does not specify a user's role, they will be given the default role defined by Default Role for User Provisioning.
IdP Managed Roles: Example
Consider the configured SAML response that defines a user's role as role and a user's first name as firstName, as follows:
<saml:AttributeStatement>
      <saml:Attribute Name="firstName" NameFormat="urn:oasis:names:tc:SAML:2.0:attrname-format:basic">
        <saml:AttributeValue xsi:type="xs:string">Adam</saml:AttributeValue>
      </saml:Attribute>
      <saml:Attribute Name="role" NameFormat="urn:oasis:names:tc:SAML:2.0:attrname-format:basic">
        <saml:AttributeValue xsi:type="xs:string">developer</saml:AttributeValue>
      </saml:Attribute>
    </saml:AttributeStatement>
Corresponding Attribute Mapping should be configured such that role defined USER_ROLE and firstName defined the USER_FIRST_NAME, as follows:
Updated 4 months ago