Publish and Manage Deployments
Airkit apps come configured with three deployment environments:
- Development
- QA
- Production
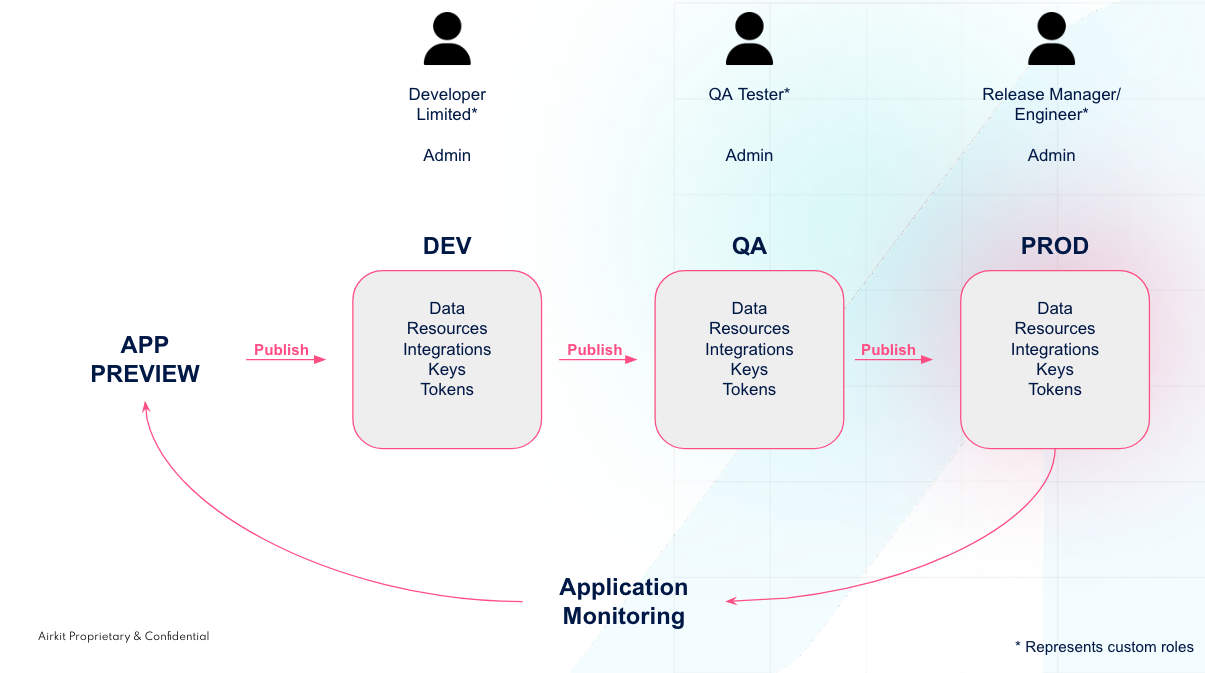
Whenever an app is published, it must be published to one of these three environments, each of which can be associated with its own data, resources, and integrations. For example, an app deployed in the Development environment should be tied to integrations and data sources that have sample data, where an app deployed in the Production environment should be tied to the production data source.
Typically, an application is published in the Development environment while it is still being built, the QA environment when it is being tested, and the Production environment when it is finalized and ready to present to the end users. Best practice dictates that any changes or fixes made to the application should pass through a similar lifecycle before being merged with the app in Production:
For more on the application lifecycle, see Managing the Application Lifecycle.
To facilitate this lifecycle, Airkit provides a publishing process that:
- allows an application to be published in multiple environments at once, though publishing to the same environment multiple times will overwrite the previous deployment with the most recent.
- allows each deployment environment to tied to different resources, including but not limited to:
Configuring Resources, Data, and Notifications
The resources tied to a deployment environment are configured in Studio, under Settings. Similarly, Datastores are configured in the Studio, under AirData Builder. The publishing process also allows key resources to be confirmed or reconfigured, although not all resources can be modified in this way. Configuring resources as part of publishing should only be done sparingly, as part of the confirmation process.
There is one exception: configuring how notifications will be sent in the case of errors. This is always configured as part of the publishing flow.
Configuration in the Studio
While in the Studio, it is possible to toggle between different environments via the dropdown to the immediate right of the application name:
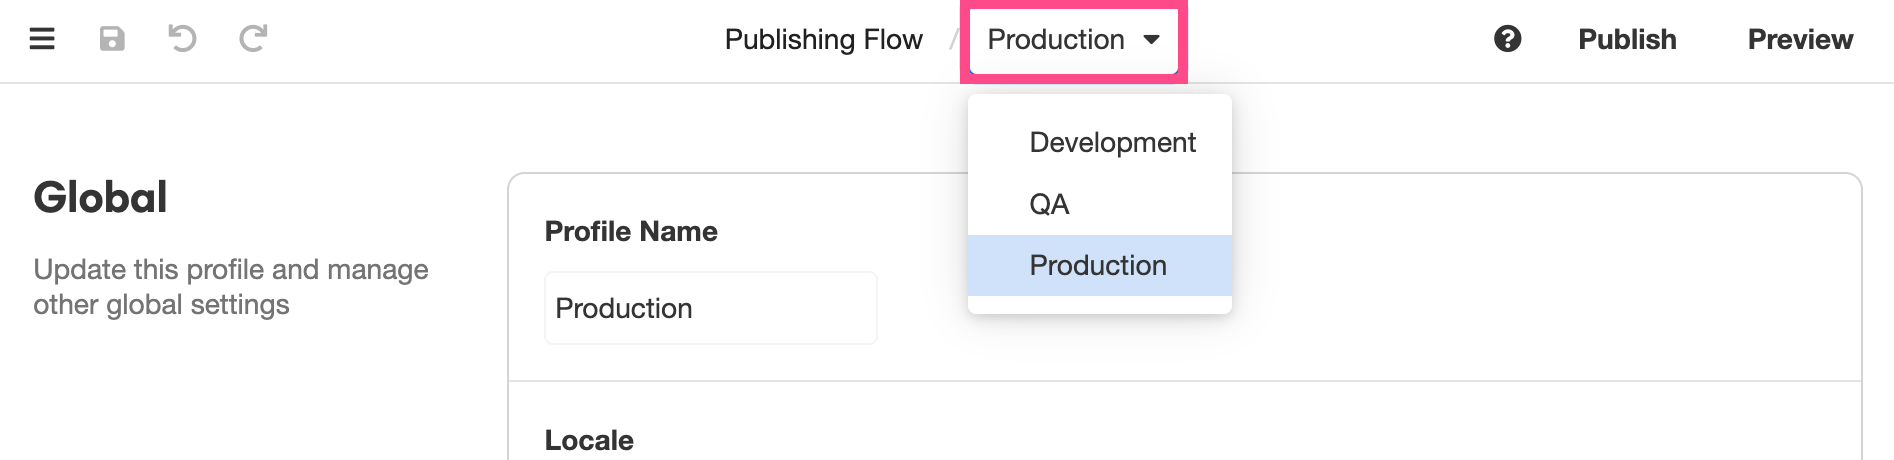
The environment selected here is the one that will be associated with the resources configured in Settings. For more on how to configure these resources, see Configure Application Resources.
Selecting an environment here also impacts which Datastores the application will access if and when interacting with AirData. For more on how to configure Datastores, see Datastores.
Configuration as part of publishing process
Part of the process of publishing an application includes a review of the connections, changes, and migrations that need to be confirmed before the application can be published. The interface looks as follows:
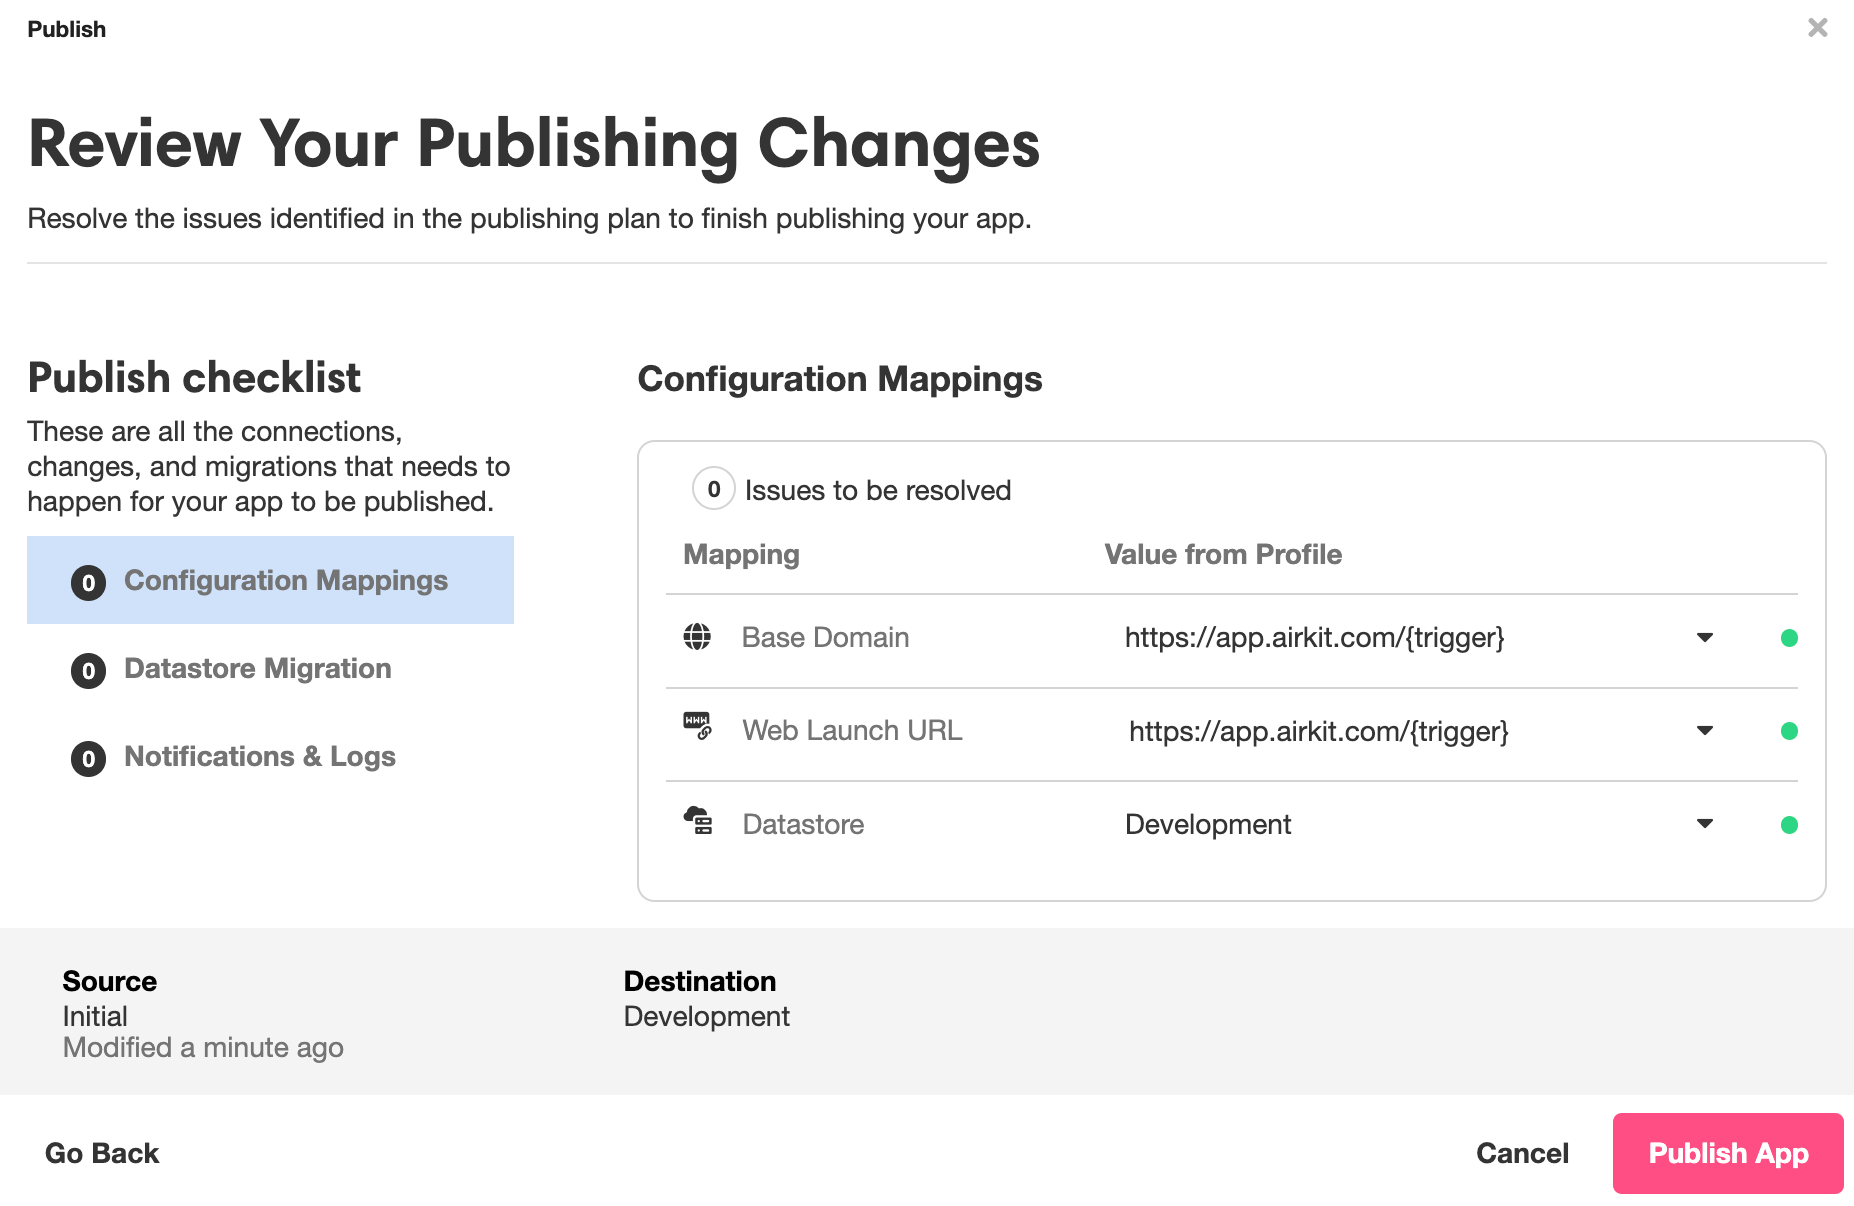
There are three items on the Publish checklist: Configuration Mappings, Datastore Migration, and Notifications & Logs. You can toggle between them via the list on the left side of the interface. Any errors interfering with publication will be explicitly flagged. However, even when there are no obvious technical errors (as in the example show above) it is still good practice to look through each item and confirm that the configuration is not only technically viable but also correct for the present deployment.
Configuration Mappings
The Configurations Mappings interface lists key resources required for deployment, including, as relevant, the Base Domain, the Web Launch URL, the Datastore, the SMS Resource, and the Voice Resource:
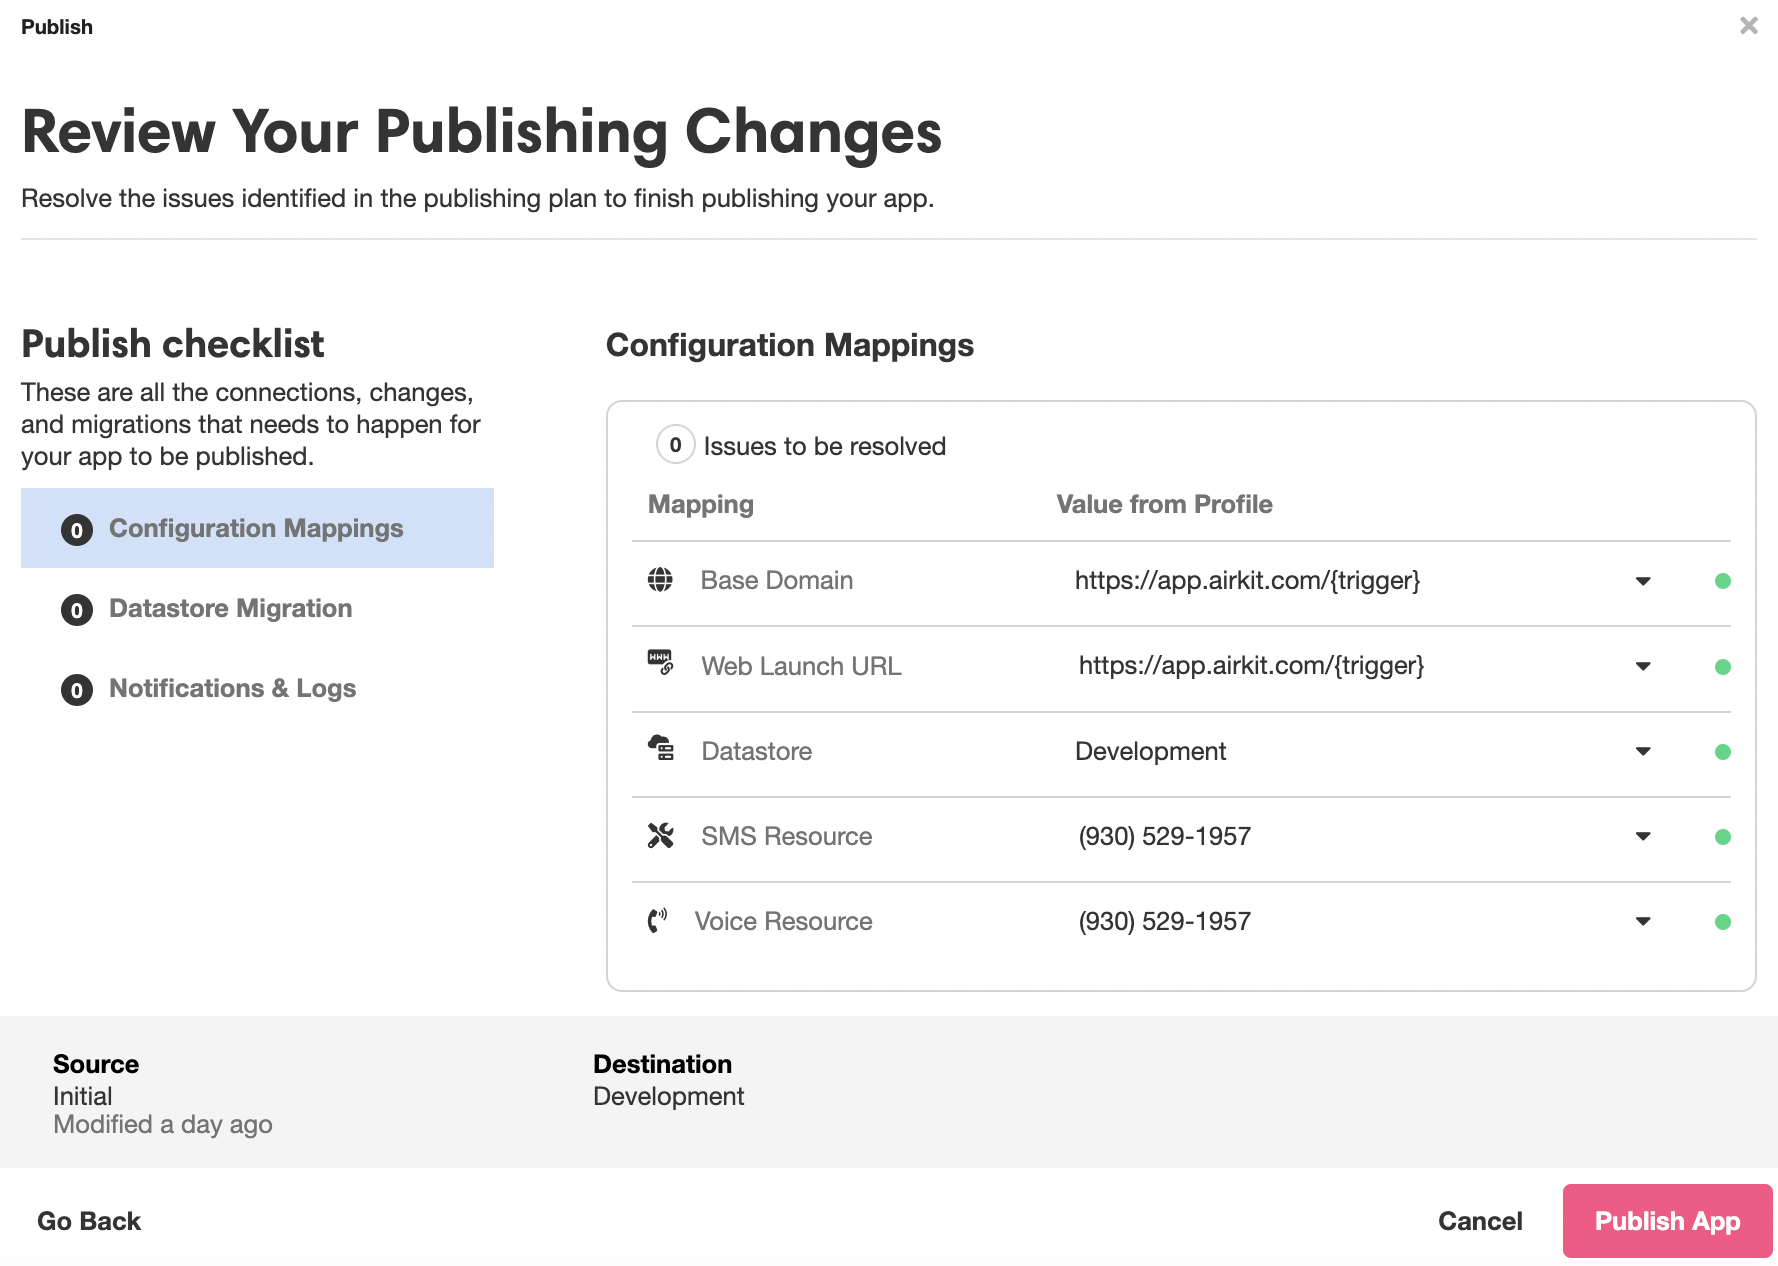
Not every application will display all these resources. An application that neither sends nor parses phone calls will not, for example, require a Voice Resource, and thus it will not display one.
If, upon reviewing the Configuration Mappings, you encounter a value that looks incorrectly configured, you can selected a new Value from Profile from the dropdown menu that appears to the right of the relevant resource. The options available for selection will have been previously configured in the Console; see Configure Application Resources for a more detailed overview of how various resources can be made available.
Datastore Migration
The Datastore Migration Interface summarizes any changes that will be made to the relevant Datastores. If publishing will make any major changes to the way data was structured in a previous deployment to that environment, you will need to confirm that these changes were deliberate and that you understand the risks of making them:
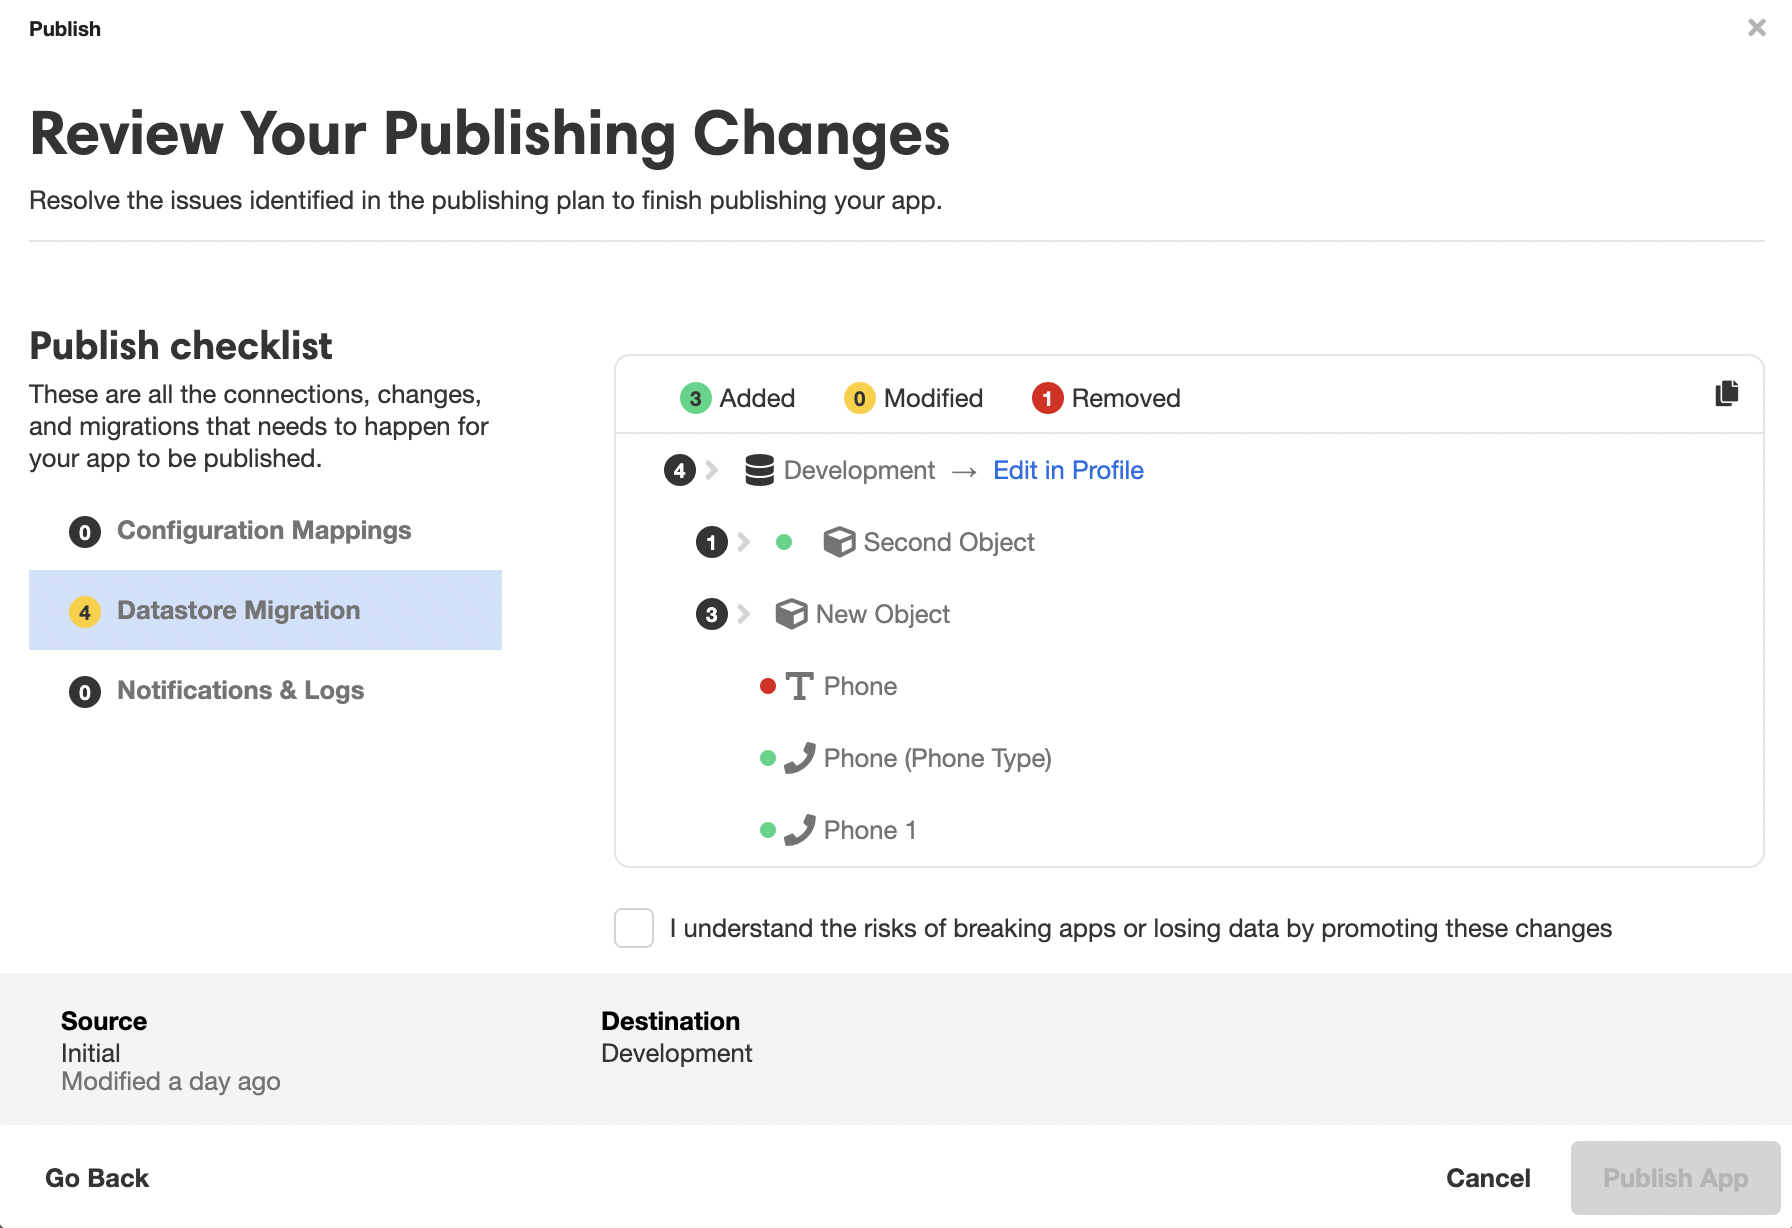
This will typically only be relevant when your application works with AirData App Objects, but in such cases, it is extremely important. If you are changing the structure of AirData App Objects from what they were during earlier deployments in this environment, you can loose important saved data. For instance, deleting an object property and replacing it with an analogous one (such as in the above example), will not transfer any saved data from the old property to the new: all saved data will be deleted.
Notifications and Logs
Notifications can be configured to send alerts when an application throws an error. There are two error types: Application Errors, which occur whenever an error is thrown as part of a Journey, and Custom Log Event Errors which are built into the Journey as Actions. (For more on the different kinds of errors, see Logging Errors.) To select a notifier to tie with either such error, select a notifier from the dropdown menu to the left of each Notification Event:
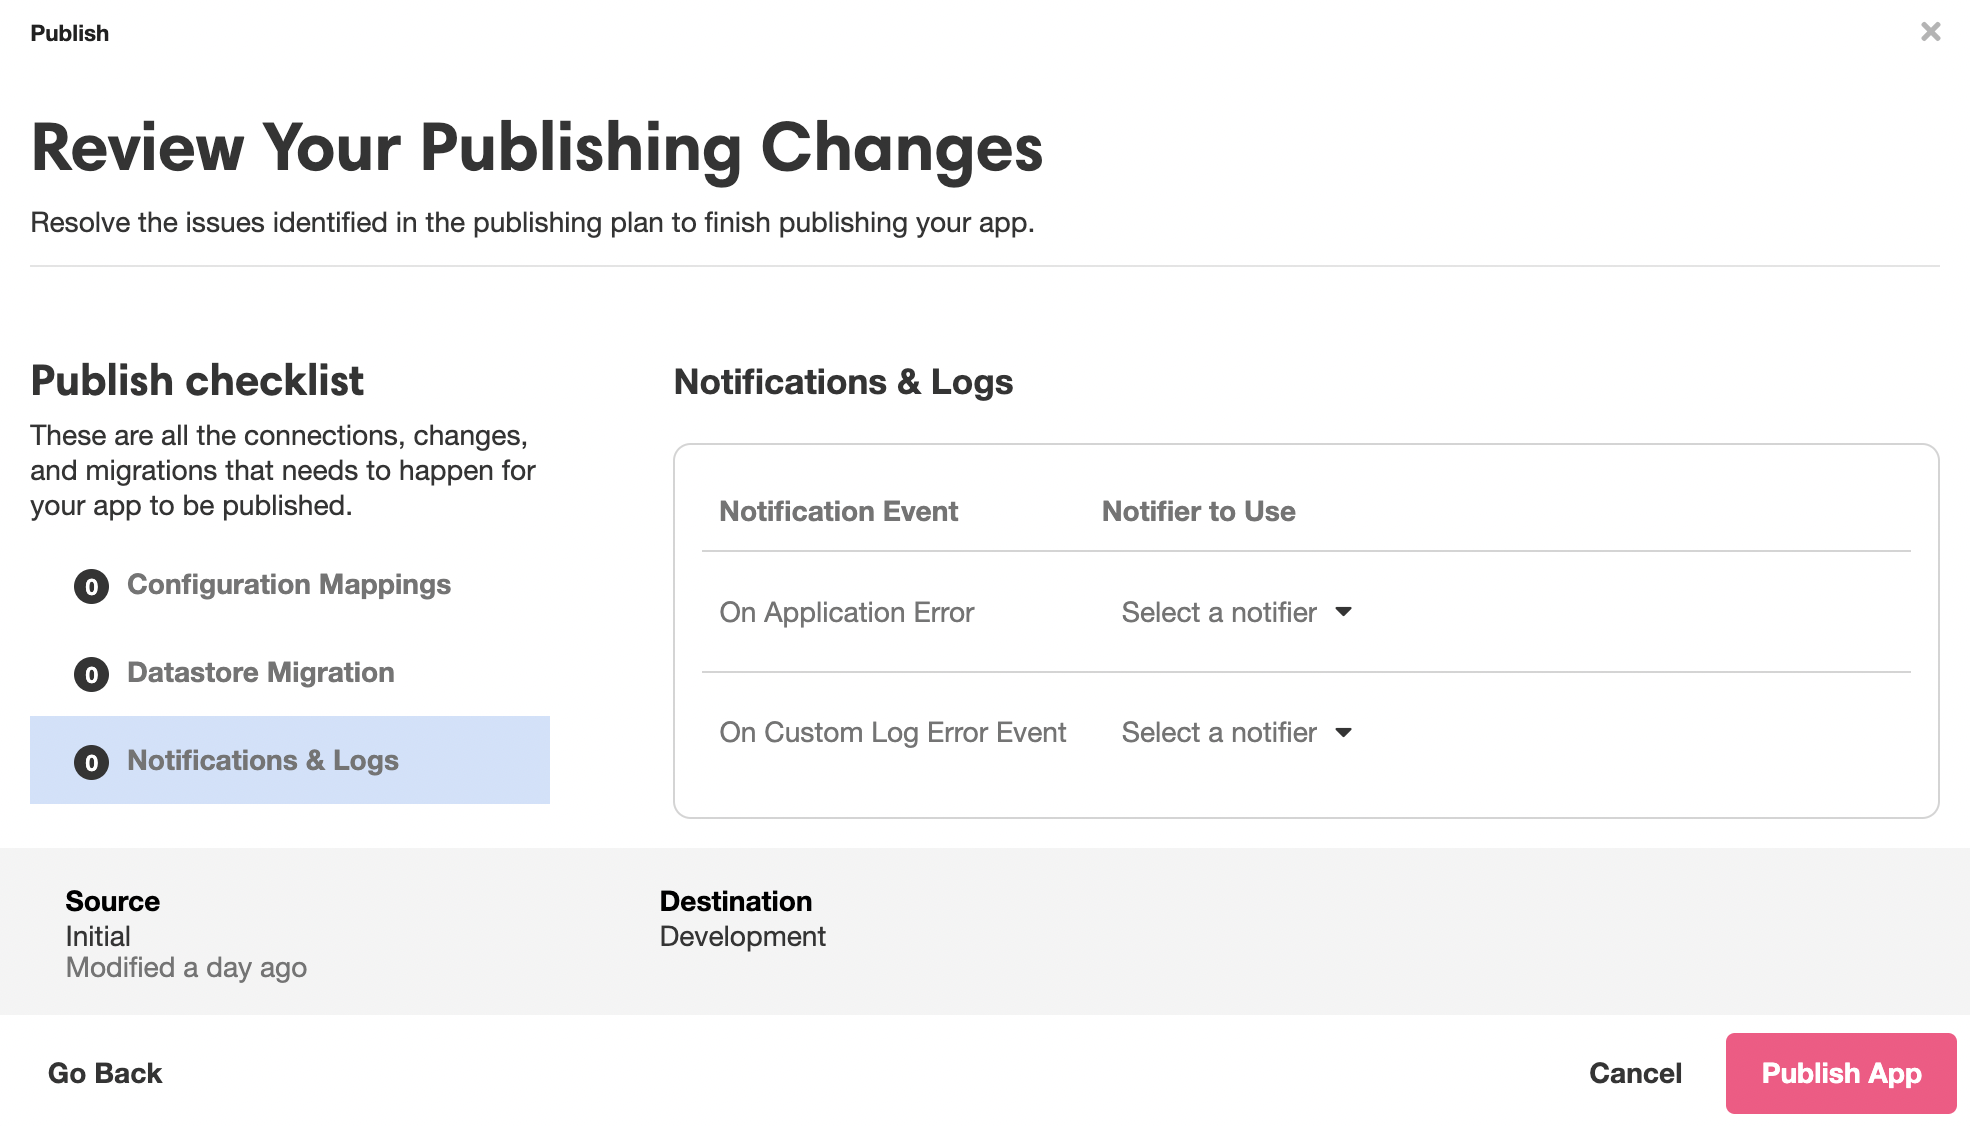
The notifiers available for selection have been previously configured in the Console, in the Logs & App Notifiers section in the Settings Tab. For examples of how to configure notifiers in the Console, see Setting up Email Notifiers or Integrating Error Notifiers to Slack.
Publishing
Publishing an app makes it live and accessible to the outside world through the configured resources. Publishing an app also locks down a version of the app so that additional changes to the app won’t affect the current users.
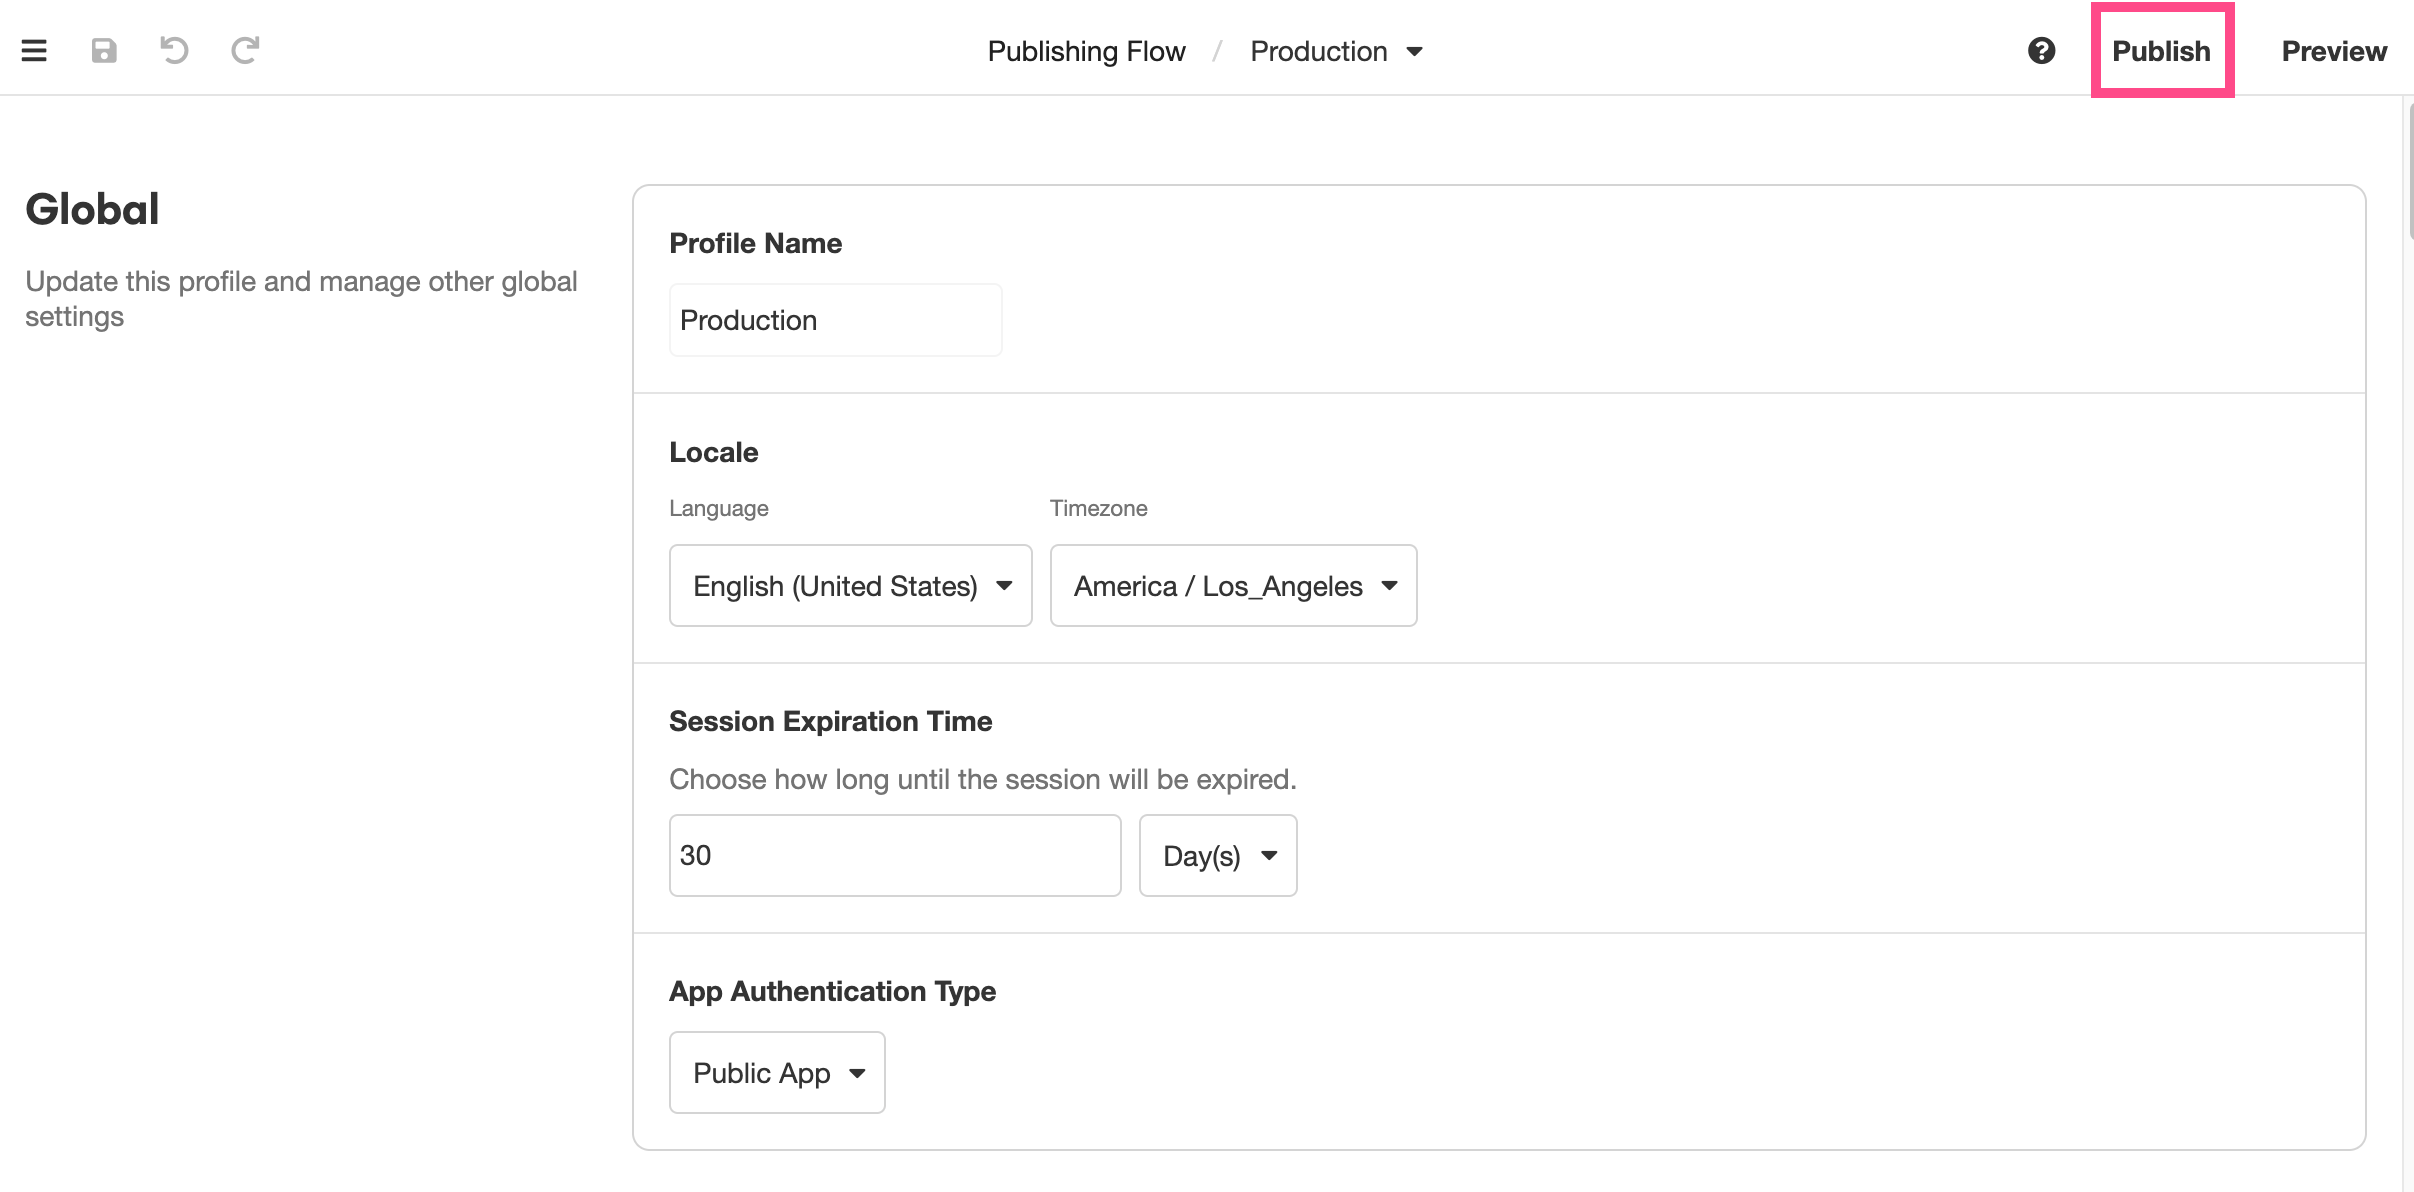
You can publish an application through either the Studio or the Console.
To publish an application from the Studio, click on the Publish button in the upper right:
To publish an application from the Console, navigate to the Apps Tab, Inspect the relevant application, and select Publish App from the Inspector:
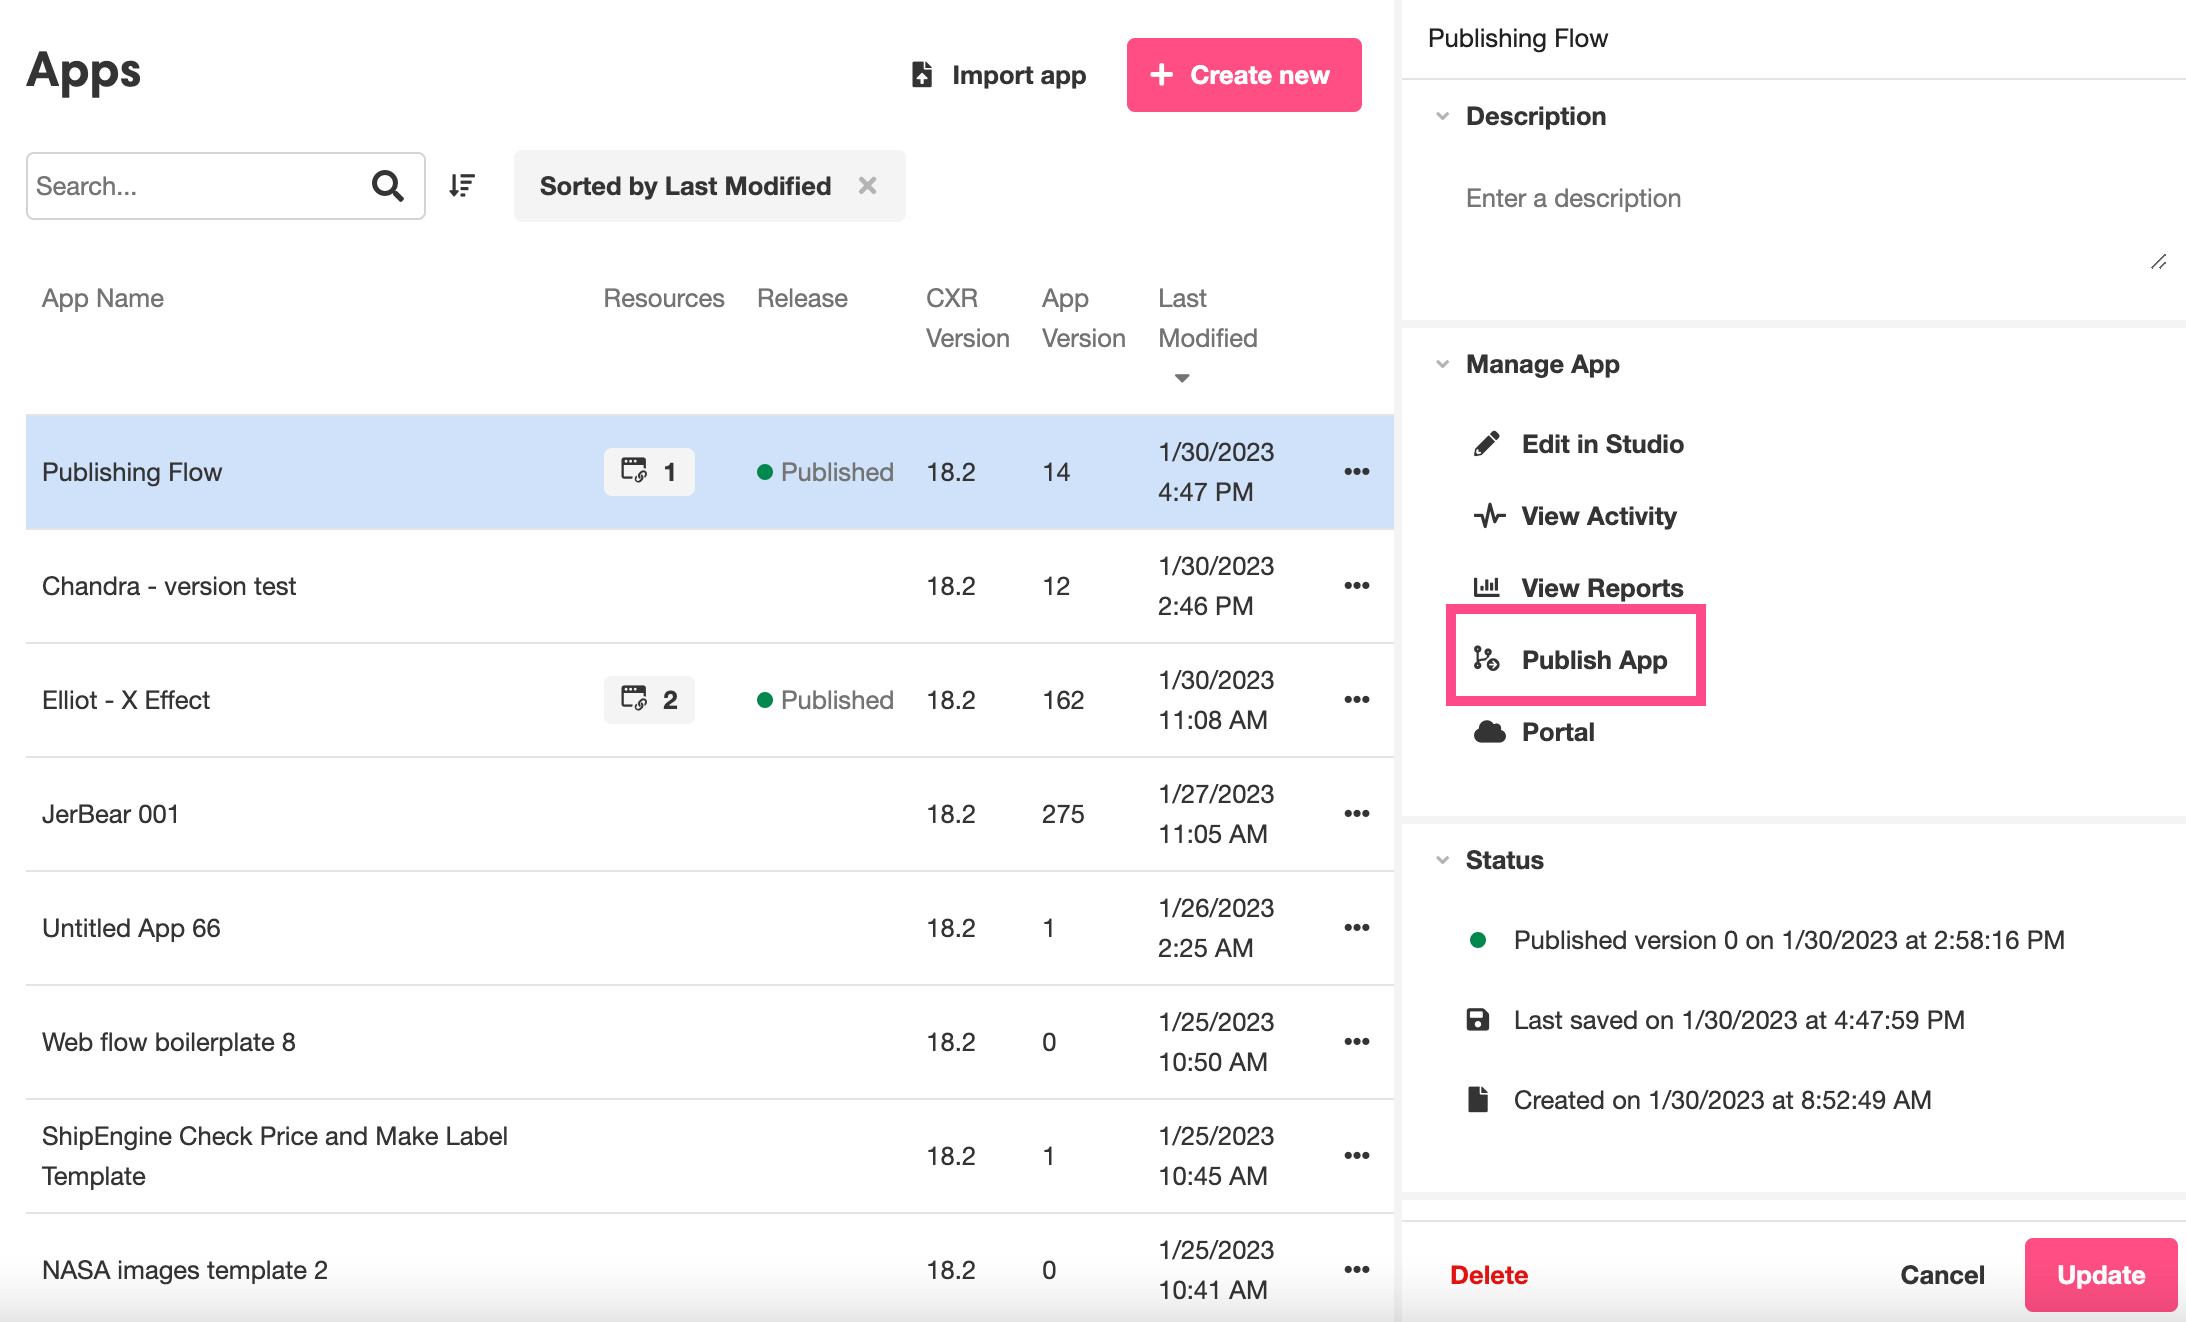
Likewise, you can click on the "..." icon to the far right of the application and select Publish App from the dropdown menu that appears:
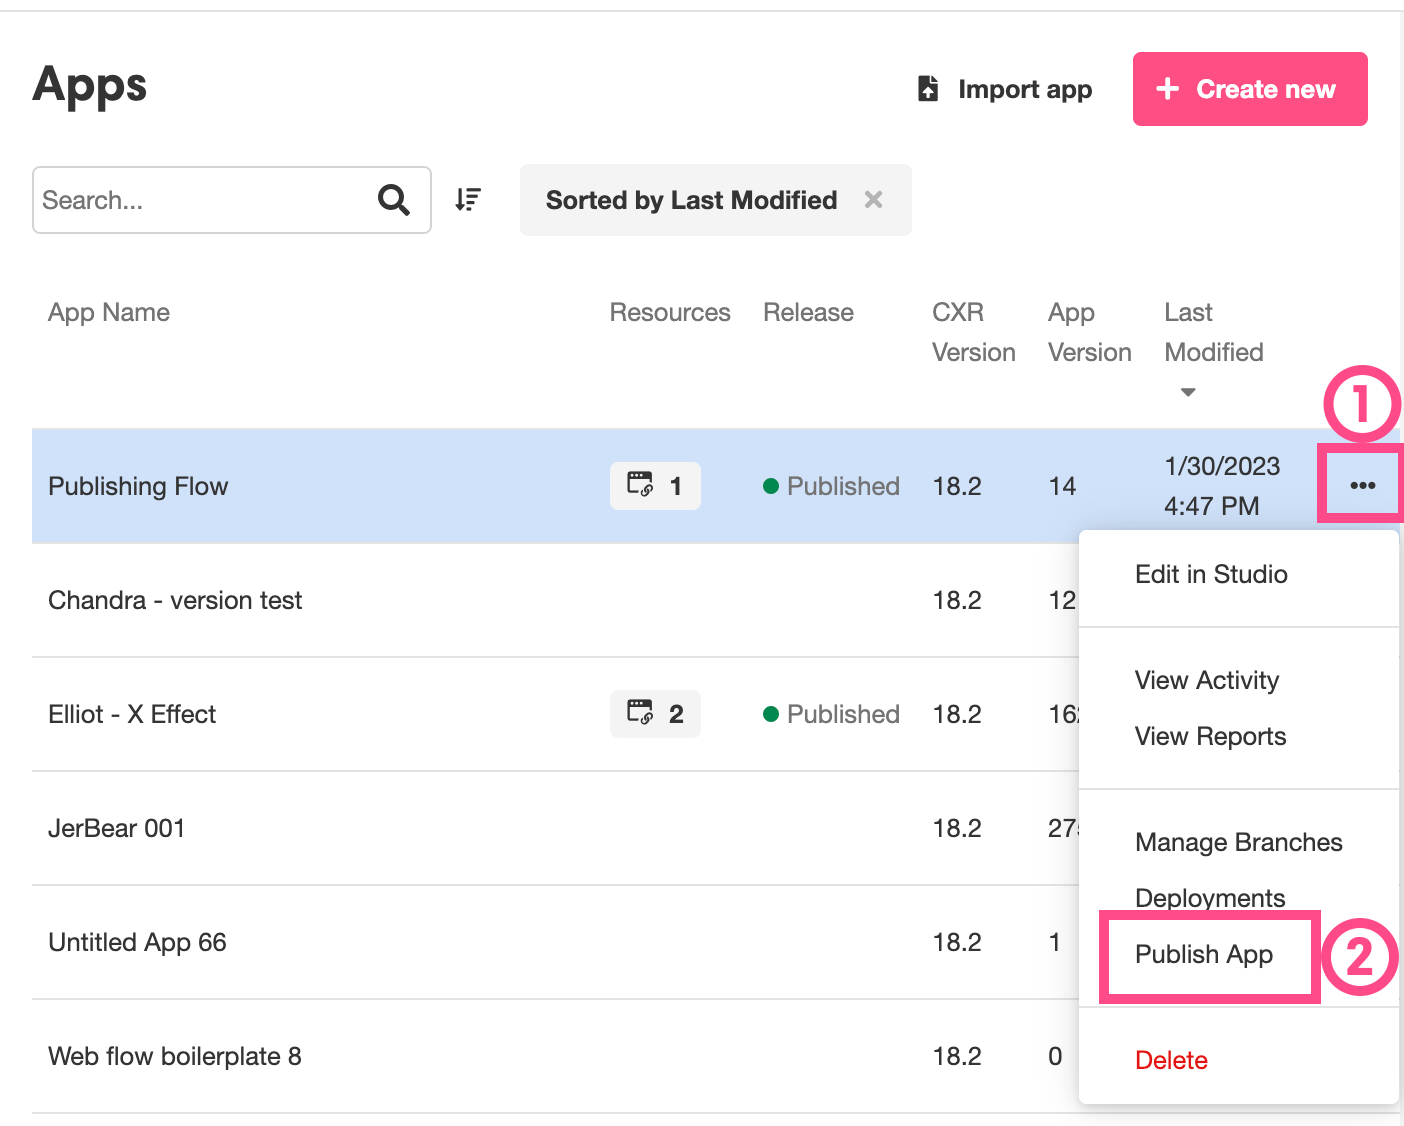
In all three cases, this will open the publishing flow in a pop-up window.
Publishing Flow
When the publishing flow opens in the pop-up window, it will first ask you to prepare your deployment for deployment:
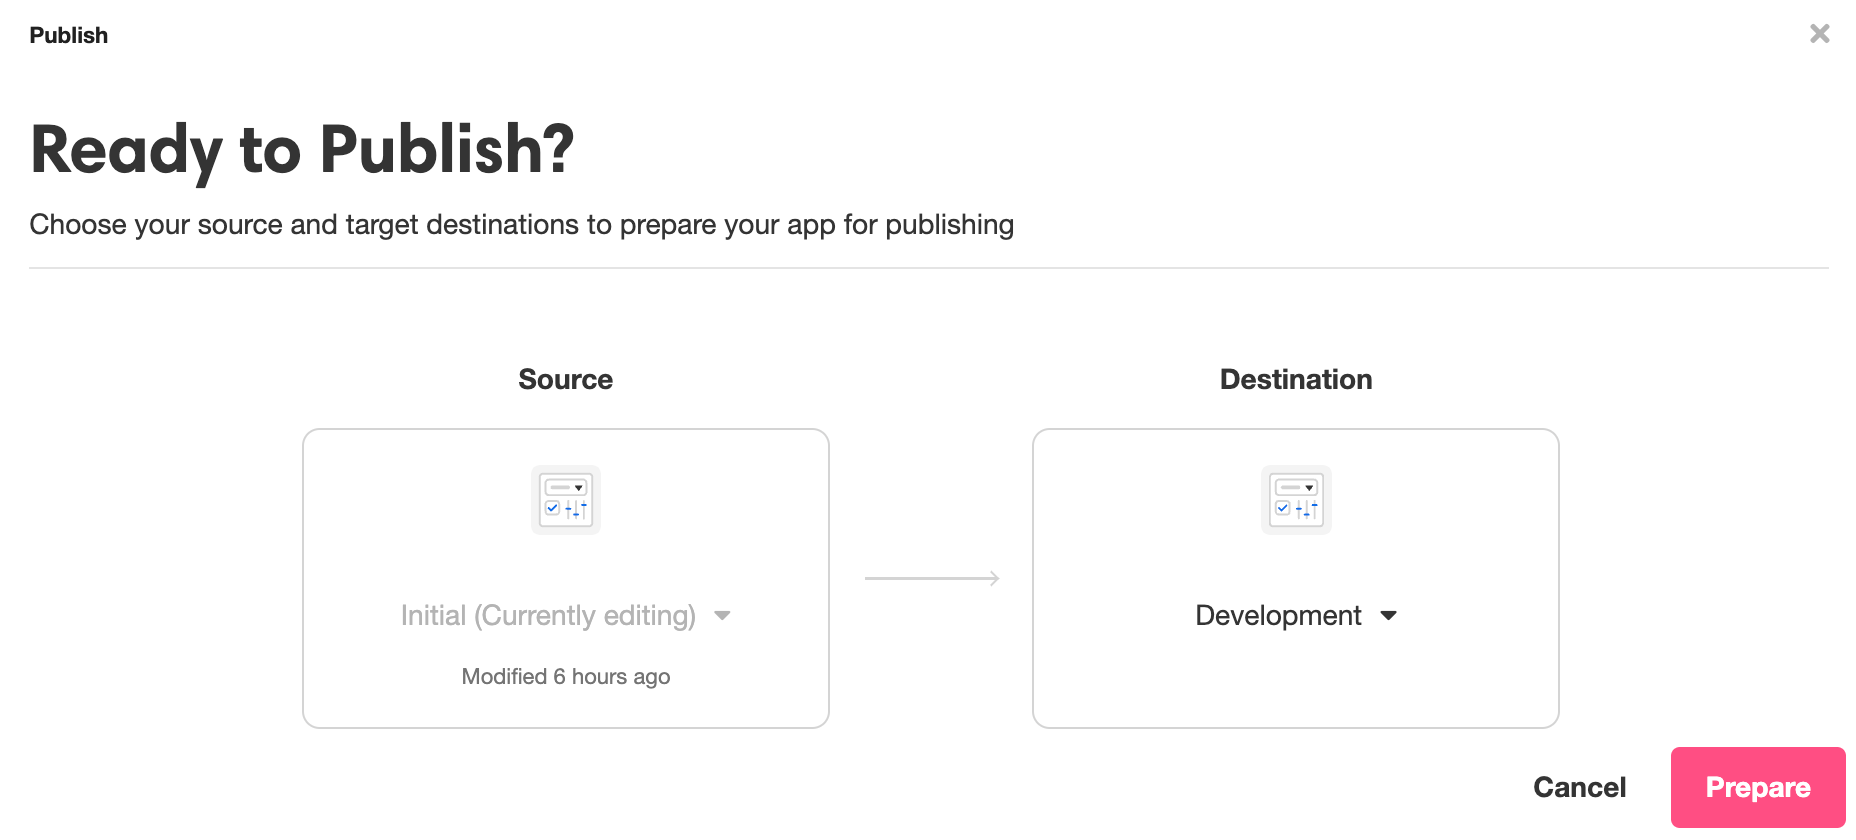
The Source defines which branch of the application will be used for deployment. When publishing from the Studio, this will not be editable: you can only publish the branch you are currently editing. When publishing from the Console, you can select the branch you want to use from the dropdown menu under Source.
The Destination defines what environment you will be publishing the application in. The dropdown menu allows you to select one of the three environments: Development, QA, or Production.
Only one deployment can be published in each environment at a time.While it is possible for an application to be published in multiple environments at the same time, only one deployment can be published in each environment. For instance, if you have already published an application to the Development environment, doing so again will overwrite the initial deployment. Existing Journeys will continue through the deployment that was published when they started, but any new Journeys started will be started in the most recent deployment.
Once your Source and Destination have been defined, click on the Prepare button to the lower right. This will take you to a review of the connections, changes, and migrations that need to occur in order for your application to be successfully published:
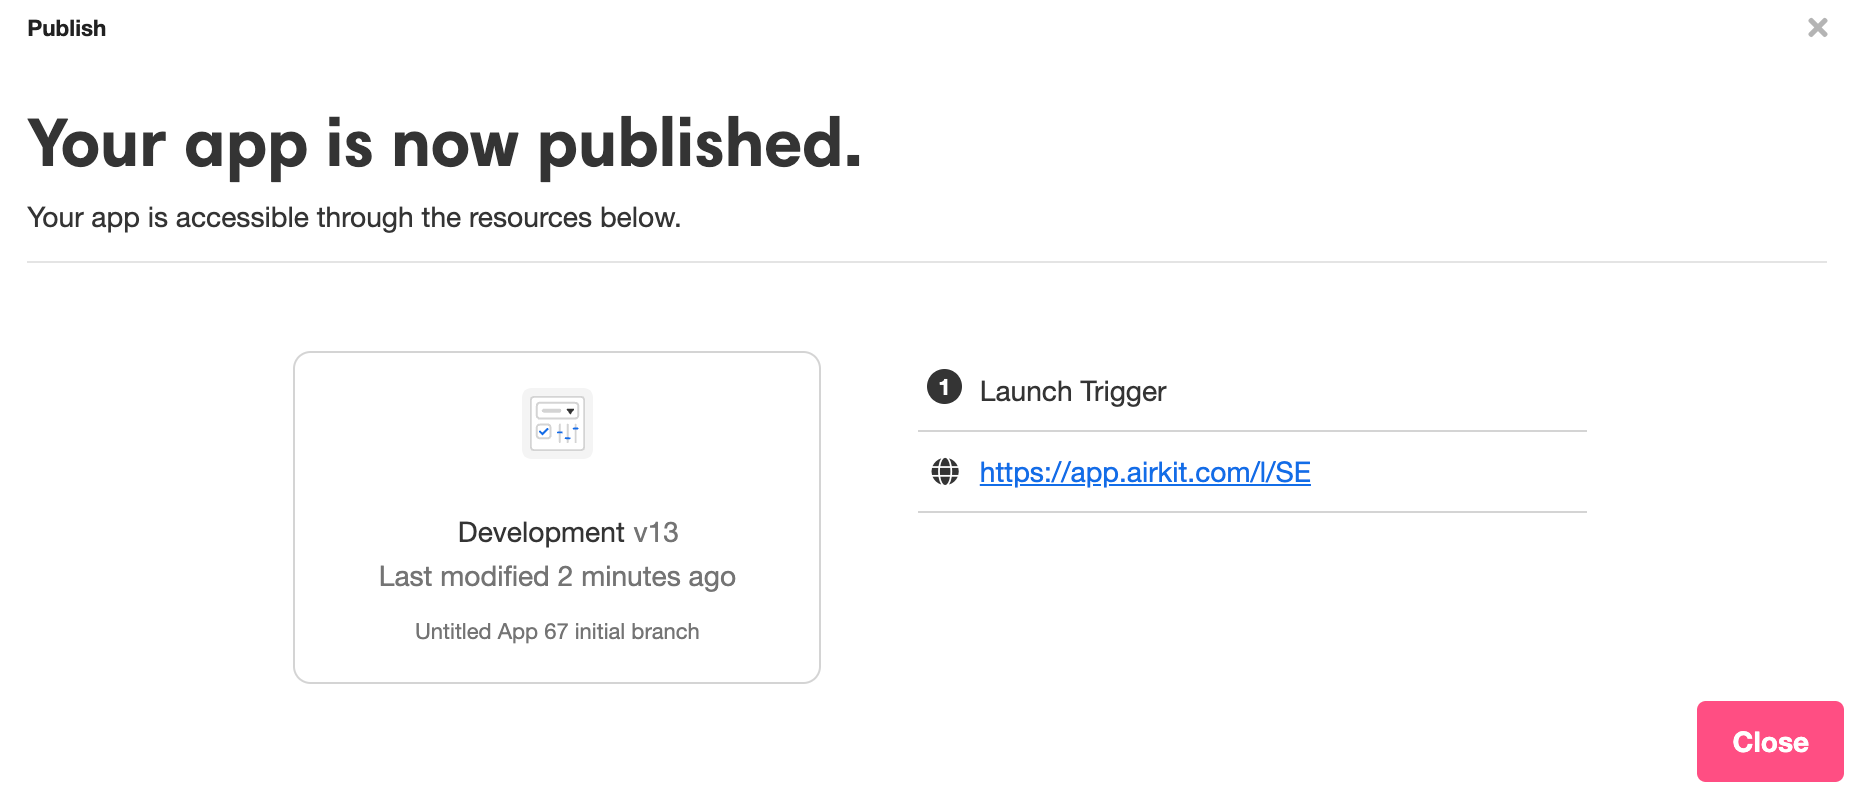
Once you have confirmed that all the configurations here are correct, click on the Publish App button to the lower right. This will publish your application. Upon success, you will see the following interface, which includes a summary of the resources that can be used to launch a new Journey in your application:
Managing Deployments and Branches
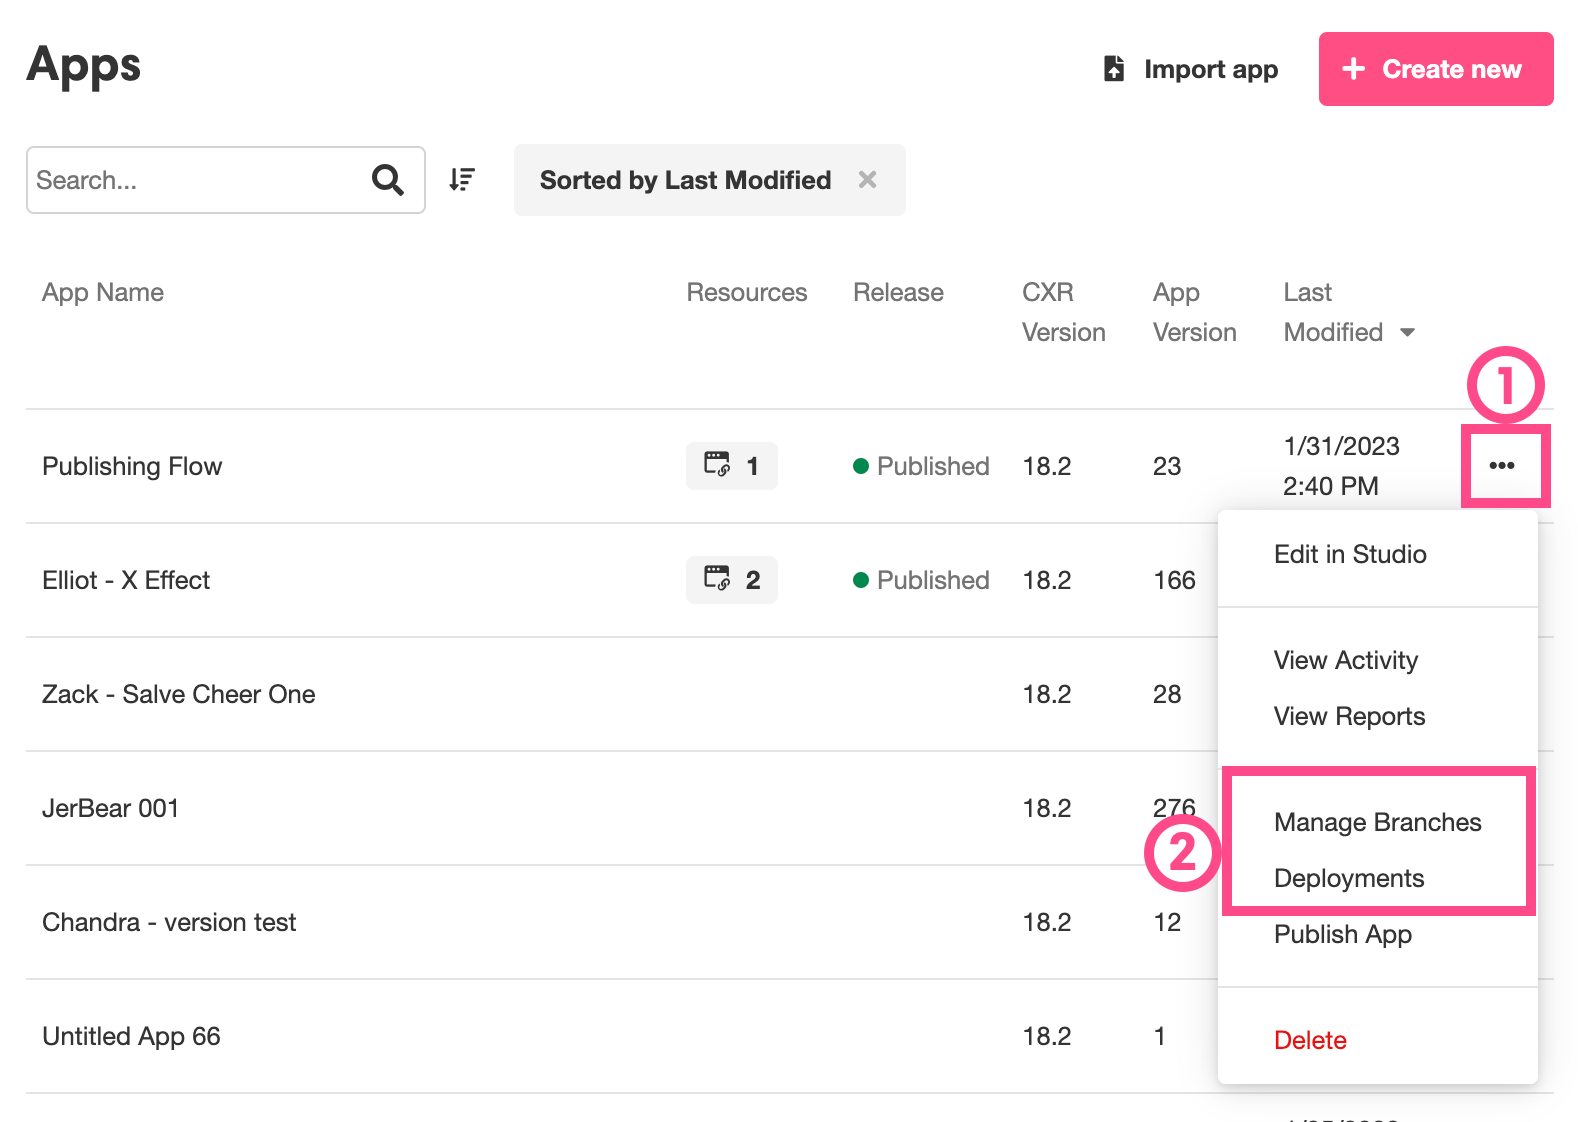
The Deployments and Branches of an application are managed in the Console, under the Apps Tab. To manage either, click on the '...' icon to the far right of the relevant app, and select either Manage Branches or Deployments from the dropdown menu that appears:
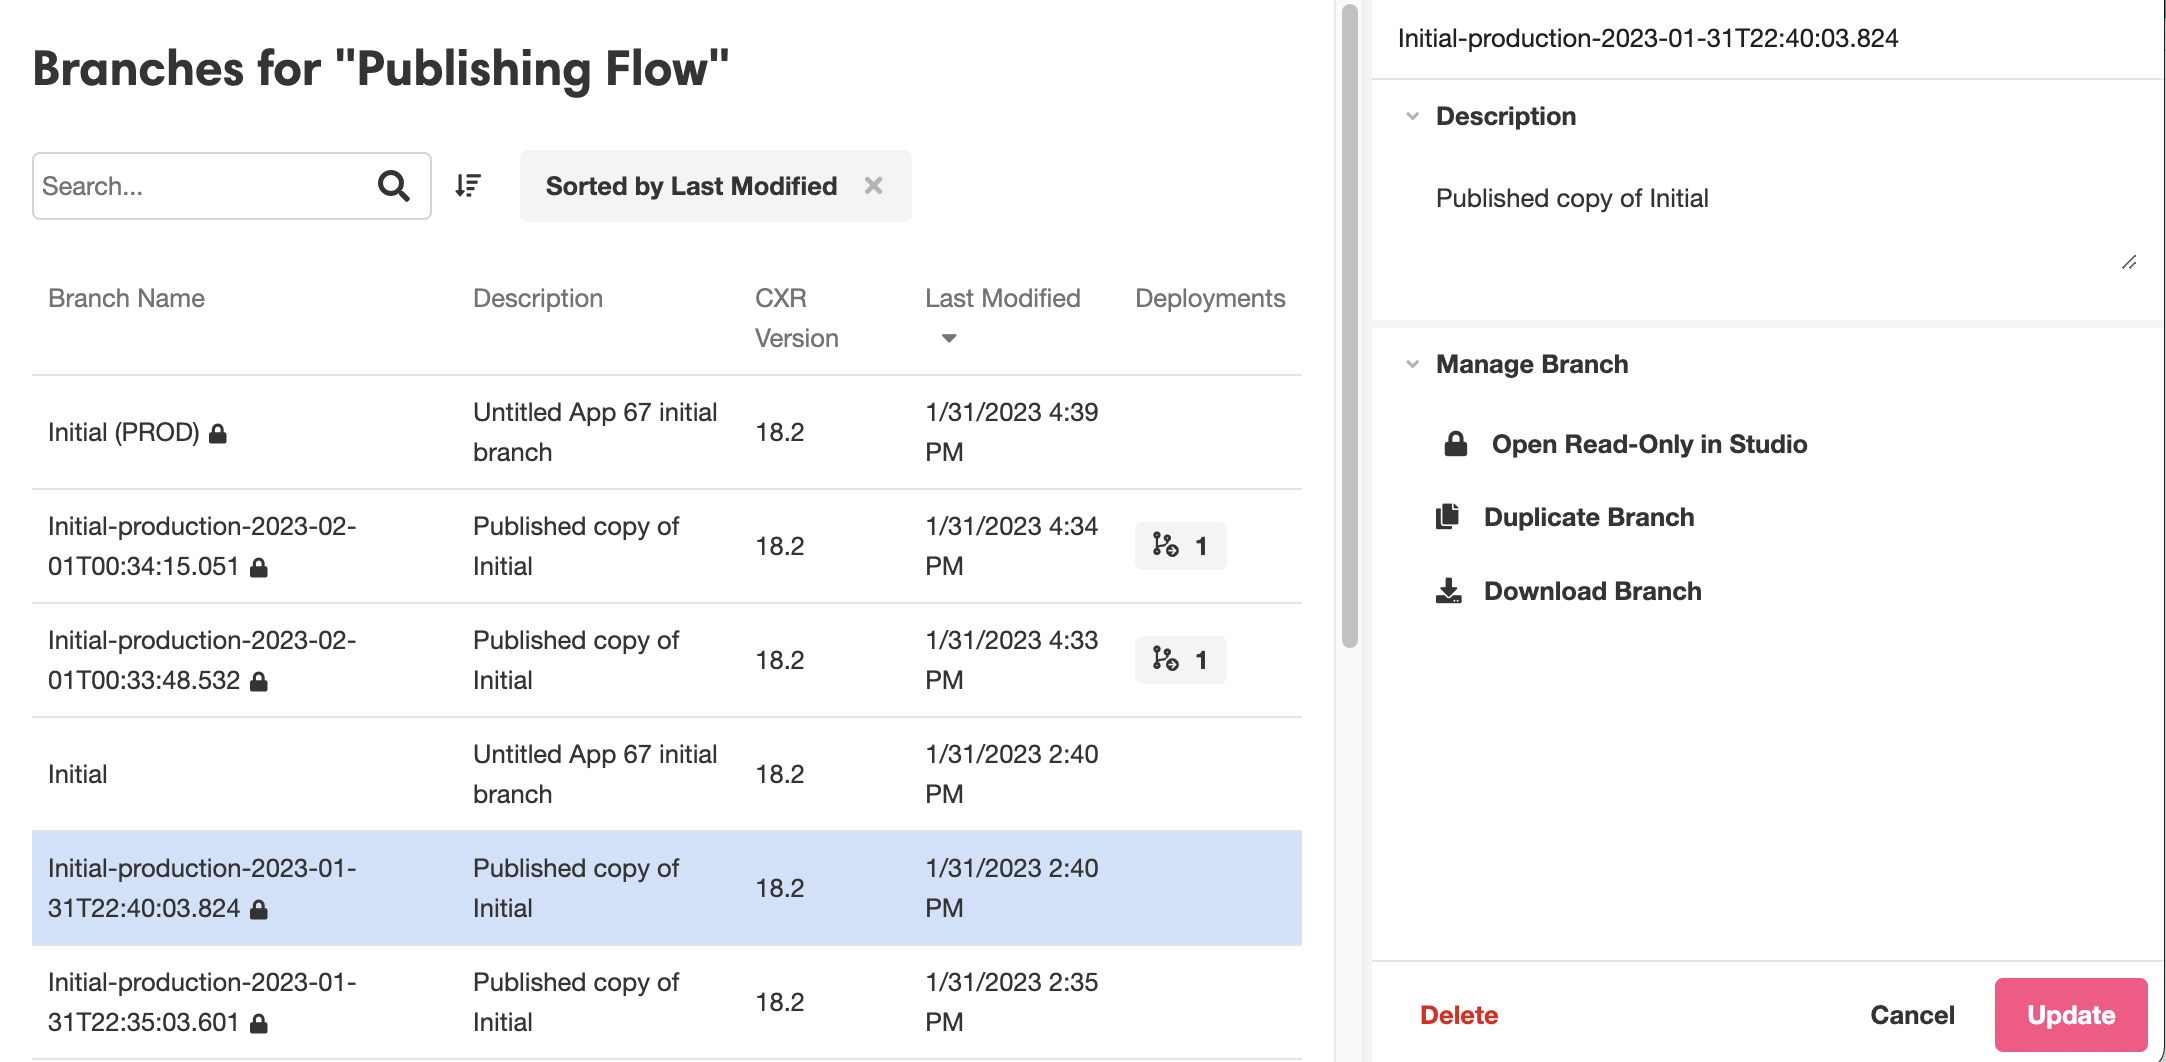
Selecting Manage Branches will take you to an interface that displays all Branches of the application. Under the Deployments column, you can see which Branches are currently deployed, and in how many environments.
Clicking on a Branch opens it in the Inspector. Here, you'll have the option of opening earlier Branches in the Studio for examination or downloading a .zip file of the branch, which you can edit as a separate application after importing it into the Console:
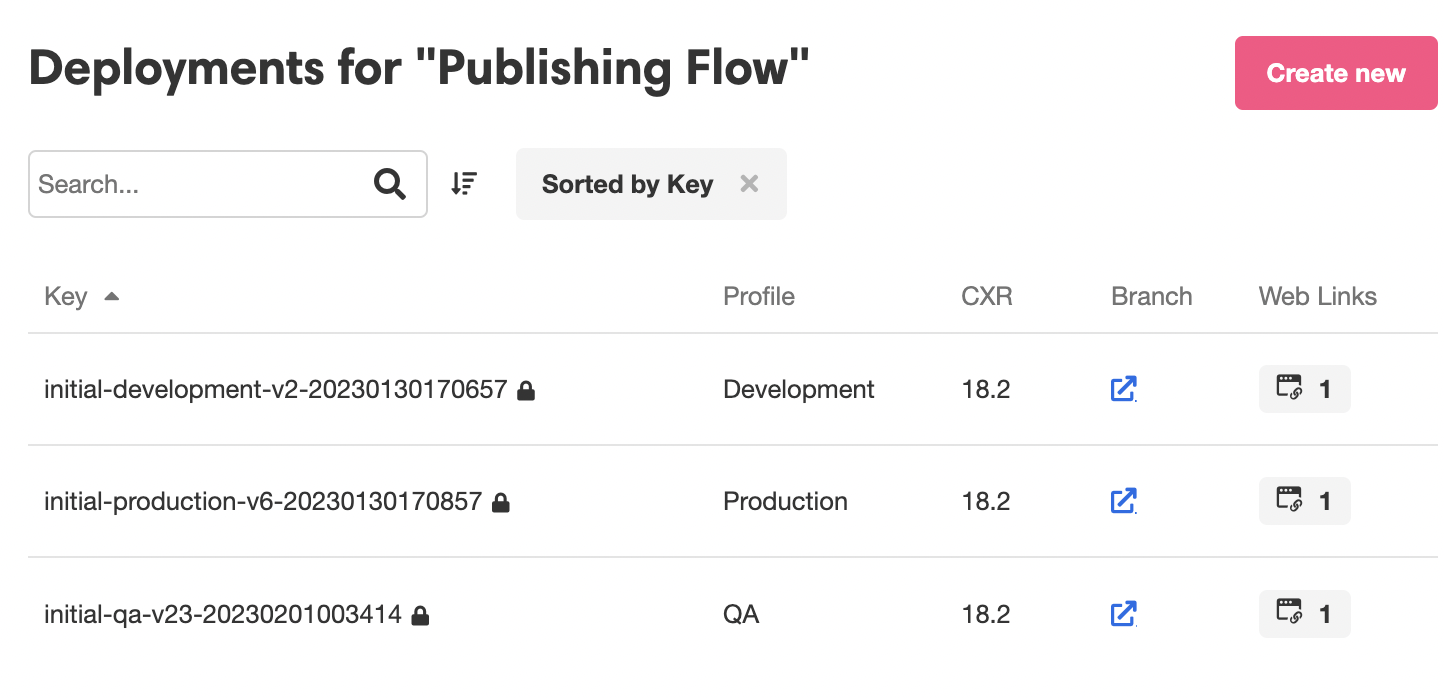
Selecting Deployments will take you to an interface that displays all currently published deployments. At any given time, there can be a maximum of three: one for each deployment environment.
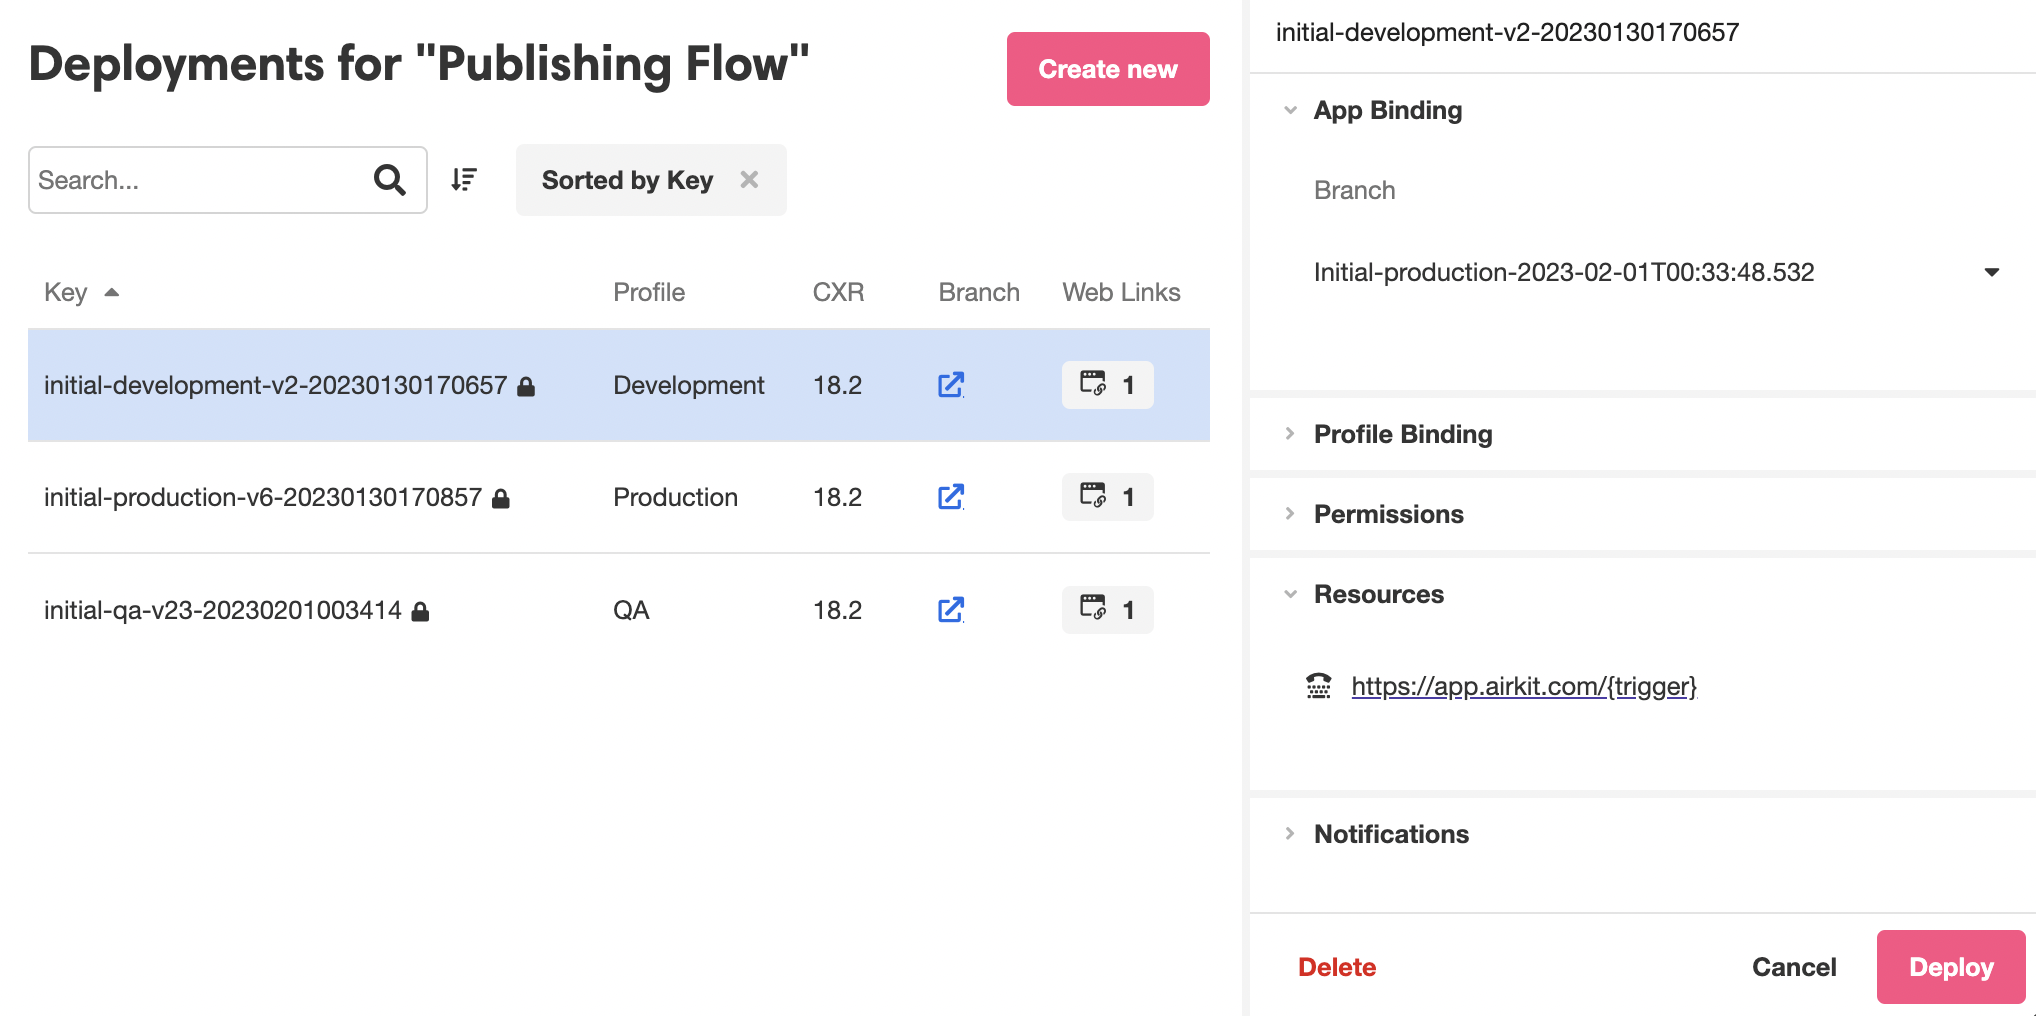
Clicking on a Development opens it in the Inspector, where you can view details of the Deployment, including the Branch the Deployment came from, the resources the Deployment is tied to, and how error Notifications have been configured:
Deleting a Deployment
Deleting a Deployment is part of managing Deployments. It is done Console, under the Apps Tab. To manage Deployments, click on the '...' icon to the far right of the relevant app, and select Deployments.
To delete a Deployment, on the relevant Deployment to open it in the Inspector, and then press the Delete button to the bottom left:
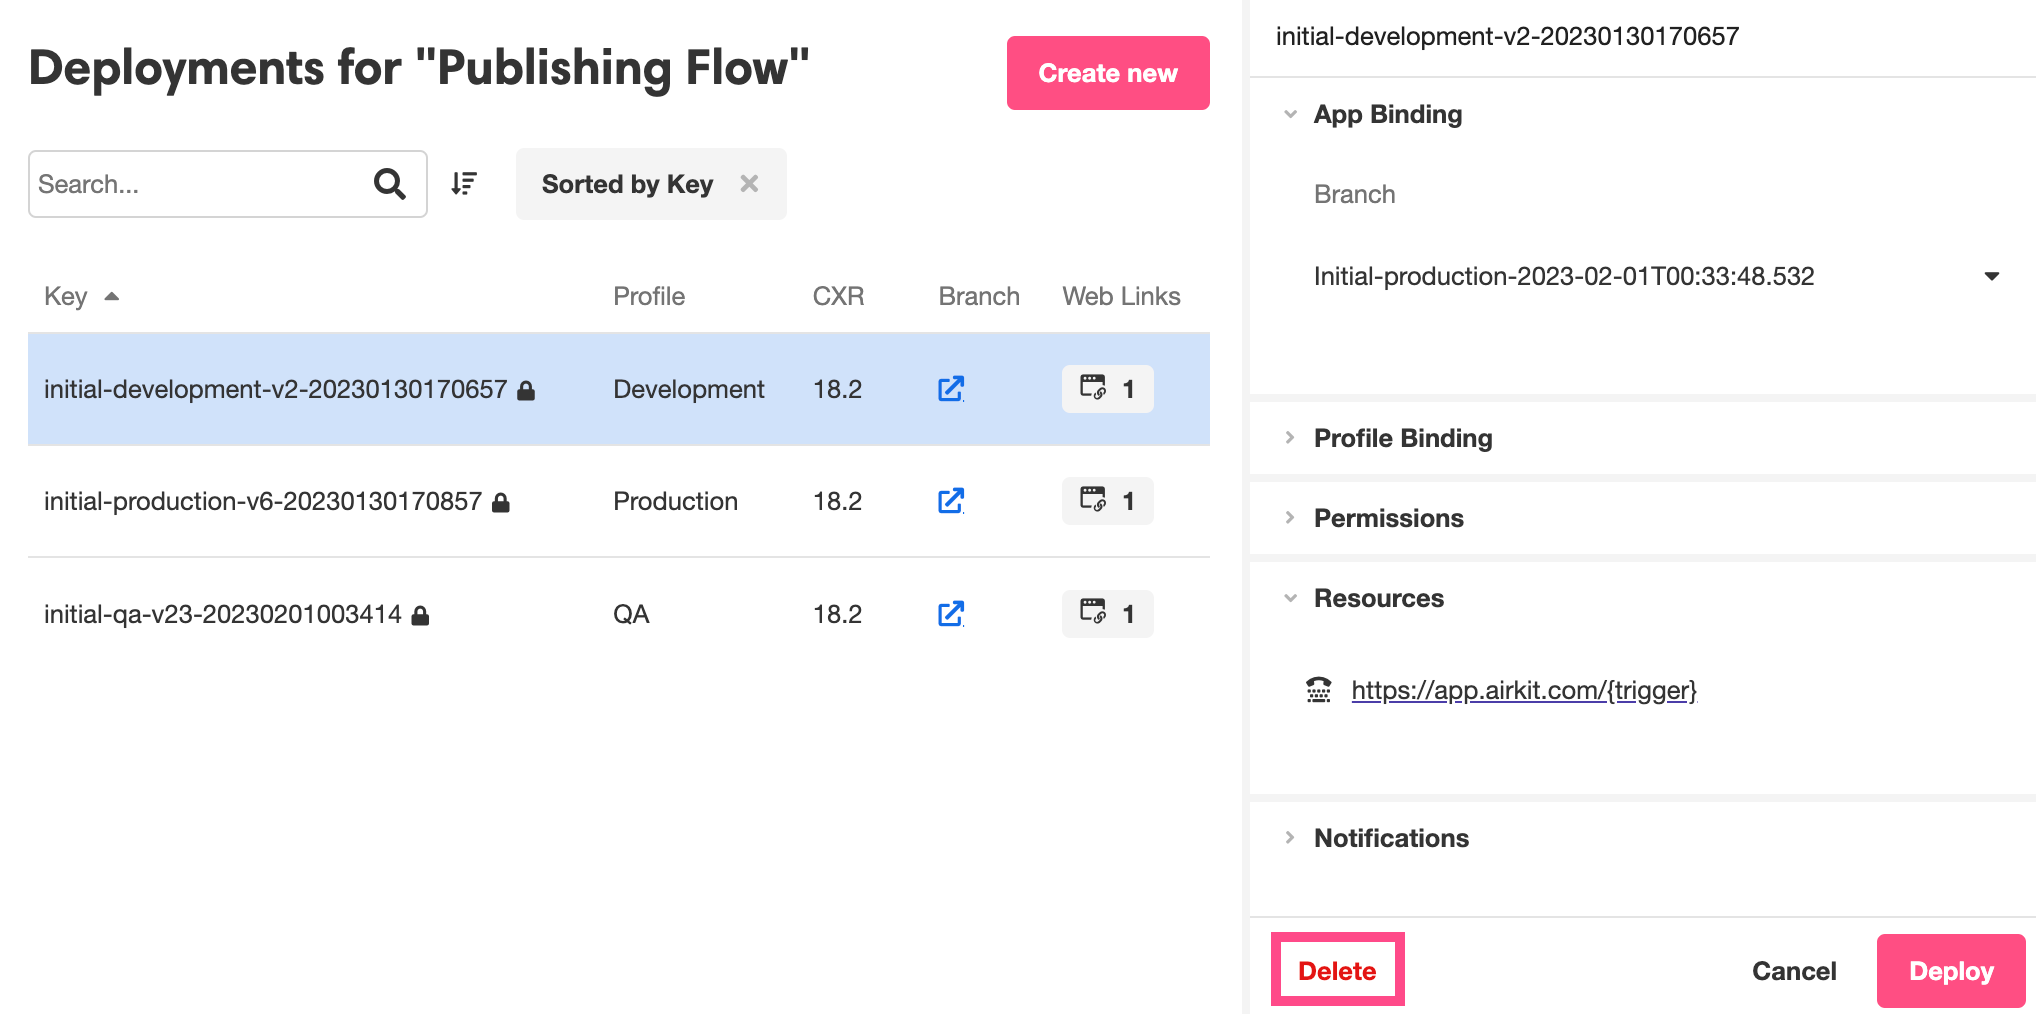
This will not delete the Branch that this Deployment was made from, but it will un-publish the Deployment, forcibly ending all Journeys within it and preventing any new Journeys from starting.
In order to delete an application from an Org, it can have no live Deployments.
Updated 4 months ago