Passing Data
In addition to providing a customizable way to embed Airkit apps into your existing web pages, the SDK also makes it easy to pass information between your Airkit app and your website. Information collected within your application can be used to customize your web page, and visa versa.
Here, we provide a walkthrough of how to pass data between your Airkit apps and your website via Events. Outgoing Events send information from your Airkit App to the web page it is embedded in. Incoming Events are send information from the embedded environment to the Airkit App. In both cases, data is passed as a JSON object.
Prerequisite
The following tutorials assume you have already configured an application so that it can be embedded it into an existing web page. You will need to reference to the SDK_API_URL associated with this application. For more on how to configure the SDK_API_URL, check out the the SDK Quickstart.
Outgoing Events
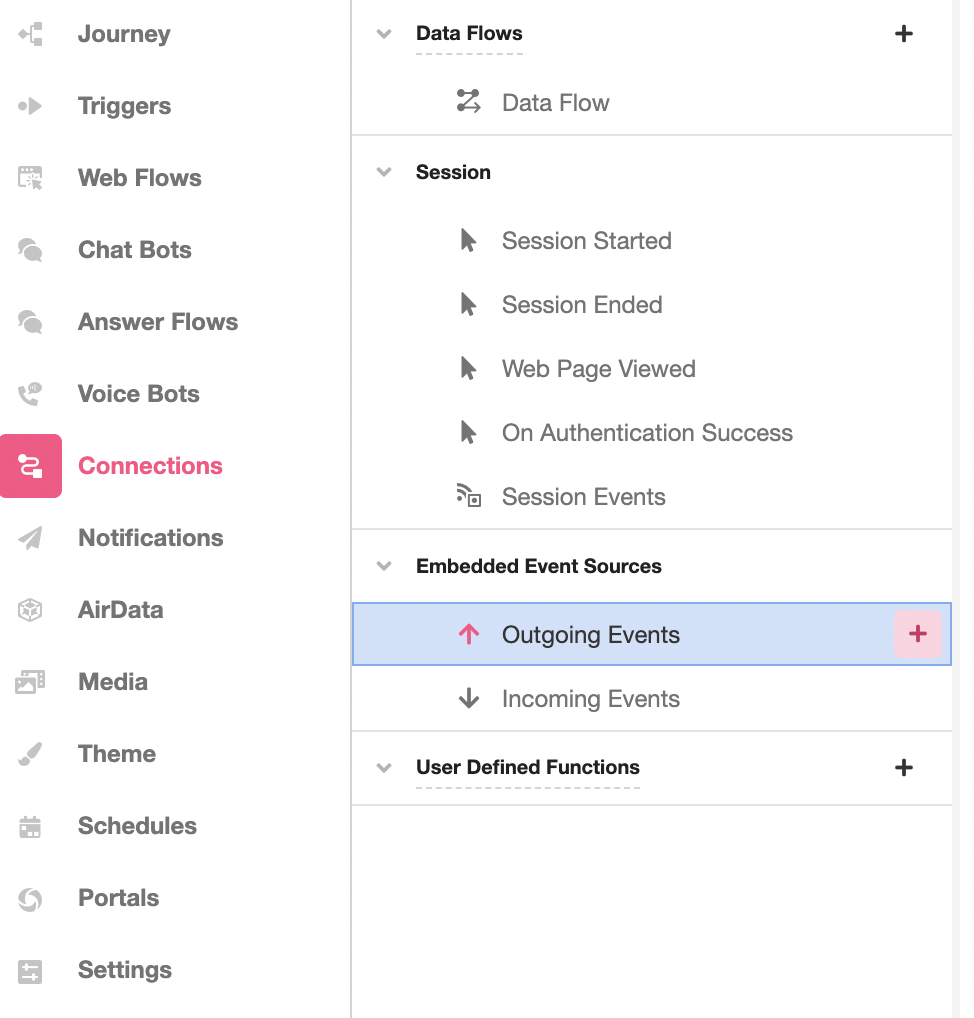
Open your Airkit application and toggle to the Connections Builder. Click on the '+' icon to the right of Embedded Event Sources > Outgoing Events to add a new Outgoing Event:
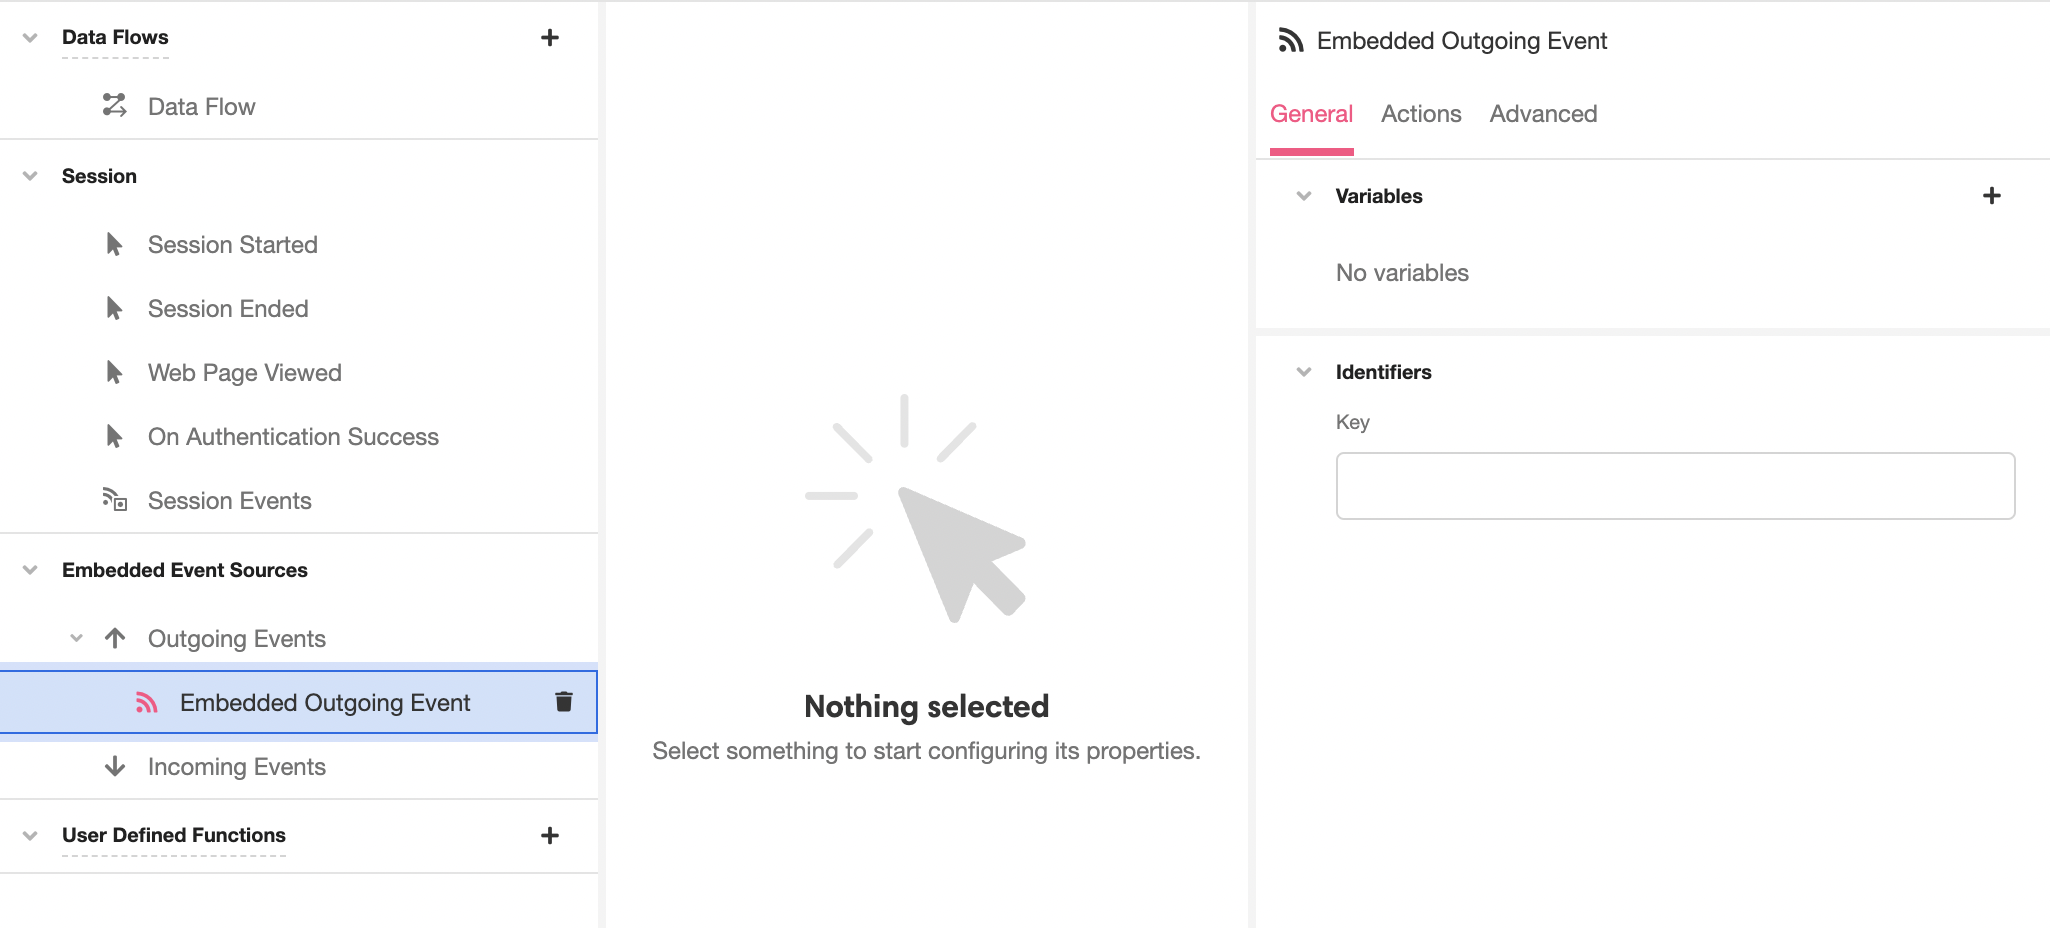
This will allow you to Inspect the new Embedded Outgoing Event:
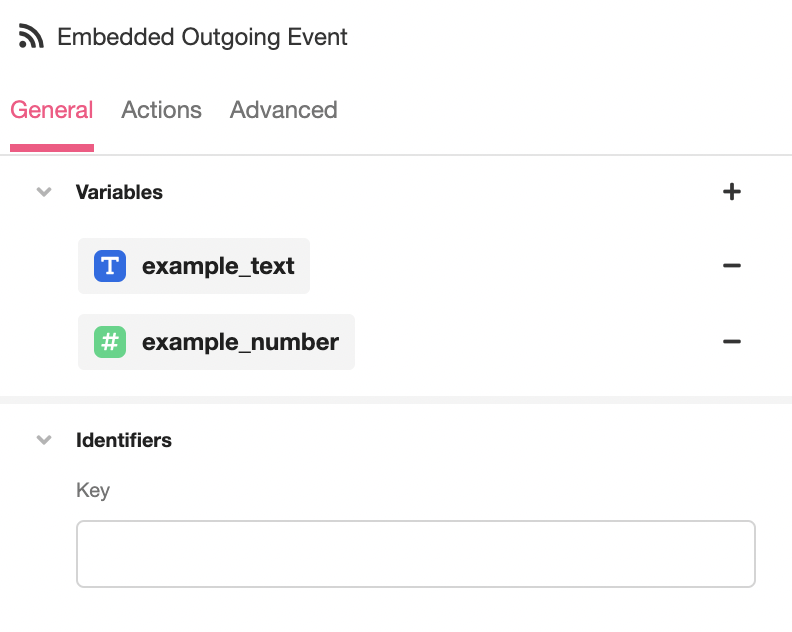
In the Inspector, click on the '+' icon to the right of General > Variables to create the Event Variables that you want to send over to the web page. In our example, we'll be sending two variables, example_text, a variable of type Text, and example_number, a variable of type Number.
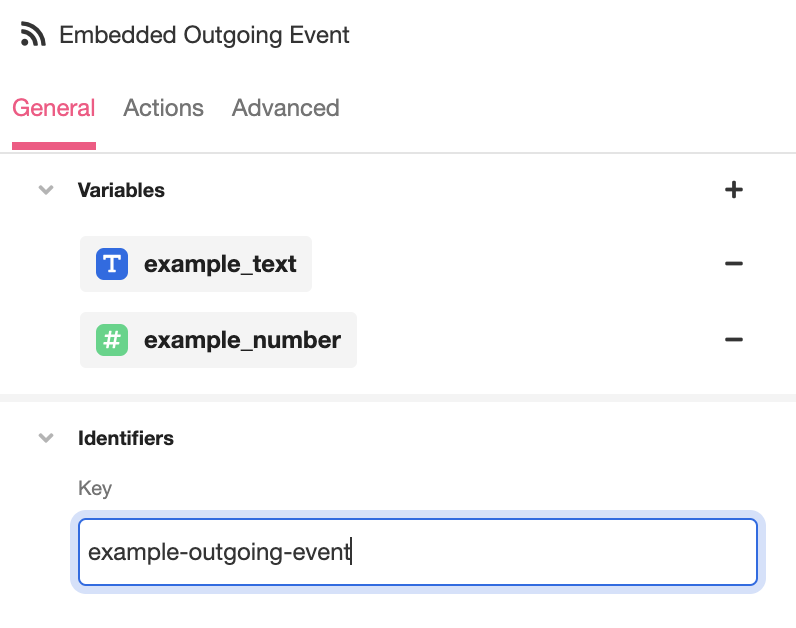
Under General > Identifiers > Key, define the eventSourceKey that will be used to reference this Outgoing Event. In our example, we'll use the key example-outgoing-event:
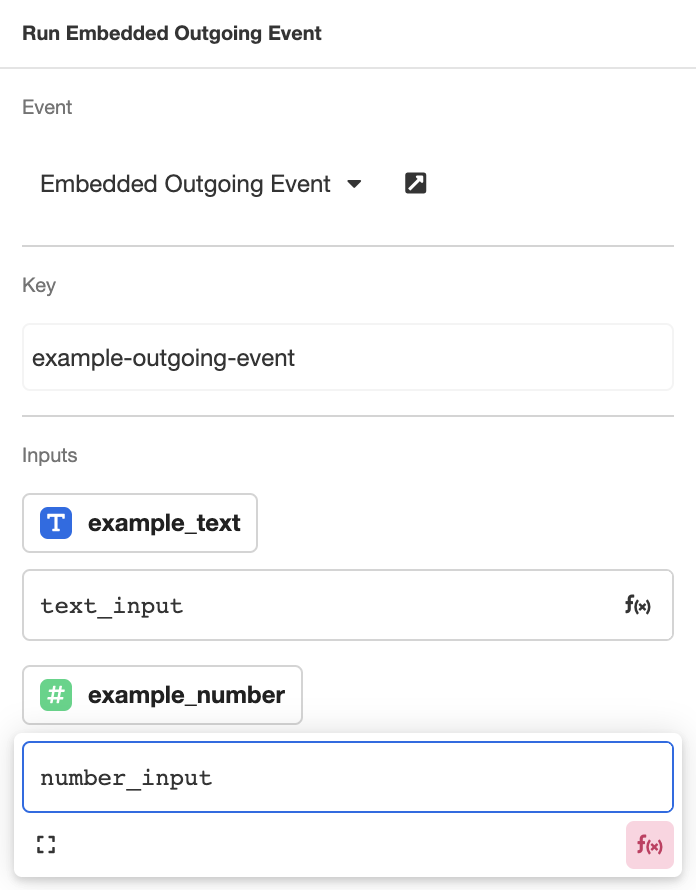
Firing the Embedded Outgoing Event as an Action functions similarly to Running a Data Flow: you have to run it as an Action in order to fire it, and you need to assign values to the expected variables in order to define the data it acts upon.
Somewhere in your Journey Flow, incorporate the Run Embedded Outgoing Event into an Action Chain. Use the previously established eventSourceKey (in our example, example-outgoing-event) to define which Embedded Outgoing Event to fire. Assign the data that you want to pass to the expected input. In our example, we'l be using two user-defined variables, text_input and number_input, to define example_text and example_number respectively:
Save and publish. Now when the the Embedded Outgoing Event is fired, it will send a JSON object to the web page. This object contains two properties: "payload", under which all input values will be nested, and "eventSourceKey", which contains the eventSourceKey. For instance, in our example, the sent JSON object will look as follows:
{
  "payload":{
    "example_text":text_input,
    "example_number":number_input
  },
  "eventSourceKey":"example_outgoing_event"
}
Now, let's configure our web page so that it will display not only our Airkit application, but the JSON object it sends.
Copy and paste the following code block into your web page, and:
- Replace
"SDK_API_URL"with the SDK endpoint configured in the Triggers Builder- To review how this was configured, see the SDK Quickstart
- Replace
"eventSourceKey"with the value of youreventSourceKey
<html>
  <head>
    <meta name="viewport" content="width=device-width, initial-scale=1">
    <meta charset="utf-8" />
    <title>Airkit web SDK</title>
  </head>
  <body>
    <div id="airkit-sdk"></div>
    <div id="message_id"></div>
    <script src="https://client.airkit.com/websdk/1.0/airkit_sdk.js"></script>
    <script>
      const sdk = new window.AirkitWebSDK({ renderMode: "inline" })
      sdk.render({ url: "SDK_API_URL"})
      sdk.on("example-outgoing-event", (event) => {
      	const container = document.getElementById("message_id")
      	container.innerHTML = JSON.stringify(event.data)
      	})
    </script>
  </body>
</html>
For instance, if our "SDK_API_URL" is "<https://app.airkit.com/event-sdk/sdk"> and our "eventSourceKey" is "example-outgoing-event", our code block will looks as follows:
<html>
  <head>
    <meta name="viewport" content="width=device-width, initial-scale=1">
    <meta charset="utf-8" />
    <title>Airkit web SDK</title>
  </head>
  <body>
    <div id="airkit-sdk"></div>
    <div id="message_id"></div>
    <script src="https://client.airkit.com/websdk/1.0/airkit_sdk.js"></script>
    <script>
      const sdk = new window.AirkitWebSDK({ renderMode: "inline" })
      sdk.render({ url: "https://app.airkit.com/event-sdk/sdk" })
      sdk.on("example-outgoing-event", (event) => {
      	const container = document.getElementById("message_id")
      	container.innerHTML = JSON.stringify(event.data)
      	})
    </script>
  </body>
</html>
Ship the changes to your website, and you'll see the text of your web page change in response to interactions with your Airkit app:
Incoming Events
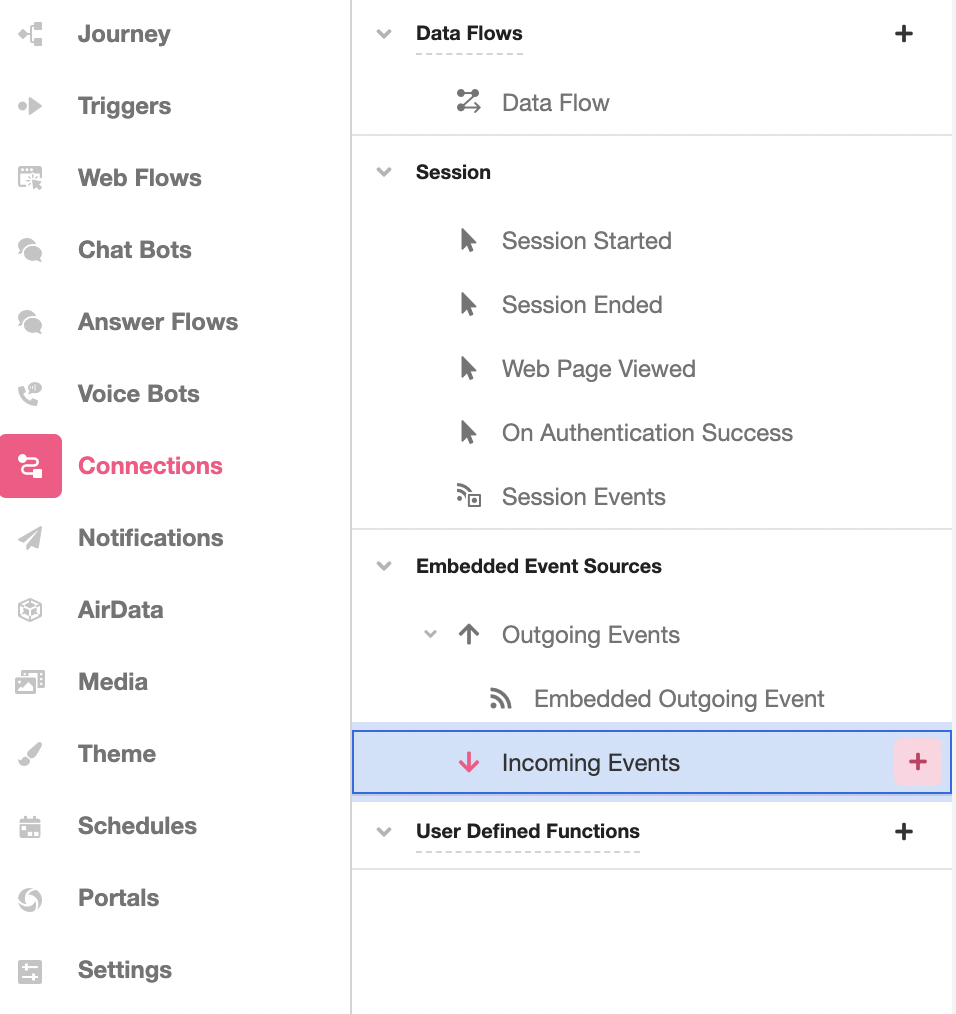
Open your Airkit application and toggle to the Connections Builder. Click on the '+' icon to the right of Embedded Event Sources > Incoming Events to add a new Incoming Event:
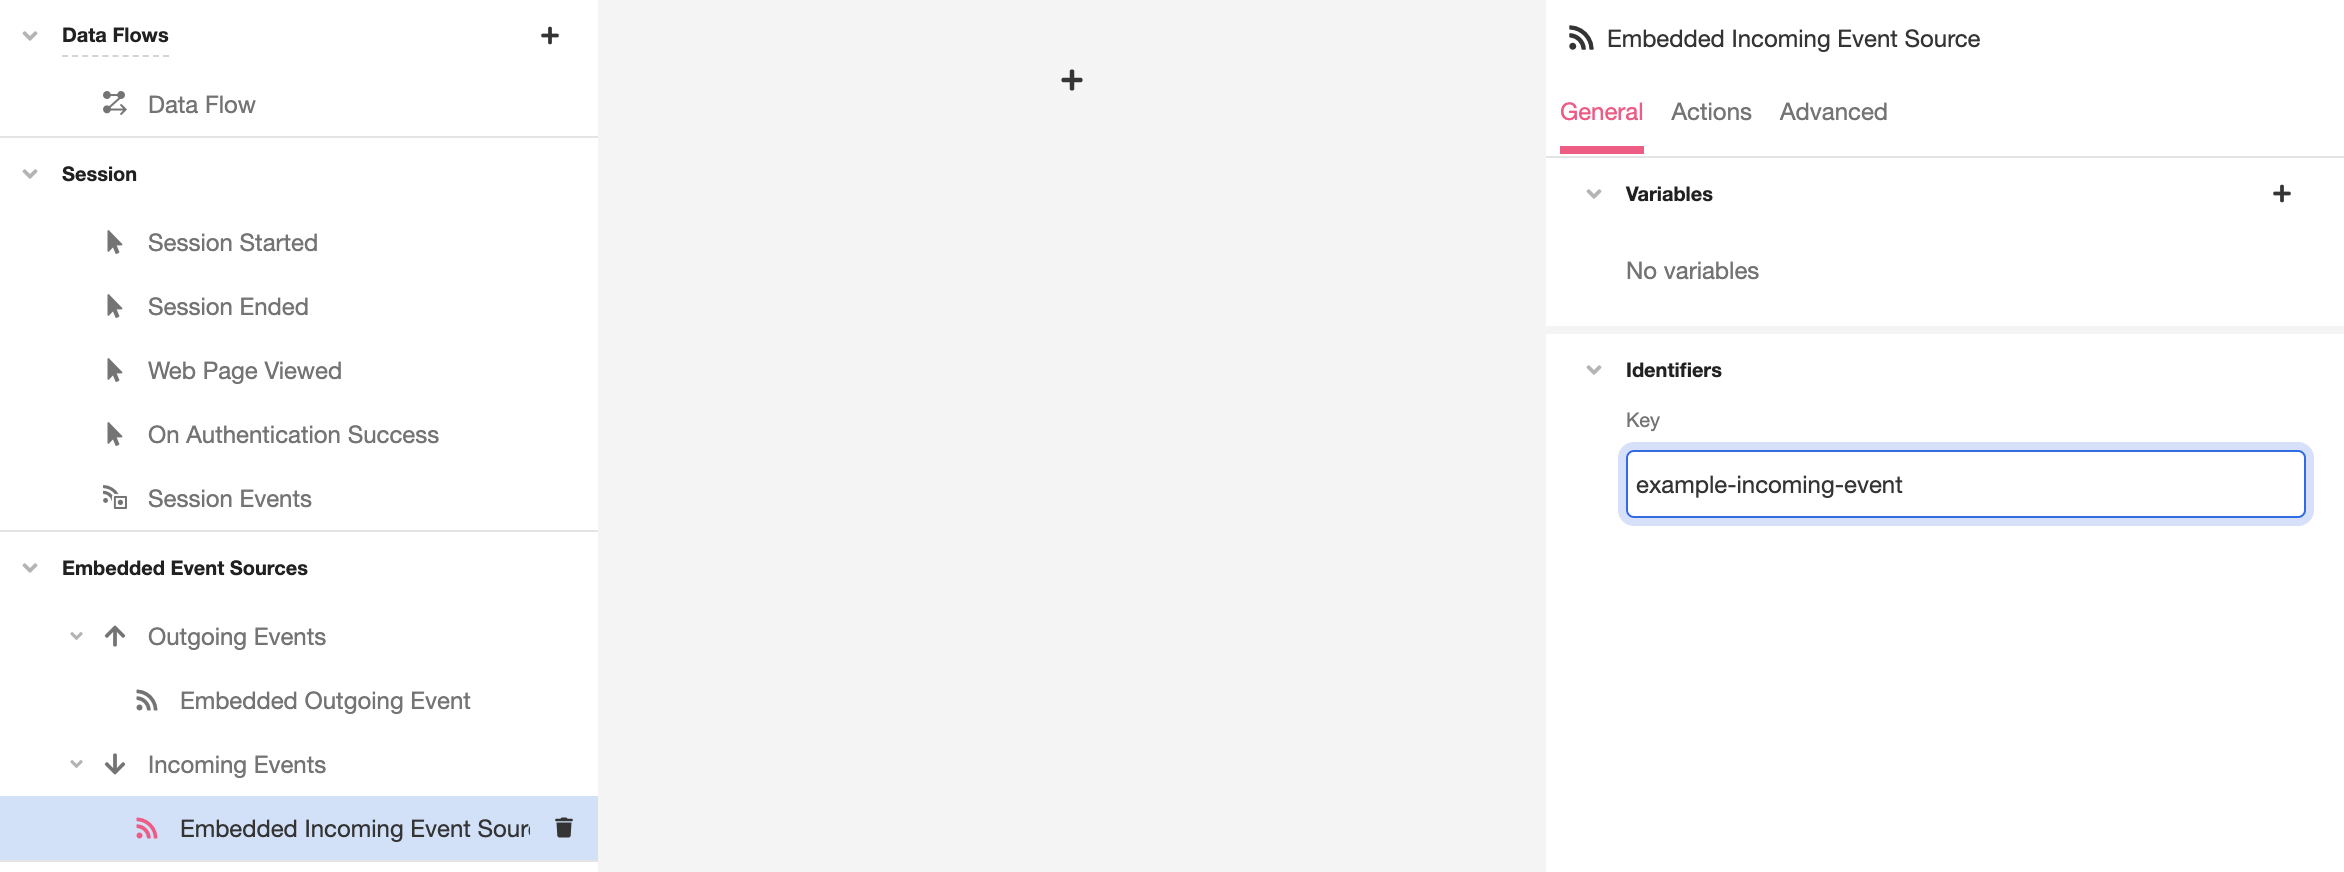
Select Incoming Event Source:

Under General > Identifiers > Key, define the eventSourceKey that will be used to reference this Incoming Event. In our example, we'll use the key example-incoming-event:
We have now configured our app so that it can catch Incoming Events. Next, we'll define the Action Chain that will fire when the Incoming Event is caught.
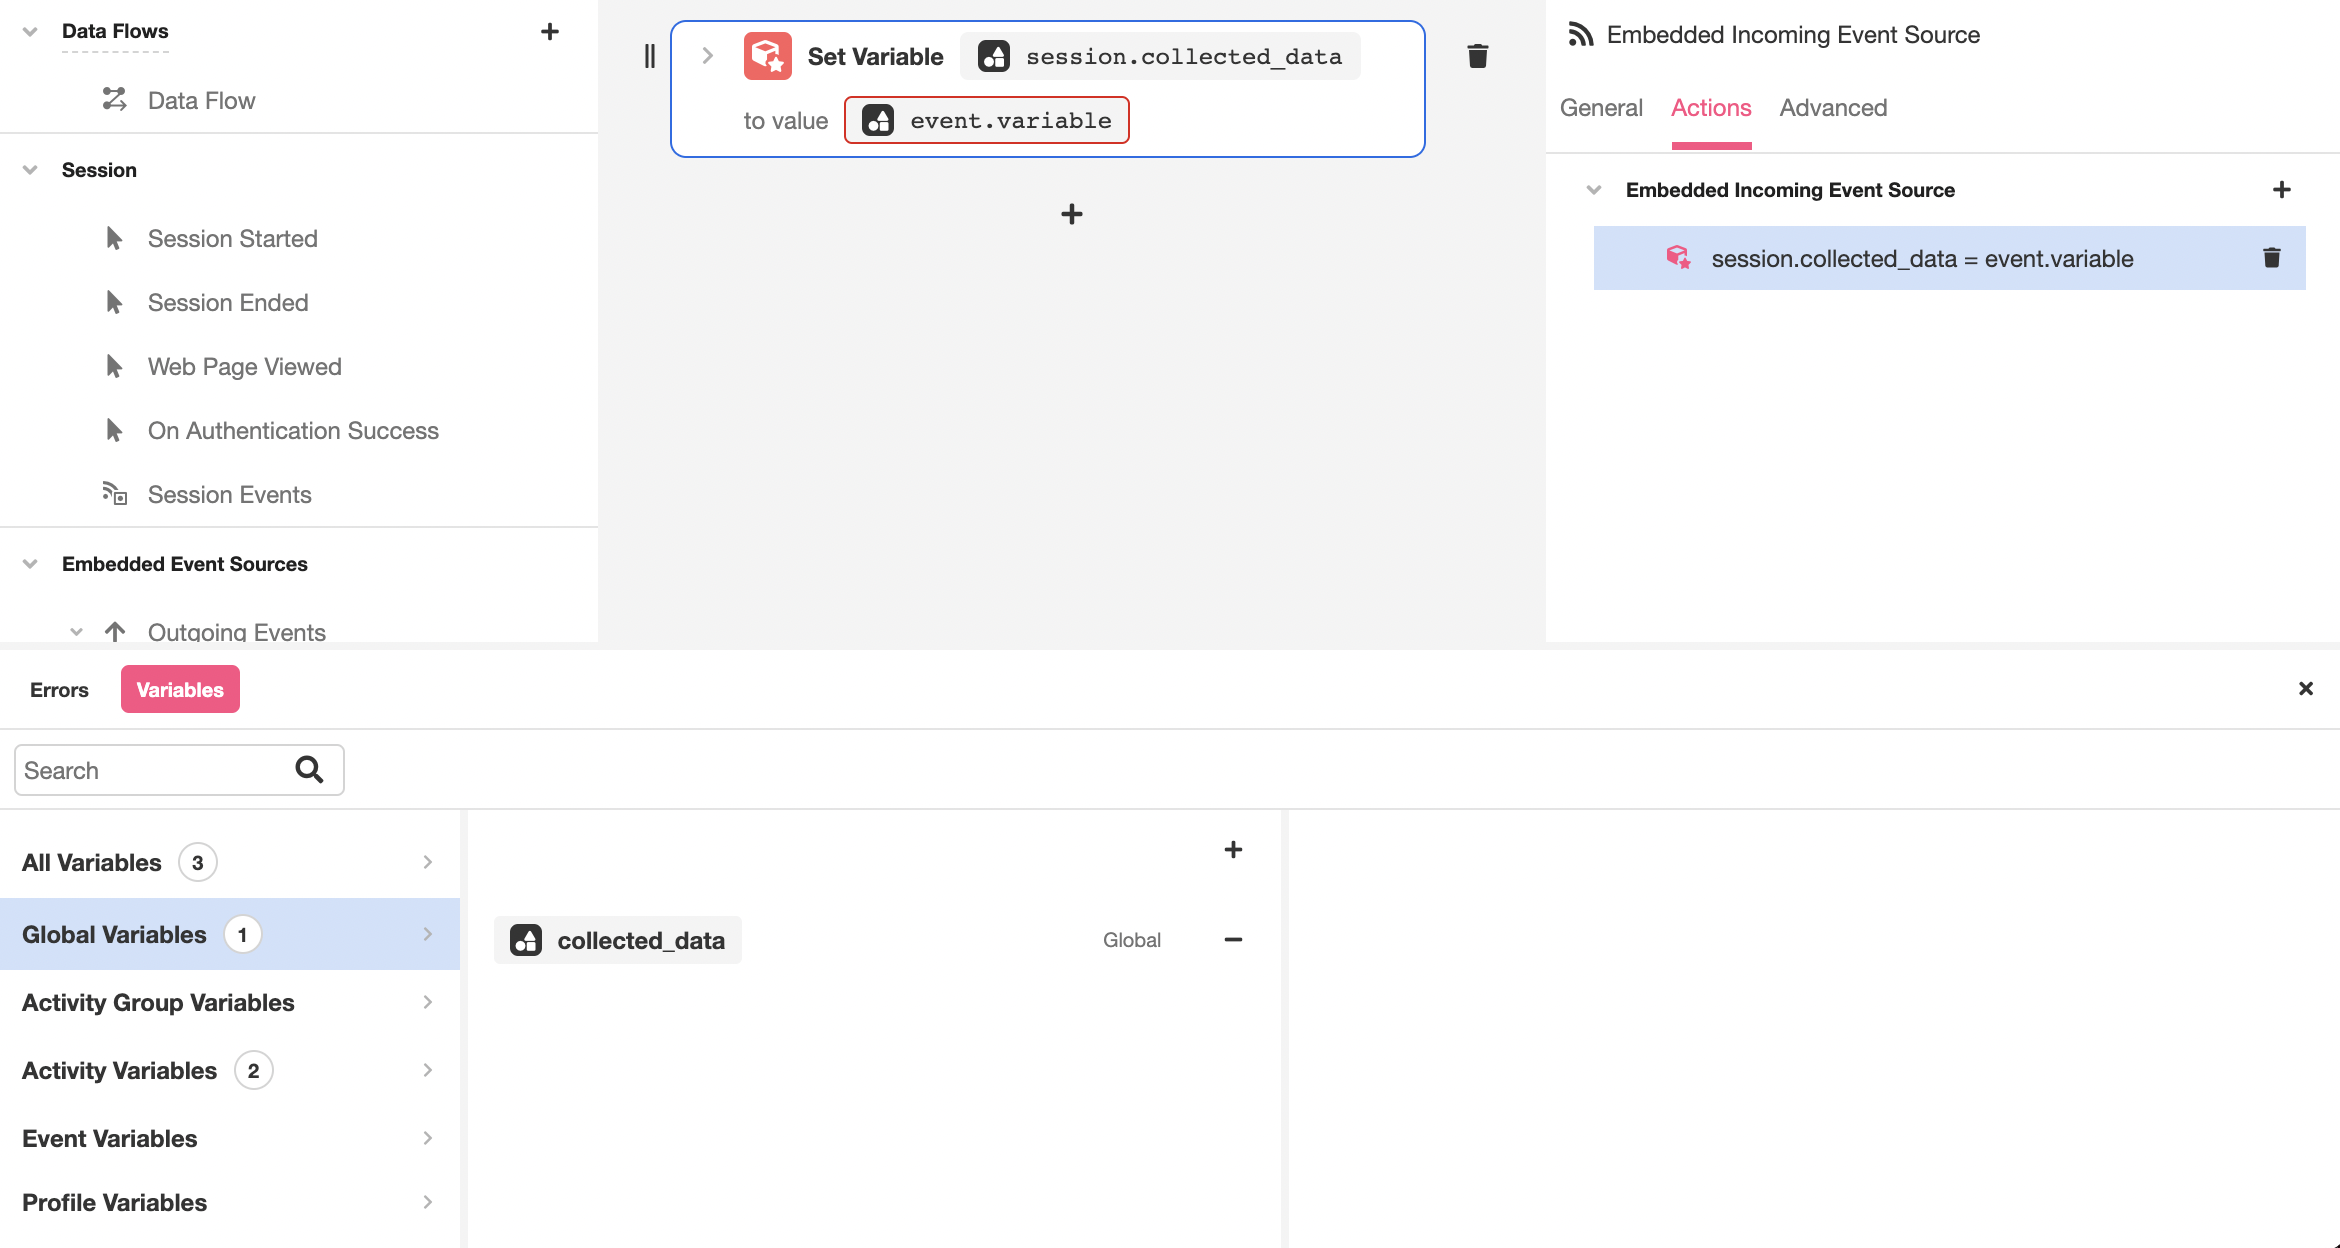
Our example Action Chain will consist only of a Set Variable Action, which will use the incoming data to define a local variable, a Session Variable we've defined as session.collected_data. The incoming data, which we'll define as variable in our example, is an Event Variable, and thus must be referenced in the event namespace:
To display this data after it has been caught as saved, put it in a Label. The data comes in as a JSON object, so use the TO_JSON function to convert it into a string capable fo being displayed by a Label.
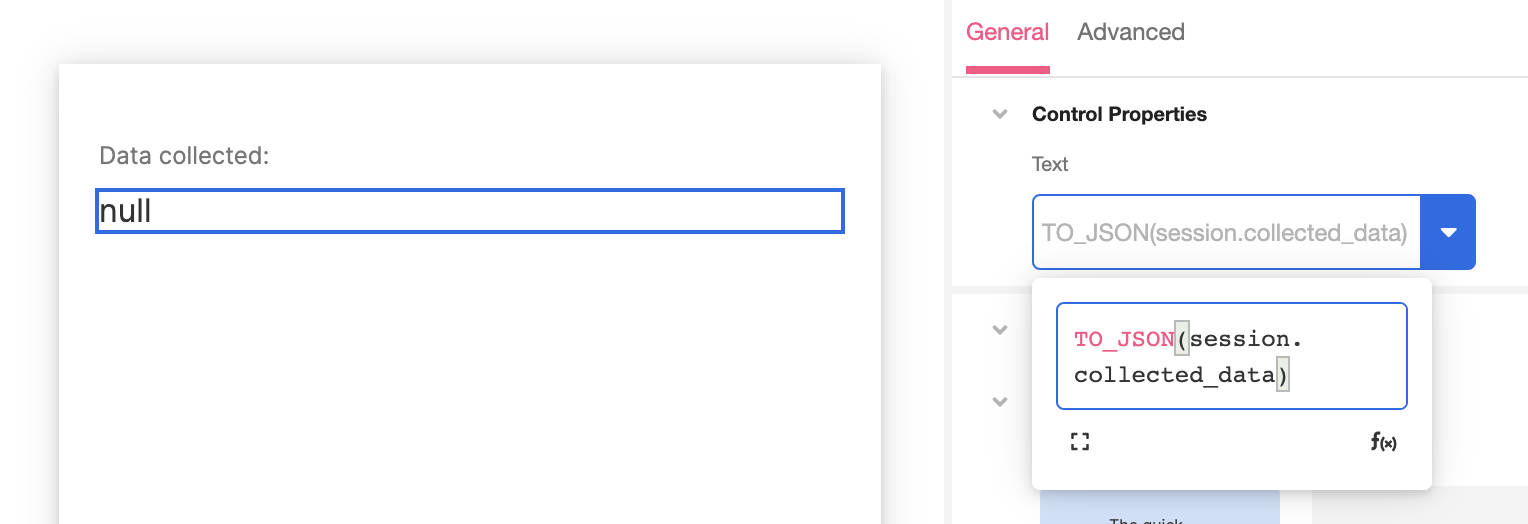
Save and publish your application. It will now parse and display data associated with the eventSourceKey. Note that the incoming data must be formatted in a way the application expects; in the case of our example, it must be called variable.
Next, let's configure our web page so that it can send Events to an embedded implication. We'll do this by creating a button, that, when pressed, sends a message declaring what date it was pressed.
Copy and paste the following code block into your web page, and:
- Replace
"SDK_API_URL"with the SDK endpoint configured in the Triggers Builder- To review how this was configured, see the SDK Quickstart
- Replace
"eventSourceKey"with the value of youreventSourceKey - Replace
"VARIABLE_NAME"with the value used to reference Event Variable when building the Action Chain to associate with the Incoming Event
<html>
  <head>
    <meta name="viewport" content="width=device-width, initial-scale=1">
    <meta charset="utf-8" />
    <title>Airkit web SDK</title>
  </head>
  <body>
    <div id="airkit-sdk"></div>
    <button id="button_id">Send Data</button>
    <script src="https://client.airkit.com/websdk/1.0/airkit_sdk.js"></script>
    <script>
      const sdk = new window.AirkitWebSDK({ renderMode: "inline" })
      sdk.render({ url: "SDK_API_URL" })
      const button = document.getElementById("button_id")
    	button.addEventListener("click", () => {
        sdk.dispatch({
          eventSourceKey: "eventSourceKey",
          data: { "VARIABLE_NAME": `Message from web sdk send at ${new Date()}` },
        })
      })
    </script>
  </body>
</html>
For instance, if our "SDK_API_URL" is "<https://app.airkitcom/event-sdk/sdk",> our "eventSourceKey" is "example-incoming-event", and our "VARIABLE_NAME" is "variable", the code block will looks as follows:
<html>
  <head>
    <meta name="viewport" content="width=device-width, initial-scale=1">
    <meta charset="utf-8" />
    <title>Airkit web SDK</title>
  </head>
  <body>
    <div id="airkit-sdk"></div>
    <button id="button_id">Send Data</button>
    <script src="https://client.airkit.com/websdk/1.0/airkit_sdk.js"></script>
    <script>
      const sdk = new window.AirkitWebSDK({ renderMode: "inline" })
      sdk.render({ url: "https://app.airkit.com/event-sdk/sdk" })
      const button = document.getElementById("button_id")
      button.addEventListener("click", () => {
        sdk.dispatch({
          eventSourceKey: "example-incoming-event",
          data: { "variable": `Message from web sdk send at ${new Date()}` },
        })
      })
    </script>
  </body>
</html>
Ship the changes to your website, and you'll see the contents of the Label in your app change in response to pressing the button in your web page:
Updated 4 months ago