Custom Domains
This guide will walk you through how to connect a domain to Airkit and white-label the links that lead to your application. Connecting a domain to Airkit requires three configuration steps.
To use a custom domain in an application, whether it is a URL Domain or URL Route, that domain has to be compatible with https://letsencrypt.org/docs/certificate-compatibility/.
Step 1: Create a CNAME record in your domain provider
Create a CNAME record for your domain so that it is pointing to the Airkit website. Depending on the realm of the Airkit organization, the URL will differ:
US Realm:
app.airkit.com EU Realm:
app.airkit.eu APAC Realm:
app.airkit.com.auBelow is an example configuration for a domain hosted in Amazon AWS:

Verifying your CNAMEAfter creating a CNAME, you should verify that your CNAME configuration is correctly set up and resolvable from the public internet. To do this, you can use Dig from the Google Admin toolbox.
Step 2: Creating a URL domain and URL Route
To add a URL Domain and a URL Route in Airkit, go to the Console to add a resource.
You need to create URL routes on the same version of Console that you are using to build your application. Keeping track of what version of the Console you are working in is particularly important if your Organization contains apps that were built in multiple versions of the Studio.
The URL console.airkit.com automatically directs to the latest version of Airkit. To access an earlier version, place the desired version in the URL. For instance, if you're building an app on CXR 17.15, make sure to create your Web URL Route Resources on v17-15.console.airkit.com.
To add a URL domain, toggle to Resources and click Create New. Type a unique name to label the domain and select URL Domain in the Capabilities dropdown.
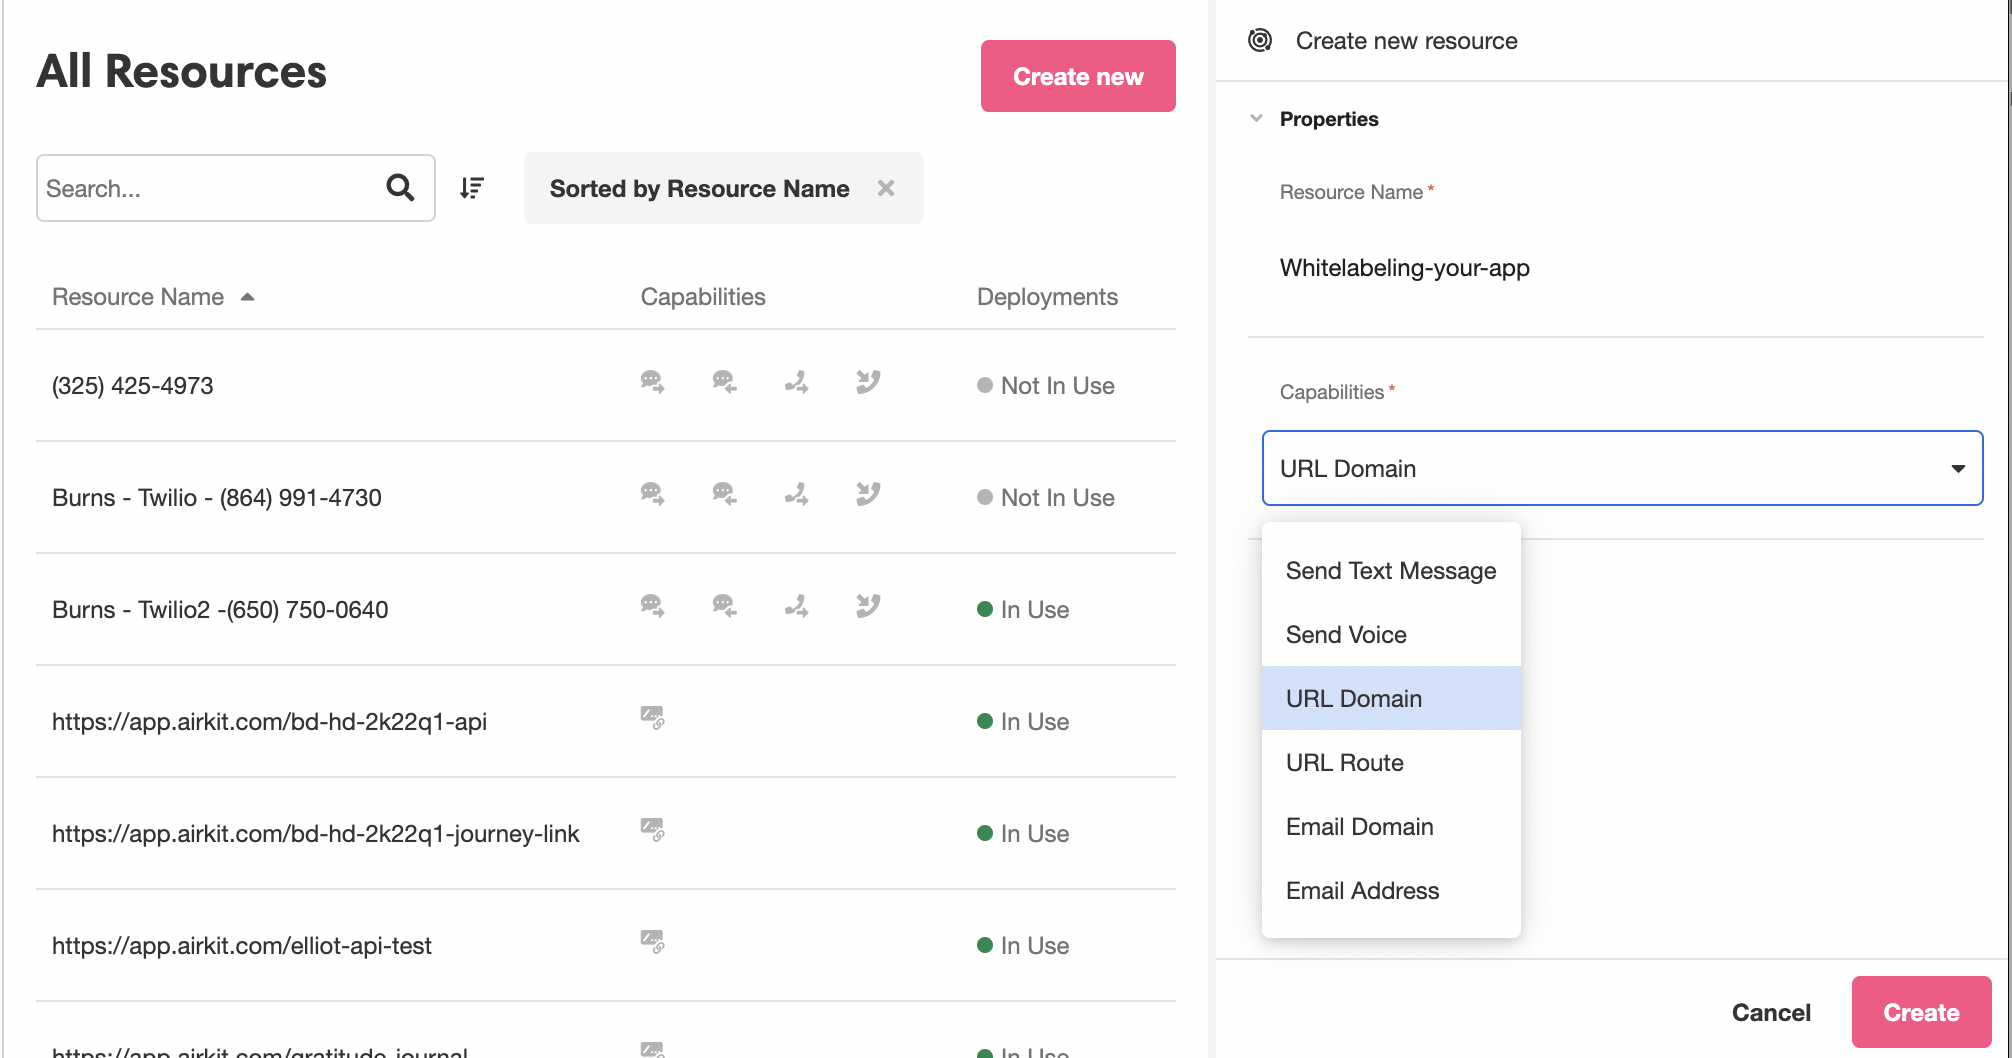
After selecting URL Domain, put in the custom domain name that was created when the CNAME was created. (For example: usher.woodsidebikes.com.) Upon clicking the Create button in the lower right, Airkit will attempt to retrieve the certificate that was created. Assuming no errors arise, this URL Domain can then be used to define the base domains of your applications.
After adding a URL domain, add a URL Route resource. Under the Resources tab, Click on Create New, type a unique name to label the route, and select URL Route in the Capabilities dropdown.
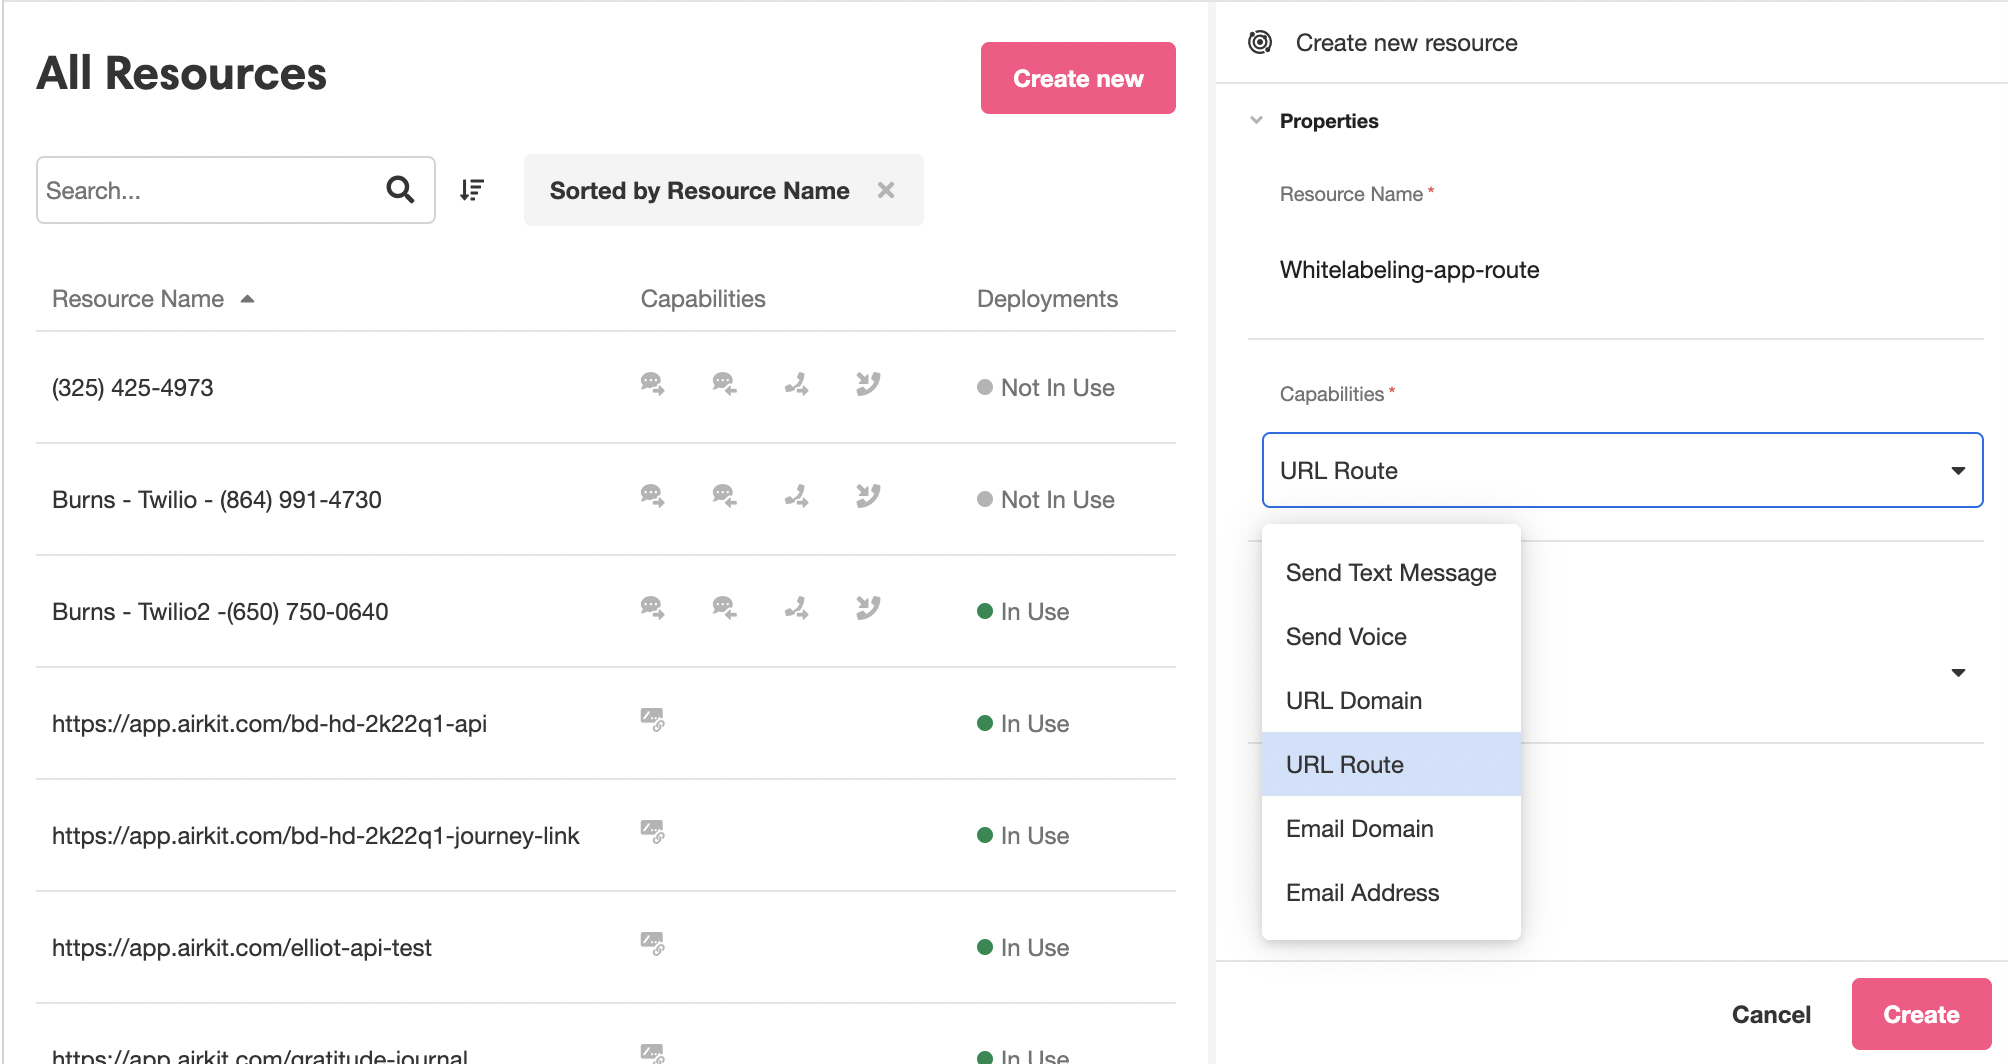
Select the URL domain that was created in the previous step. This will provide the ability to create a custom path on your domain (e.g. usher.woodsidebikes.com/c/order).
Lastly, add a Custom URL key. This customizes the URL path that can launch an app.
I want to manage my own certificates
Enterprise FeatureThis feature requires an ENTERPRISE license. If you would like to enable this feature for your Airkit Organization, please contact your Airkit representative or contact [email protected].
By default, Airkit handles uses Let's Encrypt to handle all certificates associated with a custom domain. In such cases, Airkit handles certificate renewal automatically: all certificates are checked periodically and auto-renewed well before the expiration date. No maintenance is required on your end.
However, if you want to use certificates signed by your Certificate Authority (CA), Airkit provides the option to check off I want to manage my own certificates before creating your custom resource:

Should you choose to manage your own certificate, you will need to manually renew it before it expires.
Configuring your own CA requires extra configuration steps and maintenance. See tutorial here.
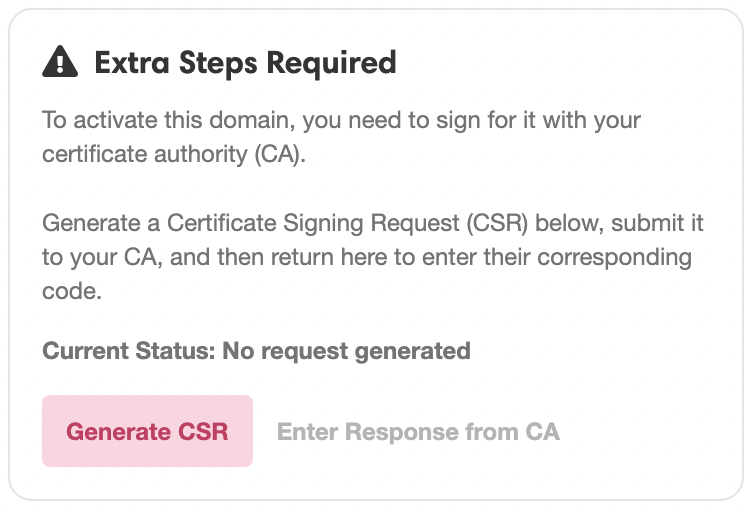
Upon clicking the Create button, the following box will appear in the Inspector. Click on the Generate CSR button:
A modal will open. Fill out the information as prompted and then click the Generate Certificate Signing Request Button:

Your Certificate Signing Request will then display as follows. Note that, in the provided example, the Certificate Signing Request has been greyed out:
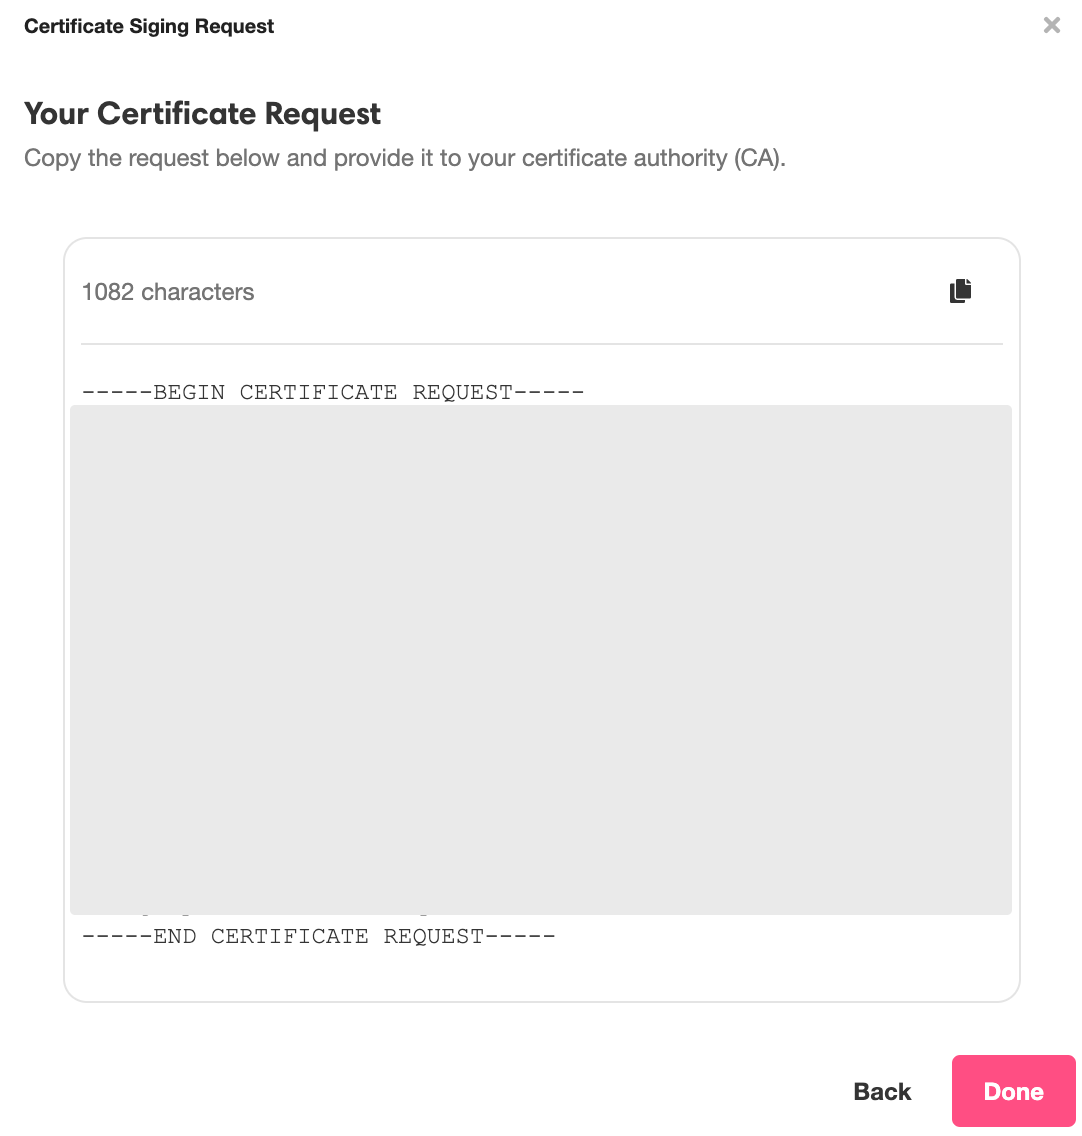
Copy your Certificate Signing Request and save it, then click Done. You can now give your Certificate Signing Request to your CA in order to generate a certificate.
Once you’ve gotten a signed Certificate back from your CA, click Enter Response from CA:
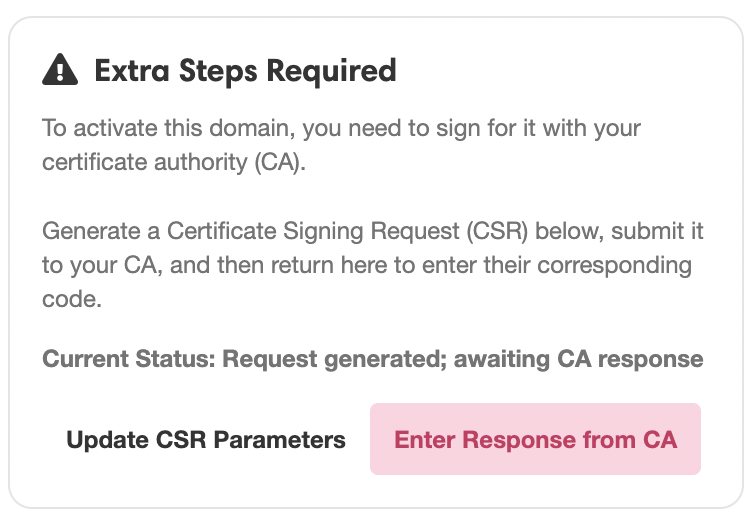
This will open the following modal:
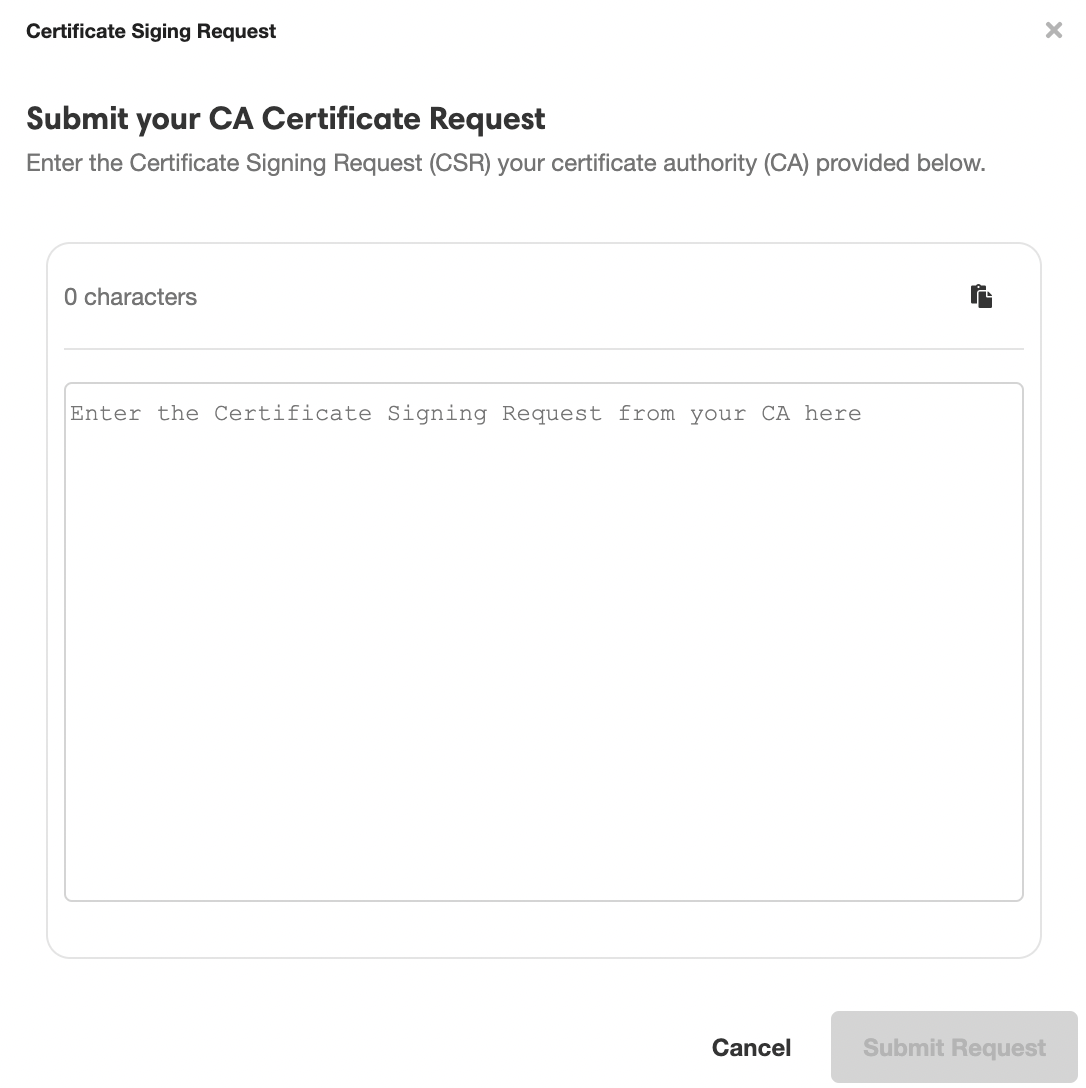
Enter the signed Certificate from your CA and press Submit Request. If you have successfully configured your Custom Domain so that you can manage your own certificates, you should see the following box in the Inspector:
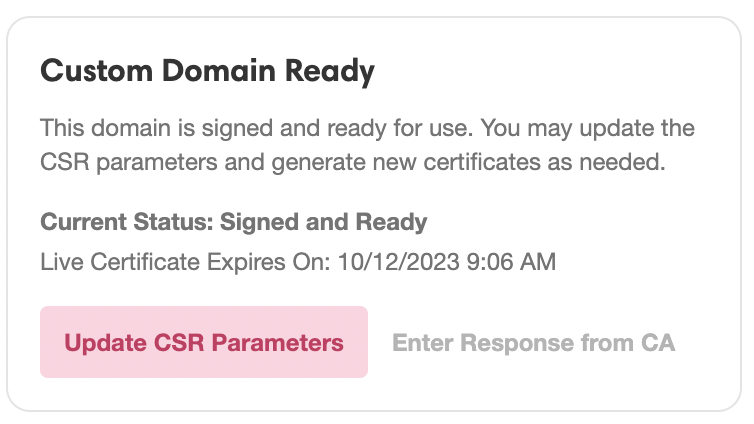
Certificates come with an expiration date.Certificates eventually expire or you may need to update your Certificate subject. In both cases, you must generate a new CSR and upload a new signed Certificate. Click on the Generate CSR button to modify the subject parameters and generate a new CSR. Generating a new CSR is a safe operation and does not remove an existing Certificate until a new signed Certificate is uploaded.
Step 3: Configure the domain in Settings
Open the relevant app in the Studio. Toggle over to Settings.
The Base Domain section specifies the domain of all links associated with this application. To set your white-label domain as an app's base domain, simply select your white-label domain from the associated dropdown menu.

The Web URL section specifies the precise URL that will launch your app's web experience, including the base domain and the path. Options are available for selection in the dropdown menu. Only URL routes with a domain in common with your set Base Domain will appear for selection, so be sure to select your white-label base domain before selecting your white-label Web URL.
Save your changes, and, once published, the application will be accessible by the specified white-label links.
Updated 3 months ago