Integrations
The Integrations Tab is where you can configure how external data sources will be authenticated. Once authenticated, you can use them across your applications.
This Tab contains two sub-tabs: Connected Accounts and Custom Integrations.
Connected Accounts
The Connected Accounts Tab allows you to quickly integrate with configured external systems by filling in some basic account information. External systems can be configured under the Custom Integrations Tab, although Airkit comes with the following systems pre-configured:
Once an account has been connected, it will be displayed in the Stage. Selecting an account will open it in the Inspector. Not that for security purposes, this will not display any sensitive account information:
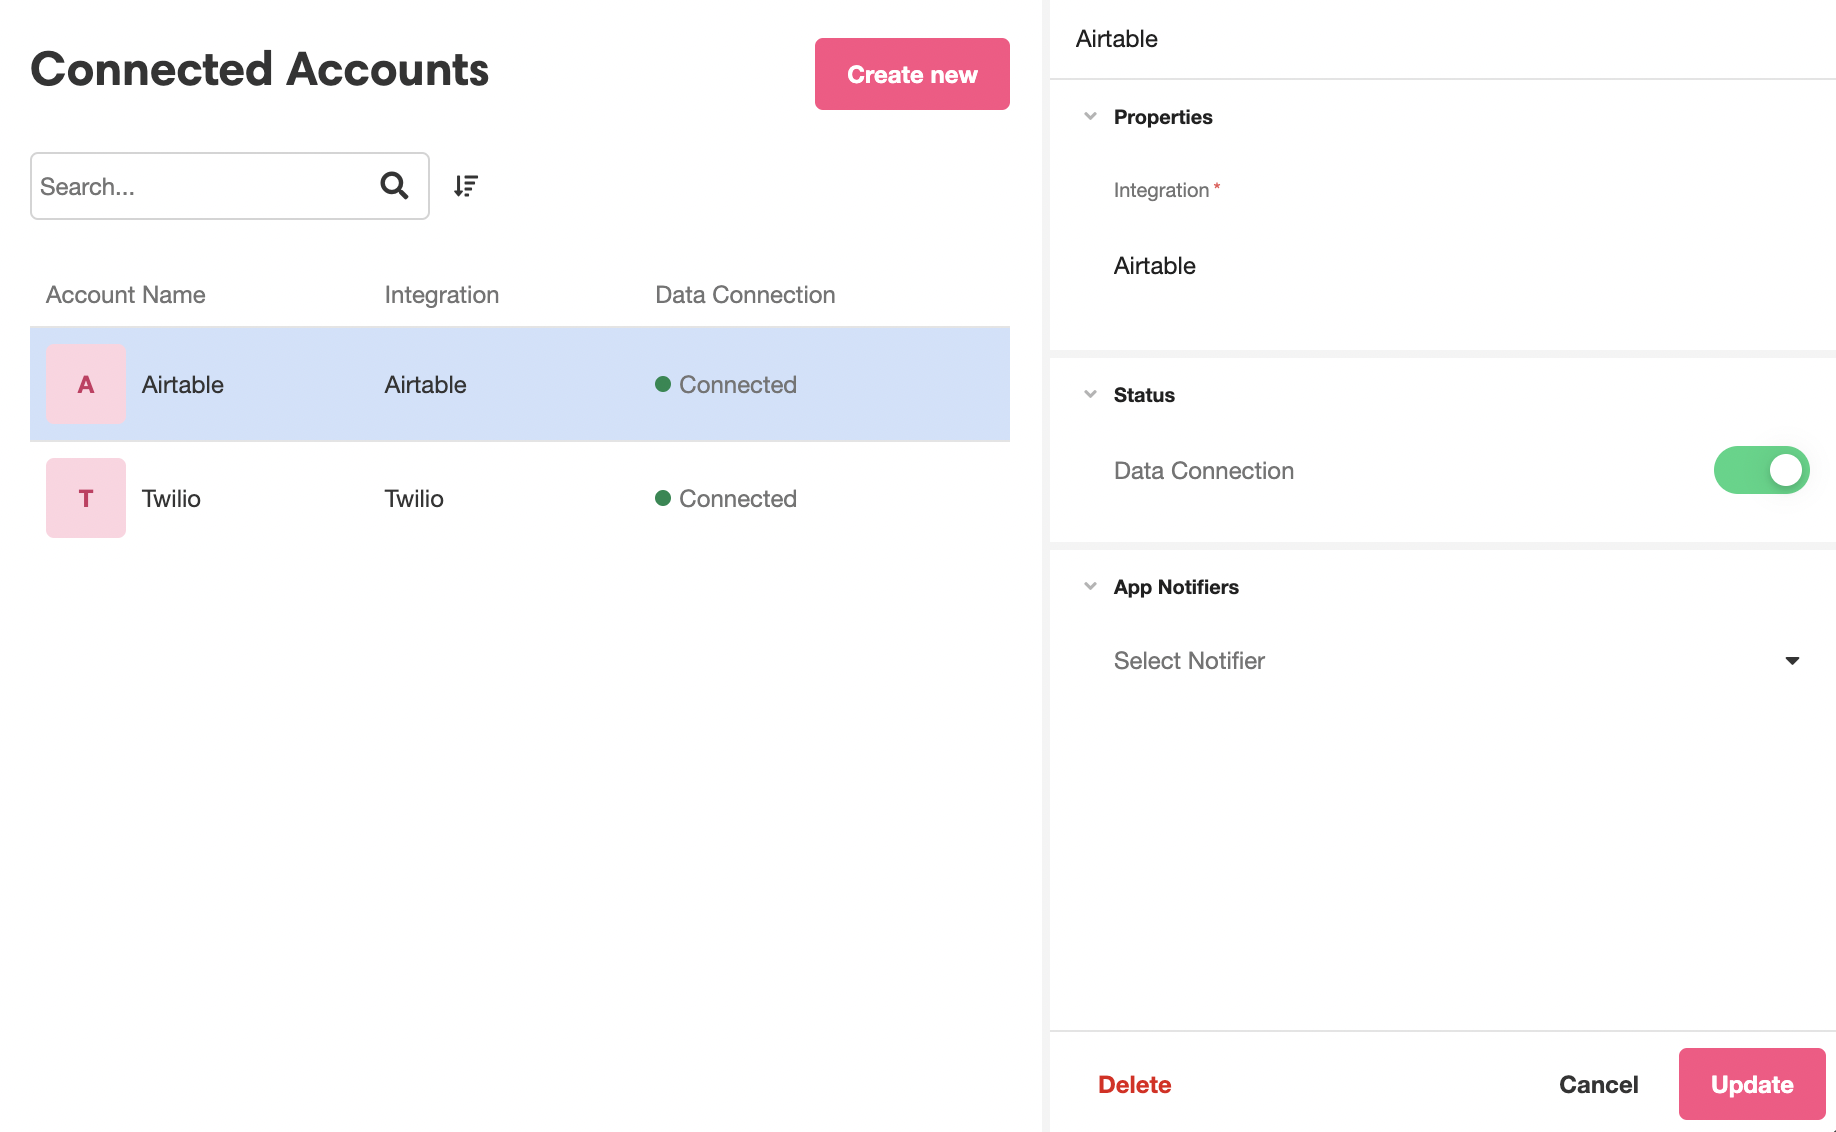
In addition to listing the Integration under Properties, the Inspector has two more fields: Status and App Notifiers.
The Status field can be used to turn off a Connected Account by toggling off the Data Connection.
The App Notifiers field provides a dropdown menu to select a Notifier to send via Slack or email if an error with the integration occurs. No Notifiers come out-of-the-box to select; they must first be created and configured in the Settings Tab.
Custom Integrations
The Custom Integrations Tab allows you to configure external systems that can be integrated within the Connected Accounts Tab. If you want to integrate your Airkit apps with a system that does not come pre-configured, you will need to configure it in the Custom Integrations Tab first.
Airkit currently supports creating Custom Integrations by the following means:
- OAuth 2.0 - Use OAuth and configure all the needed properties.
- API Token - Standard API token implementation.
- HTTP - Basic Auth - Basic Username and password HTTP Auth.
- Custom Token - Specify custom parameters to retrieve a token.
- SFTP - Specify a username and password or private key for authentication.
For more on how to create Integrations with each of these methods, see Custom Integrations.
Updated 4 months ago