Data Model Editor
The Data Model Editor, which can be toggled open and closed via the Model button at the bottom of the Studio, provides a way to create and manage Data Models. Data Models are used to structure data into Objects of key-value pairs. This can be useful for defining local variables, but it is optimized for automatically generating forms via the Form Web Control. This automatically creates a form consisting of appropriate Labels, Input Controls, and even dynamic error messages based on how the Data Model is configured.
Data Models are similar toAirData App Objects in structure, but not in application. AirData App Objects are intended for medium-term data storage, whereas Data Models are intended for short-term data structuring and form creation.
In this document, we'll discuss the ways to create Data Models, how to manage and test the Validations they define, and how Data Models might be used after they are created. For a more detailed discussion of how to use a Data Model in tandem with a Form Web Control, see Making Forms from Data Models.
Structure
Data Models are Objects, consisting of any number of key-value pairs. Defining the nature of these key-value pairs is a part of the creation process.
There are two ways to create a new Custom Data Type:
- Create a new Data Model and define all of its properties in the Model Editor manually.
- Save the structure of data returned by a Data Operation from Connections Builder.
Creating Data Models manually
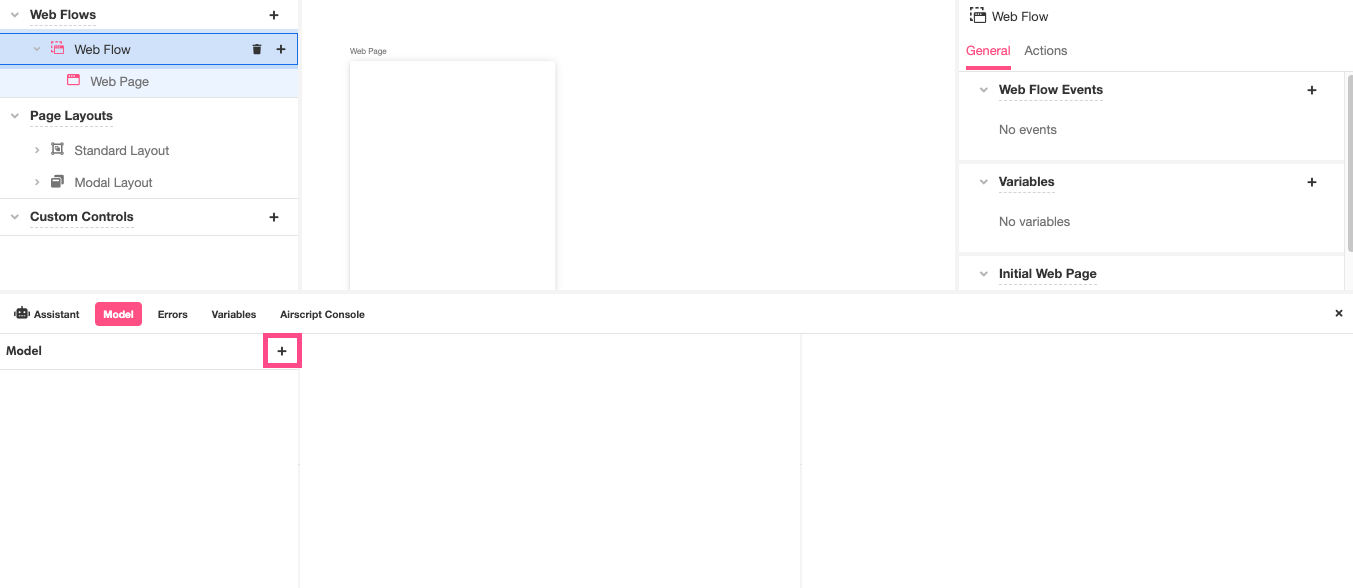
Data Models and their properties can be entirely defined and managed directly in the Data Model Editor. To open the Model Editor, click on the Model Button to the bottom left of the Studio. This will pull up the Model Editor in the bottom of the Studio regardless of which Builder you're working in.
To create a new Data Model, click on the '+' icon to the upper right of the Model Tree:
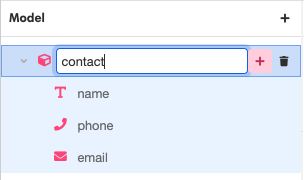
This will automatically generate a new Model. You can add properties to it by clicking on the '+' icon that appears next to it and then selecting the desired property data type from the dropdown menu that appears. The names of both a Model and its properties can be changed by clicking on the name as it appears in the Model Tree:
If at any point you want to delete a property or even a whole Model, click on the trash icon that appears to the right of it.
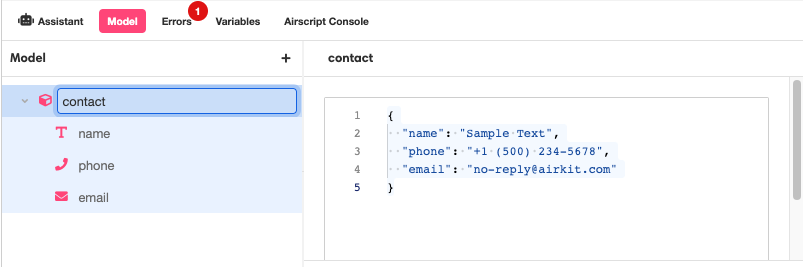
As the properties of a Model are defined, a corresponding sample Object will be generated in the Model Stage. This sample Object will come pre-populated with dummy data of the appropriate data type:
Saving the Structure of incoming data from Connections Builder
Several Data Operations return output that might potentially be structured as an Object. In such cases, the bottom left of the Data Operation in the Stage of the Connections Builder will contain the following button:
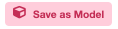
Clicking on this button saves the structure of the Data Operation's current returned value as a new Data Model. For example, say the HTTP Request Data Operation is run, returning the following JSON object:
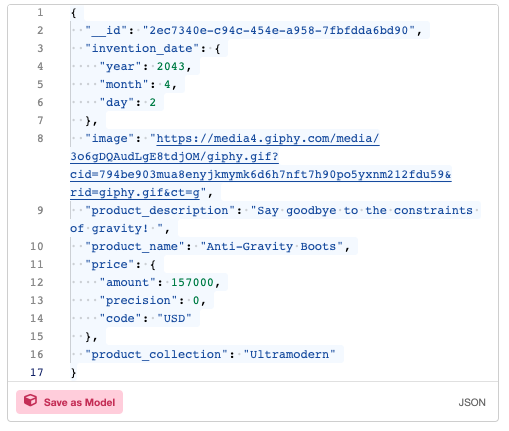
Upon clicking the Save as Model button, the following Data Model will be automatically generated. To view it in the Data Model Editor, click on the Model Button to the bottom left of the Studio. Note how a sample Object, pre-populated with dummy data of the appropriate data type, also appears in the Model Stage:
The names of Data Models generated in this way can be edited in the same was as any other Data Model: double-clicking directly on the Data Model within the Tree and typing a new name.
Validation
Once the structure of a Data Model has been defined, Validations can be added to individual properties or even the Model as a whole. Validations are managed in the Model Inspector. To add a new Validation , click on the '+' icon on the upper right Model Tree:
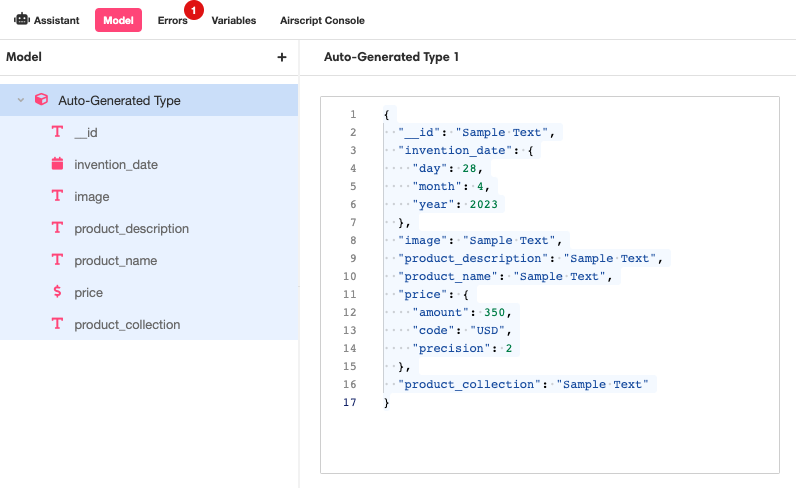
Two options will appear for selection: Required and Custom Validation.
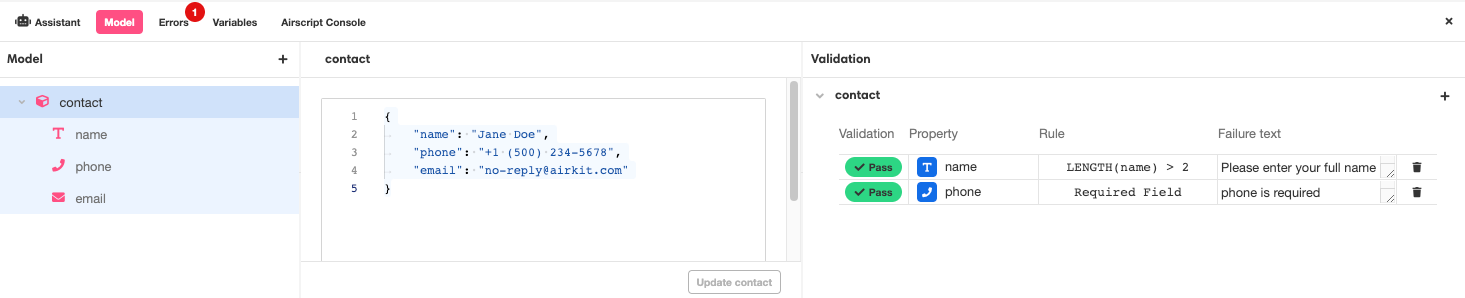
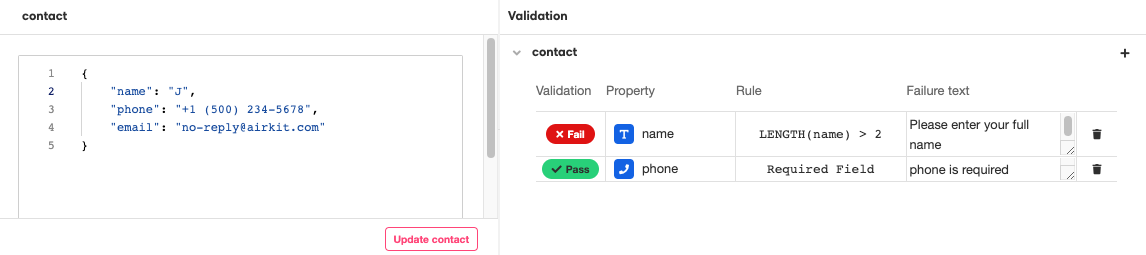
For deeper dive into what these options mean, let's consider the above example. There are two Validations associated with this example Model, contact. The Validation on the bottom was generated using the Required option, and it defines the phone property as a "Required Field", meaning that a contact Data Model will not be valid without a value assigned to the phone property. The Validation on the top was generated using the Custom Validation option, and it defines the name property using the LENGTH function to require that it consist of a string with more than two characters.
Both Validations have corresponding Failure Text ("phone is required" and "Please enter your full name", respectively) which, like the Rule associated with Custom Validations, can be edited directly in the box they appear in. Associating intuitive Failure Text with a Validation is important when tying a Data Model to a Form, because the Failure Text configured here is used to automatically generate user-facing errors should invalid data be entered. For more on this, see Making Forms from Data Models.
While both Validations in the above example were tied only to a single property, it is also possible to create Validations that apply to the Data Model as a whole, which makes it possible to create Custom Validations that define how different properties relate to each other rather than hardcoded values. In such cases, you will need to use the "@" symbol to reference the Model itself, and then use Path Expressions to reference properties.
For instance, in the following example, the Model example_model has a single, Model-level validation rule: the value of the "big_number" property must be larger than the "small_number" property, and this is established via the expression @.big_number>@.small_number:

Validation Testing
Each Validation is associated with a Validation column, which shows how each Validation will evaluate given the sample Object in the Model Stage. To test how Validations might behave given certain data, you can edit the sample Object directly.
For example, say we edit the name property so that it has the value "J". The string "J" is not greater than 2 characters long, and so the associated Validation fails, as indicated by the red "Fail" icon under the Validation column:
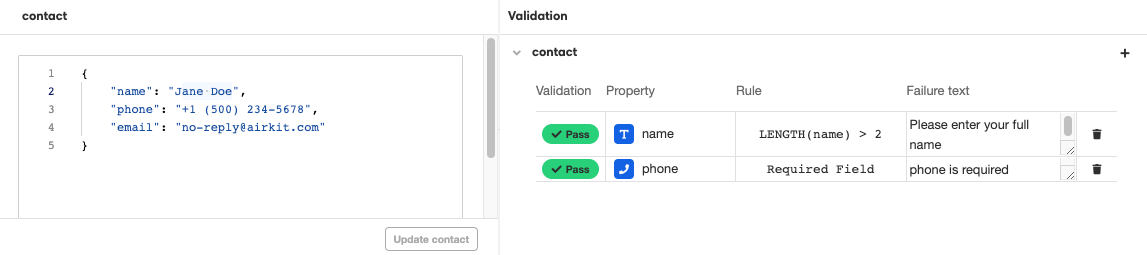
However, if we then edit the name property so that it has the value "Jane Doe", this string is greater than 2 characters long, and so the associated Validation passes, as indicated by the green "Pass" icon under the Validation column:
Any changes made to your example Object will immediately be reflected in the Model Stage, but they will not persist upon closing Model Editor unless you save them using the Update Object button at the bottom right of the Model Stage.
Sample Model Object only contains dummy data for testing purposesWhether or not a sample Object in the Model Stage passes its associated Validations has no impact on how the associated Data Model will behave in production or even Previews. The "Pass" and "Fail" icons displayed within each Validation are only intended to facilitate testing by using the sample Object as hypothetical data.
Using the Data Model
Once fully configured, Data Models can be used to automatically generate Forms and define local variables.
Creating Forms
Tying a Model to a Form Web Control is where the structure of the Model and the defined Validations come together to expedite the process of creating a form that automatically validates user input and provides users with intuitive error messages. See Making Forms from Data Models for more information.
Referencing Properties
Like AirData App Objects, Models are Objects, and, like AirData App Objects, Models can be used to define local variables. Local variables structured according to a Model can created in the Variable Tree just like any other local variable. Once created, properties can be referenced using both Path Expressions and, if relevant, Query Expressions.
Updated 4 months ago