SAML SSO for an Organization
Overview
Enterprise FeatureThis feature requires an ENTERPRISE license. If you would like to enable this feature for your Airkit Organization, please contact your Airkit representative or contact [email protected].
This document covers setting up SAML SSO for your Airkit Organization so that SAML authentication provides access to console.airkit.com and studio.airkit.com. This means that only SAML users have the ability to log in to an Airkit organizations and you manage and control access to who has access to your Airkit organization.
For more information on setting up SAML SSO inside of your Airkit Applications, see SAML Authentication.
What is SAML SSO?
SAML allows identity providers (IdPs) to store user identity data and authenticate identified users to other systems using public-key cryptography.
An Identity Provider (IdP) can be a cloud-based identity service like Okta or OneLogin, or it can be an internal enterprise resource like Azure AD. Meanwhile, a service provider (SP) is the system a user wants to access. As long as the IdP can authenticate the user, the SP will let them in.
When a builder logs into Airkit using SAML, the IdP will send a SAML assertion to their browser that is then sent to the Airkit platform, the SP. The SAML assertion is an XML file with three statement types: authentication, attribution and authorization.
How to setup SAML SSO in Airkit
Airkit currently supports SP-initiated flow only. This means that builders will have to access the Airkit platform through https://studio.airkit.com/, which then re-directs to the corresponding IdP for authentication.
Establishing and Downloading the SAML Metadata File
In order to configure SAML access to Airkit applications, the SAML Assertion Metadata must be generated from the Identity Provider (IdP) of choice. It will be used to share configuration credentials between the IdP and the Service Provider (SP). The IdP metadata usually contains the IdP certificate, the entity ID, the redirect URL, and the logout URL.
Airkit requires the Metadata File to be formatted as an XML file with the following fields:
<md:SingleSignOnService Binding="urn:oasis:names:tc:SAML:2.0:bindings:HTTP-Redirect"and/or<md:SingleSignOnService Binding="urn:oasis:names:tc:SAML:2.0:bindings:HTTP-POST"<md:NameIDFormat>urn:oasis:names:tc:SAML:1.1:nameid-format:emailAddress</md:NameIDFormat>; email is ideal butuser_lookup_attributecan be used if the user’s email is on a different fieldmd:EntityDescriptortag withentityIDattributemd:IDPSSODescriptortagX509Certificatewith cert inside
Uploading the SAML Metadata File
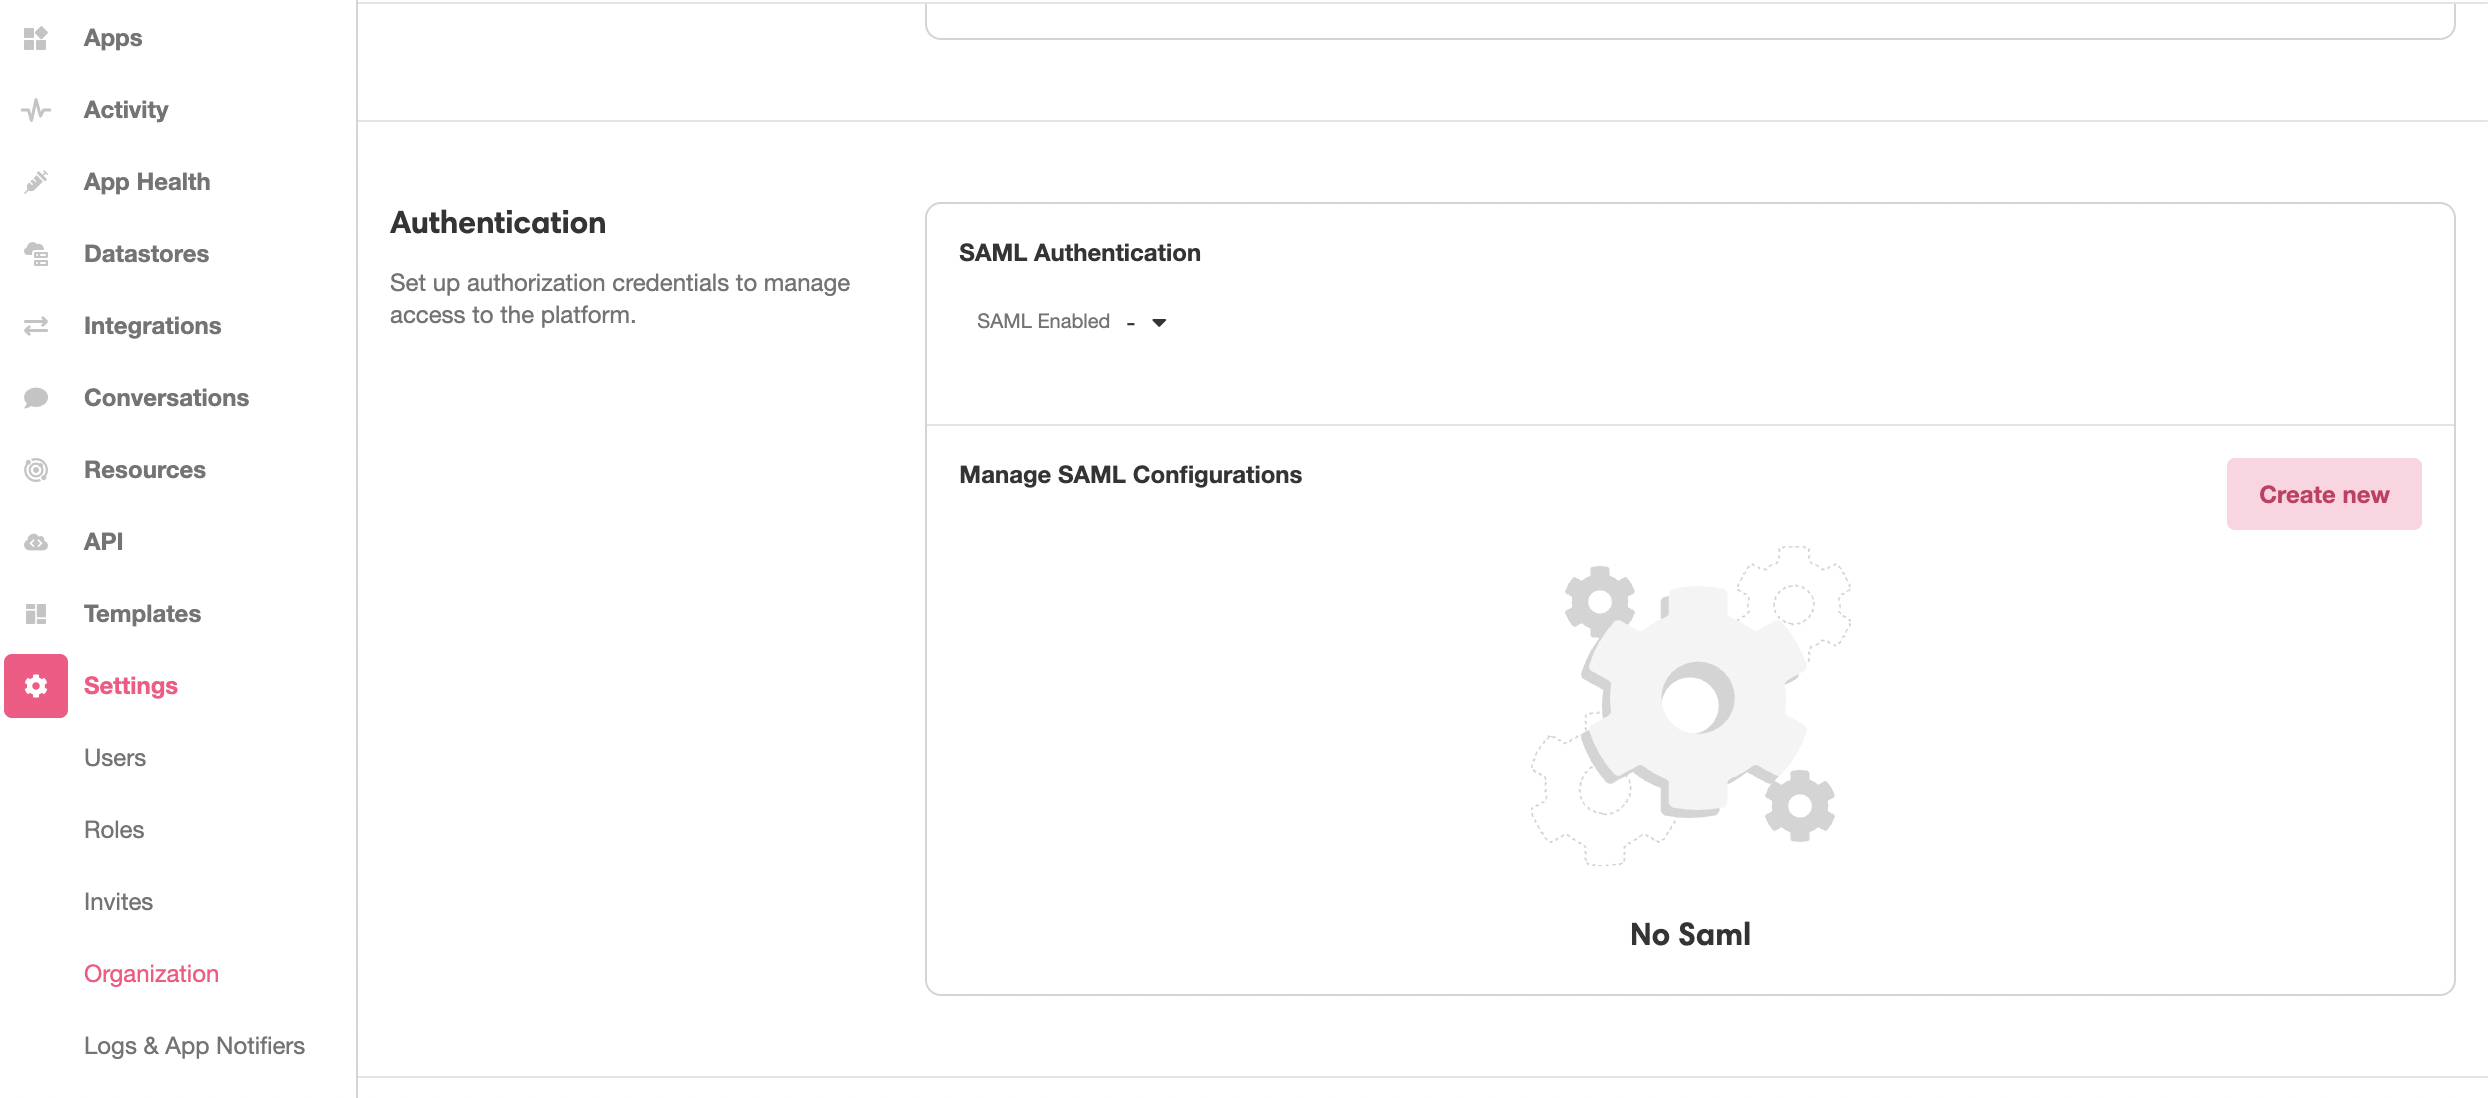
This SAML Metadata file needs to be uploaded into the Console in order to to define the IdP that will be receiving the SAML request. This is done under Console > Settings > Organization. In the Authentication section, click the Create new Button:
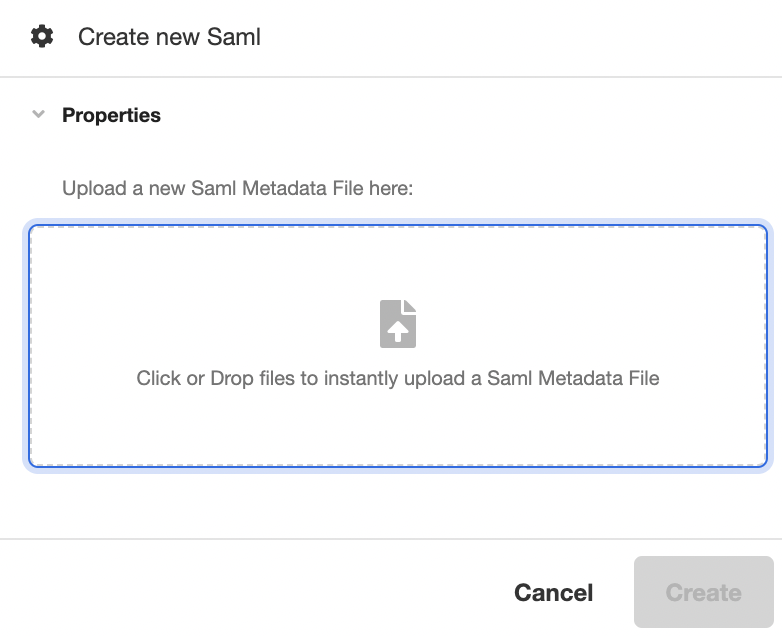
This will open the Inspector. Upload the SAML Metadata file in the space provided under Properties, and then click Create to generate a new SAML configuration out of the uploaded SAML Metadata File:
Configuring Your SAML Access
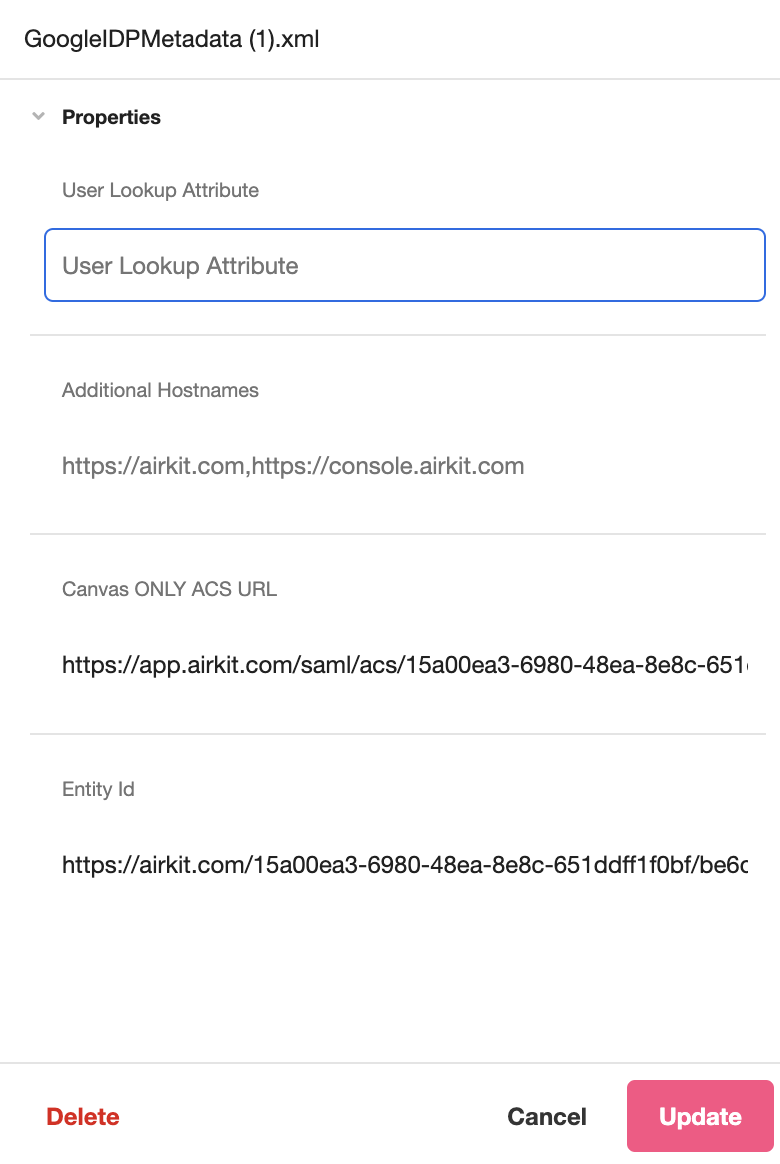
After uploading a Metadata File, you can view and configure properties associated with your SAML Authentication process.
- User Lookup Attribute (editable): Specifies the attribute that defines the Builder’s email in cases when the IDP does not provide an email in the NameID attribute.
- Canvas only URL ACS (static): This field is used when configuring SAML for App authentication. For more on configuring SAML authentication for applications, see SAML Authentication.
- ACS (static): The ACS (Assertion Consumer Service) URL that defines the endpoint where the IdP will redirect users after they are authenticated. This is defined in the SAML Metadata File and cannot be edited in the Inspector.
- Entity Id (static): The globally unique name for the SAML entity, i.e., your Identity Provider (IdP) or Service Provider (SP). This is defined in the SAML Metadata File and cannot be edited in the Inspector.
Finalizing SSO for your Organization
Toggle over to Settings > Organization. From the Authentication dropdown list, select the XML file that was uploaded in the previous step. Doing so will display the following credentials which should be used to finish the SAML integration on the IdP end.
The EntityID and ACS URL, in particular, must be used to whitelist Airkit in the IdP configuration. This process may vary depending on which IdP is being used.
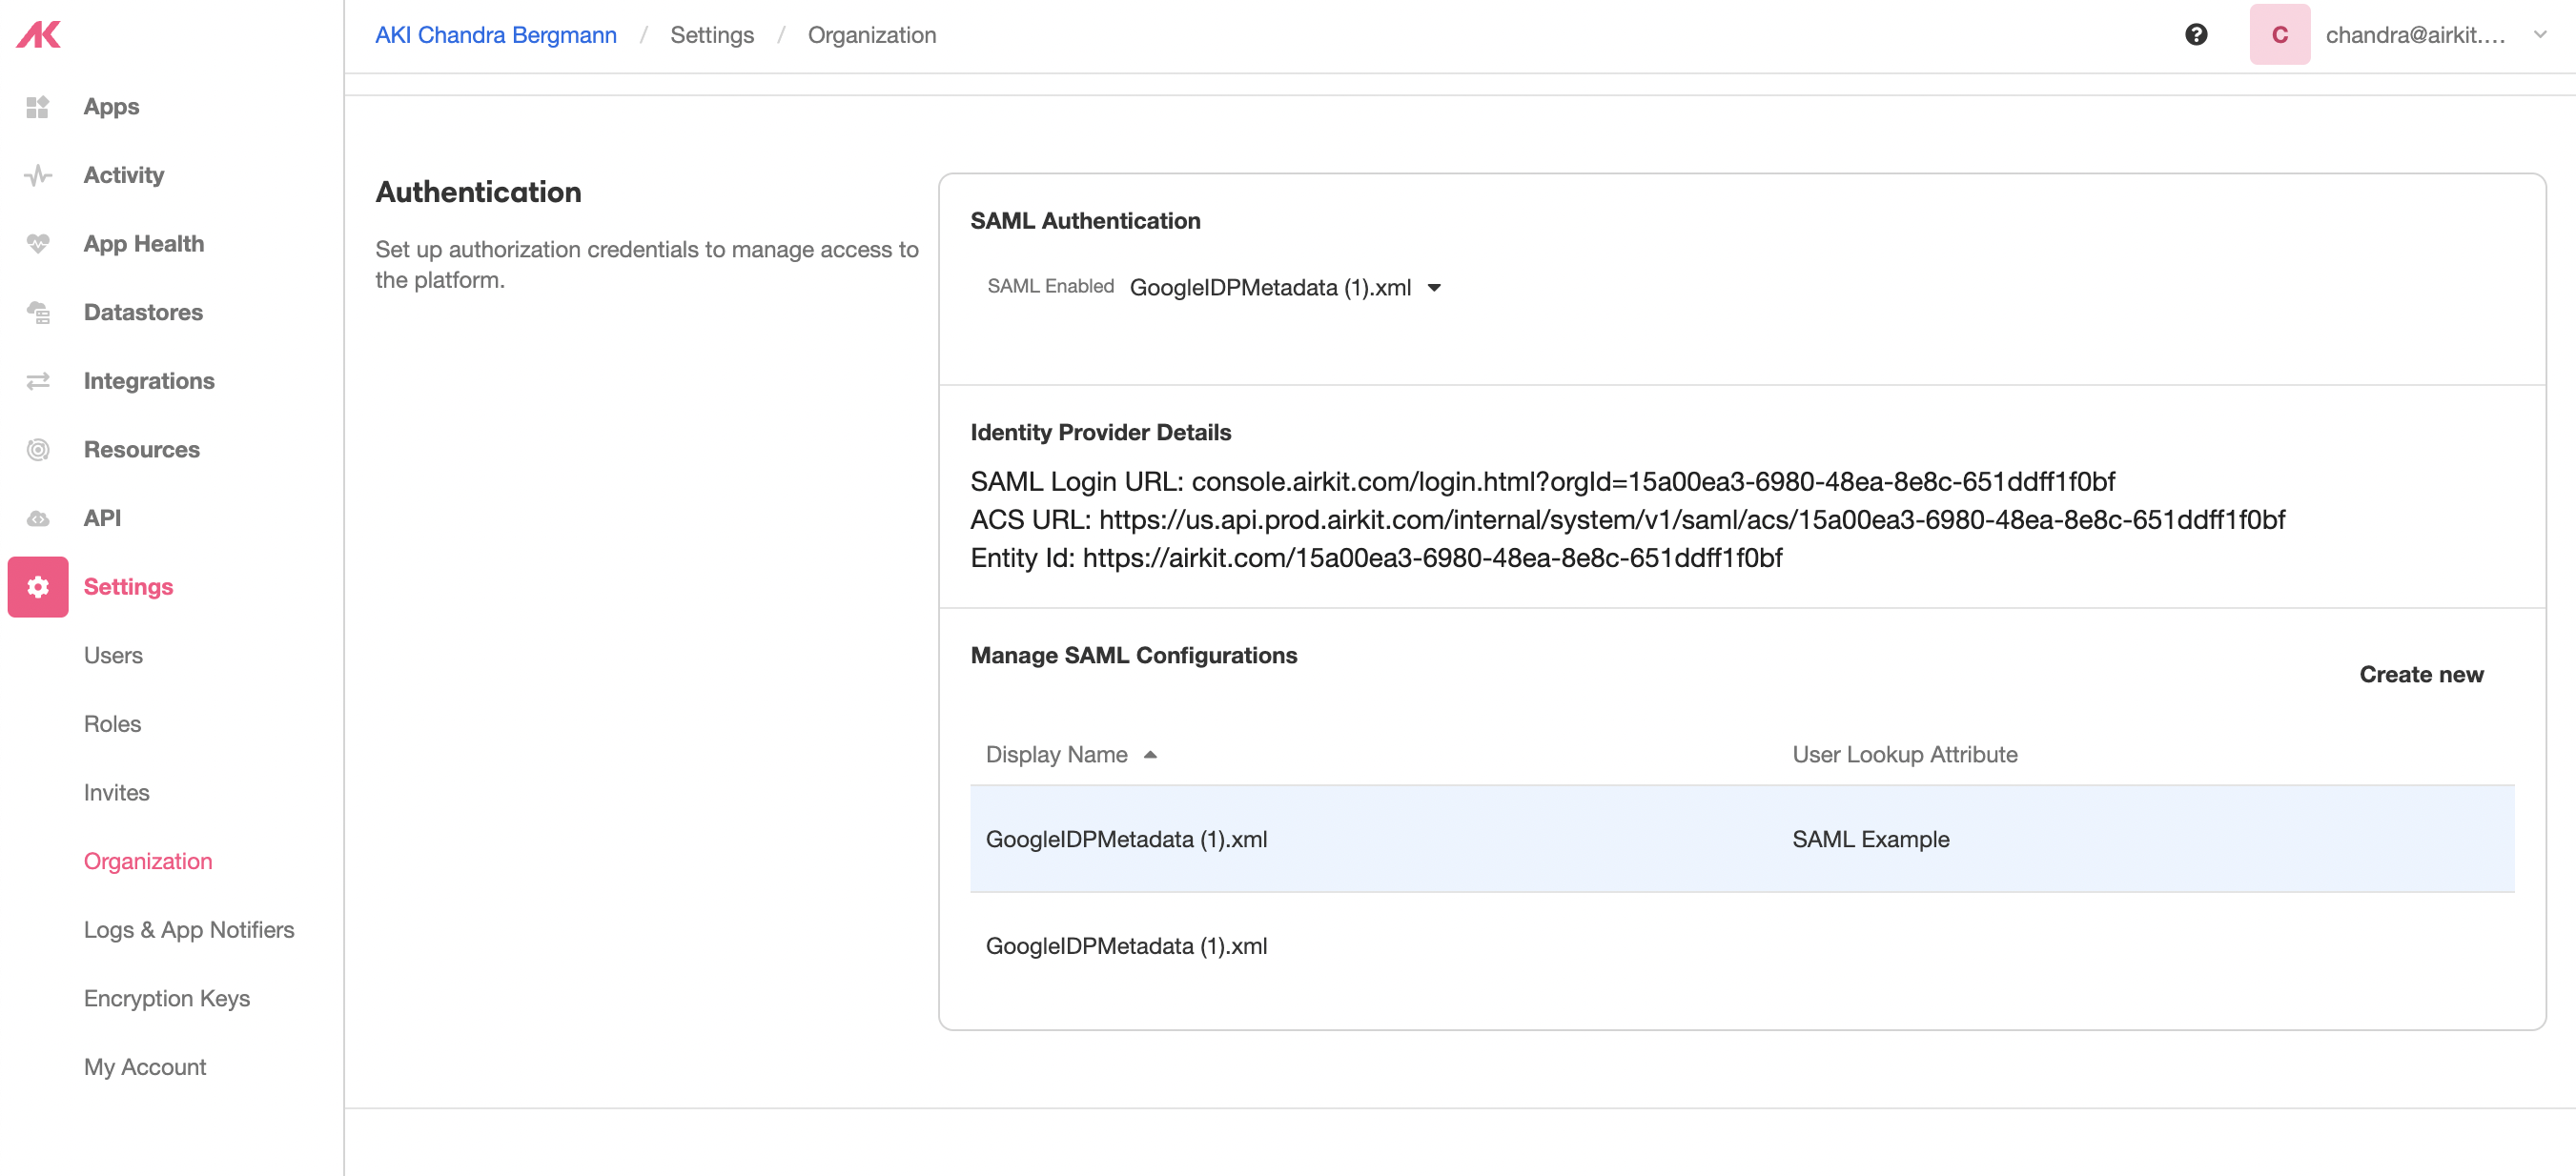
After setting up the credentials on both ends, users may access Airkit's Studio using the given SAML Login URL.
Support
If you need assistance with setting this up, feel free to file a support ticket with Airkit Support.
Updated 3 months ago