Configuring Conversation Chat Bots
Conversation Chat Bots facilitate two-way, text-based Conversations capable of being accessed through the Chat Web Control as well as through SMS channels. While these Conversations typically start by relying on the logical flow defined by Answer Groups, the logical flow of Answer Groups can also be used to hand the Conversation off to external chat management systems.
Configuring Conversation Chat Bots for deployment, then, requires not only defining the relevant Answer Group, but also configuring the many potential external resources and integrations that the Conversation might need to connect to. This is done by:
- configuring the Resources to send and receive messages,
- constructing a Conversation Hub to oversee how messages are routed, and
- building two applications:
- one to define the Answer Group itself, and
- one to manage the associated communication channels.
In this guide, we'll walk through each of these components and discuss key concepts to keep in mind while implementing your own Conversation Chat Bots.
Enterprise FeatureImplementing Conversation Chat Bots requires an ENTERPRISE license. If you would like to enable this feature for your Airkit Organization, please contact your Airkit representative or contact [email protected].
Configuring Channel Resources
In order for Airkit to send and receive messages, the channels through which they are sent must be configured as Resources in the Console. Conversation Chat Bots can be accessed through two distinct channel categories: SMS and Web Chat.
SMS
Under the hood, Airkit uses Twilio to manage SMS conversations. In order to send or receive SMS messages, an application must be associated with a phone number, which must be bought from Twilio and then configured as a Resource. For more on associating Twilio numbers with Airkit applications, see Connecting Twilio Numbers.
Web Chat
Web Chat conversations are conducted via web apps that contain a Chat Web Control. When used in tandem with the Web SDK, this allows Conversation Chat Bots to be incorporated into existing websites.
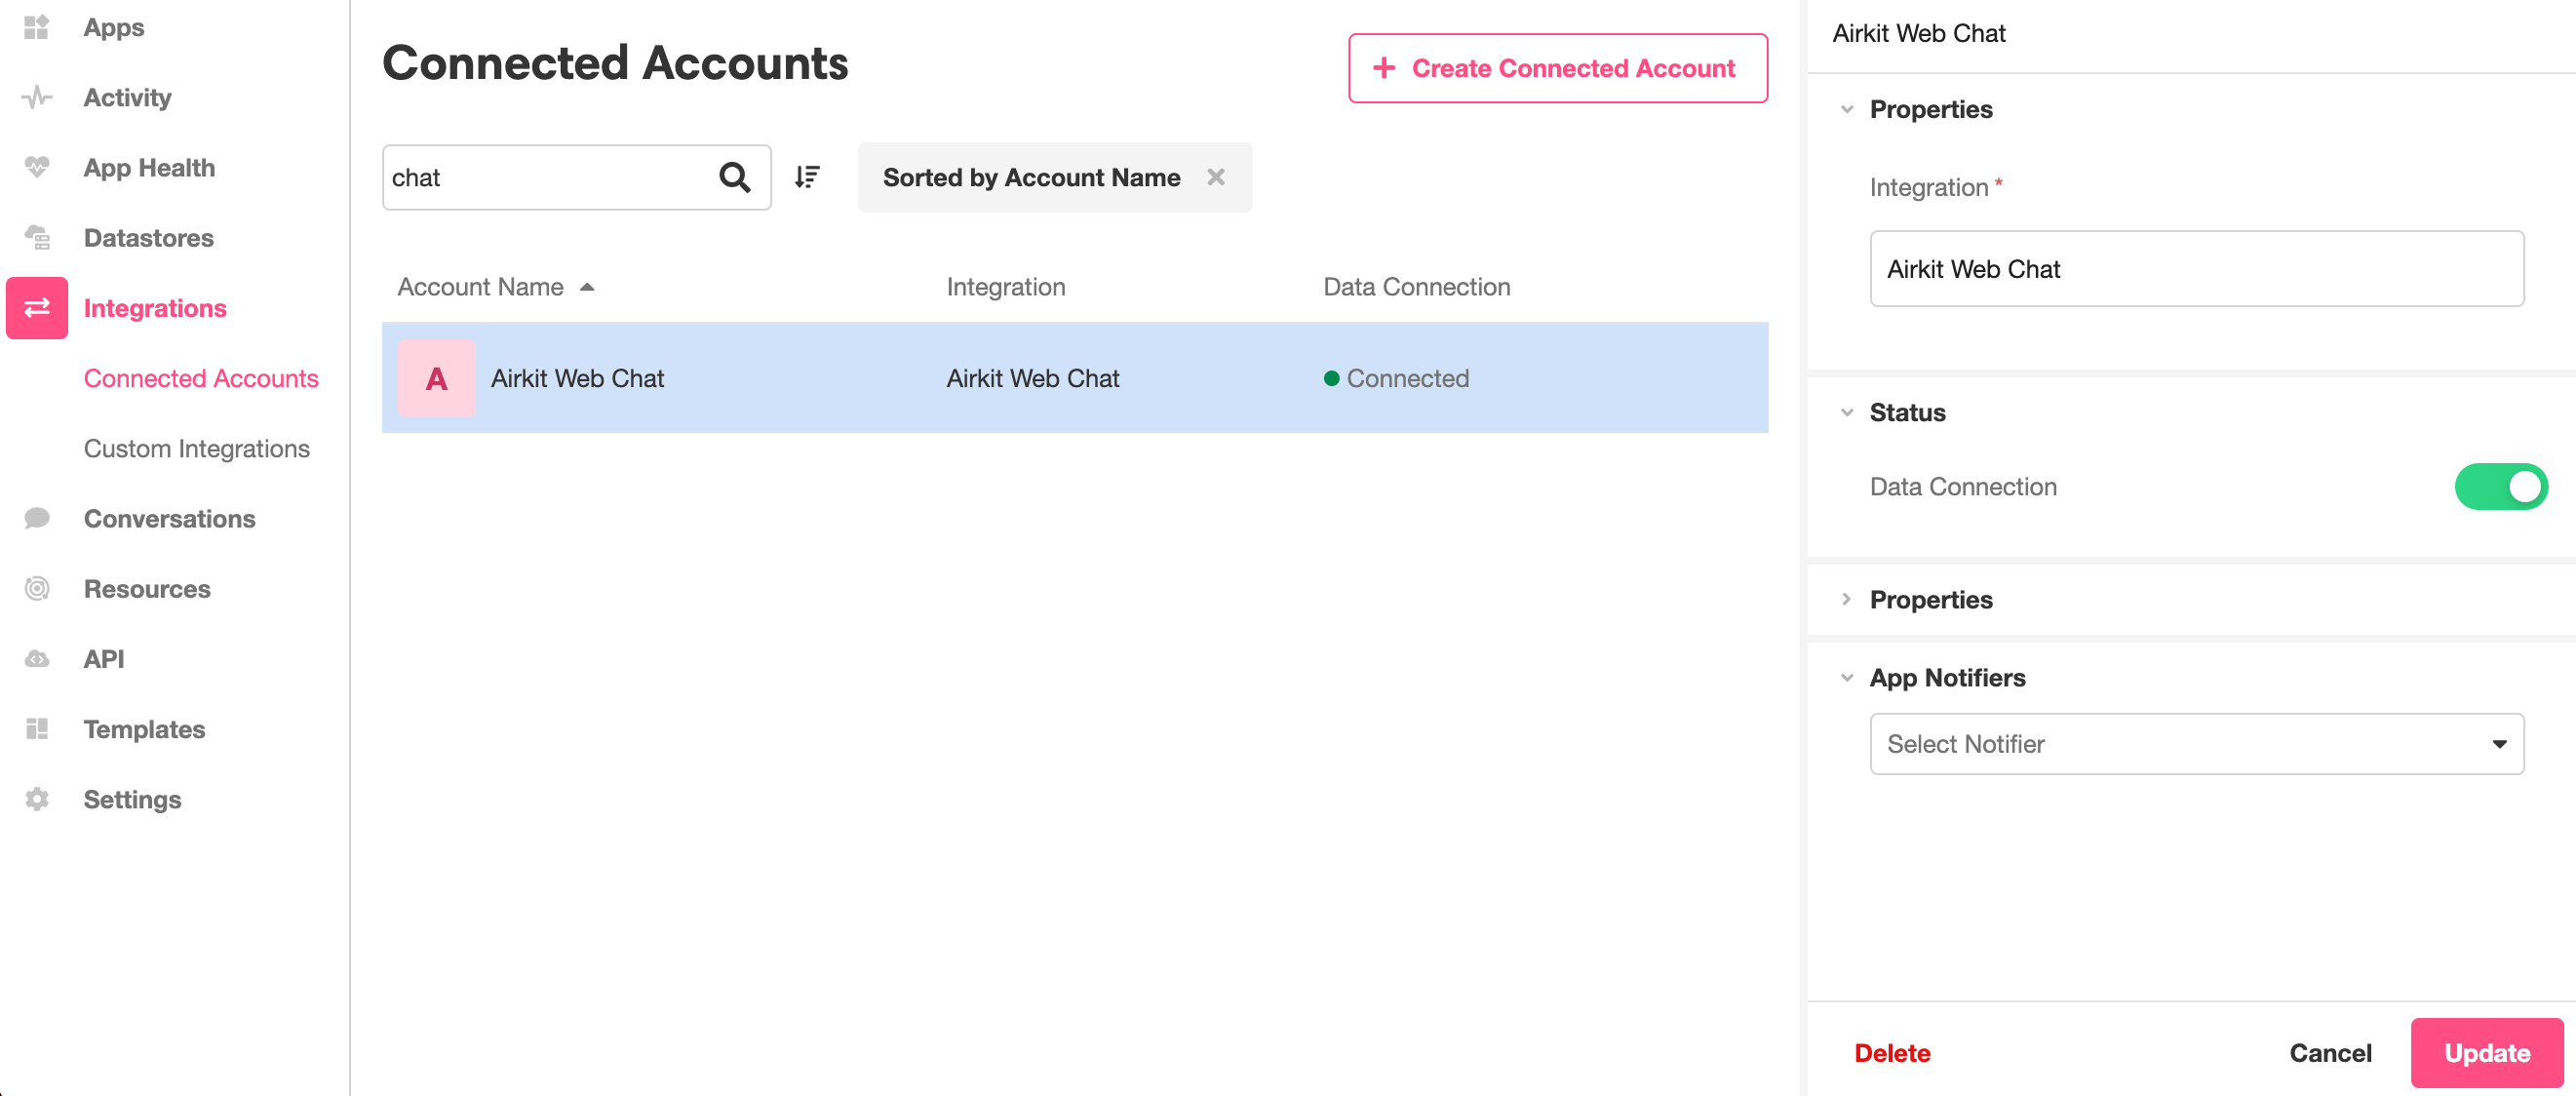
Configuring a Web Chat Resource requires an Integration with the Airkit Web Chat Account. If this Integration has not already been set up, you will need to contact [email protected] so that our Engineering Team can set it up for you. If an Integration with the Airkit Web Chat Account has been set up, you should be able to see it in the Console, under Integrations > Connected Accounts:
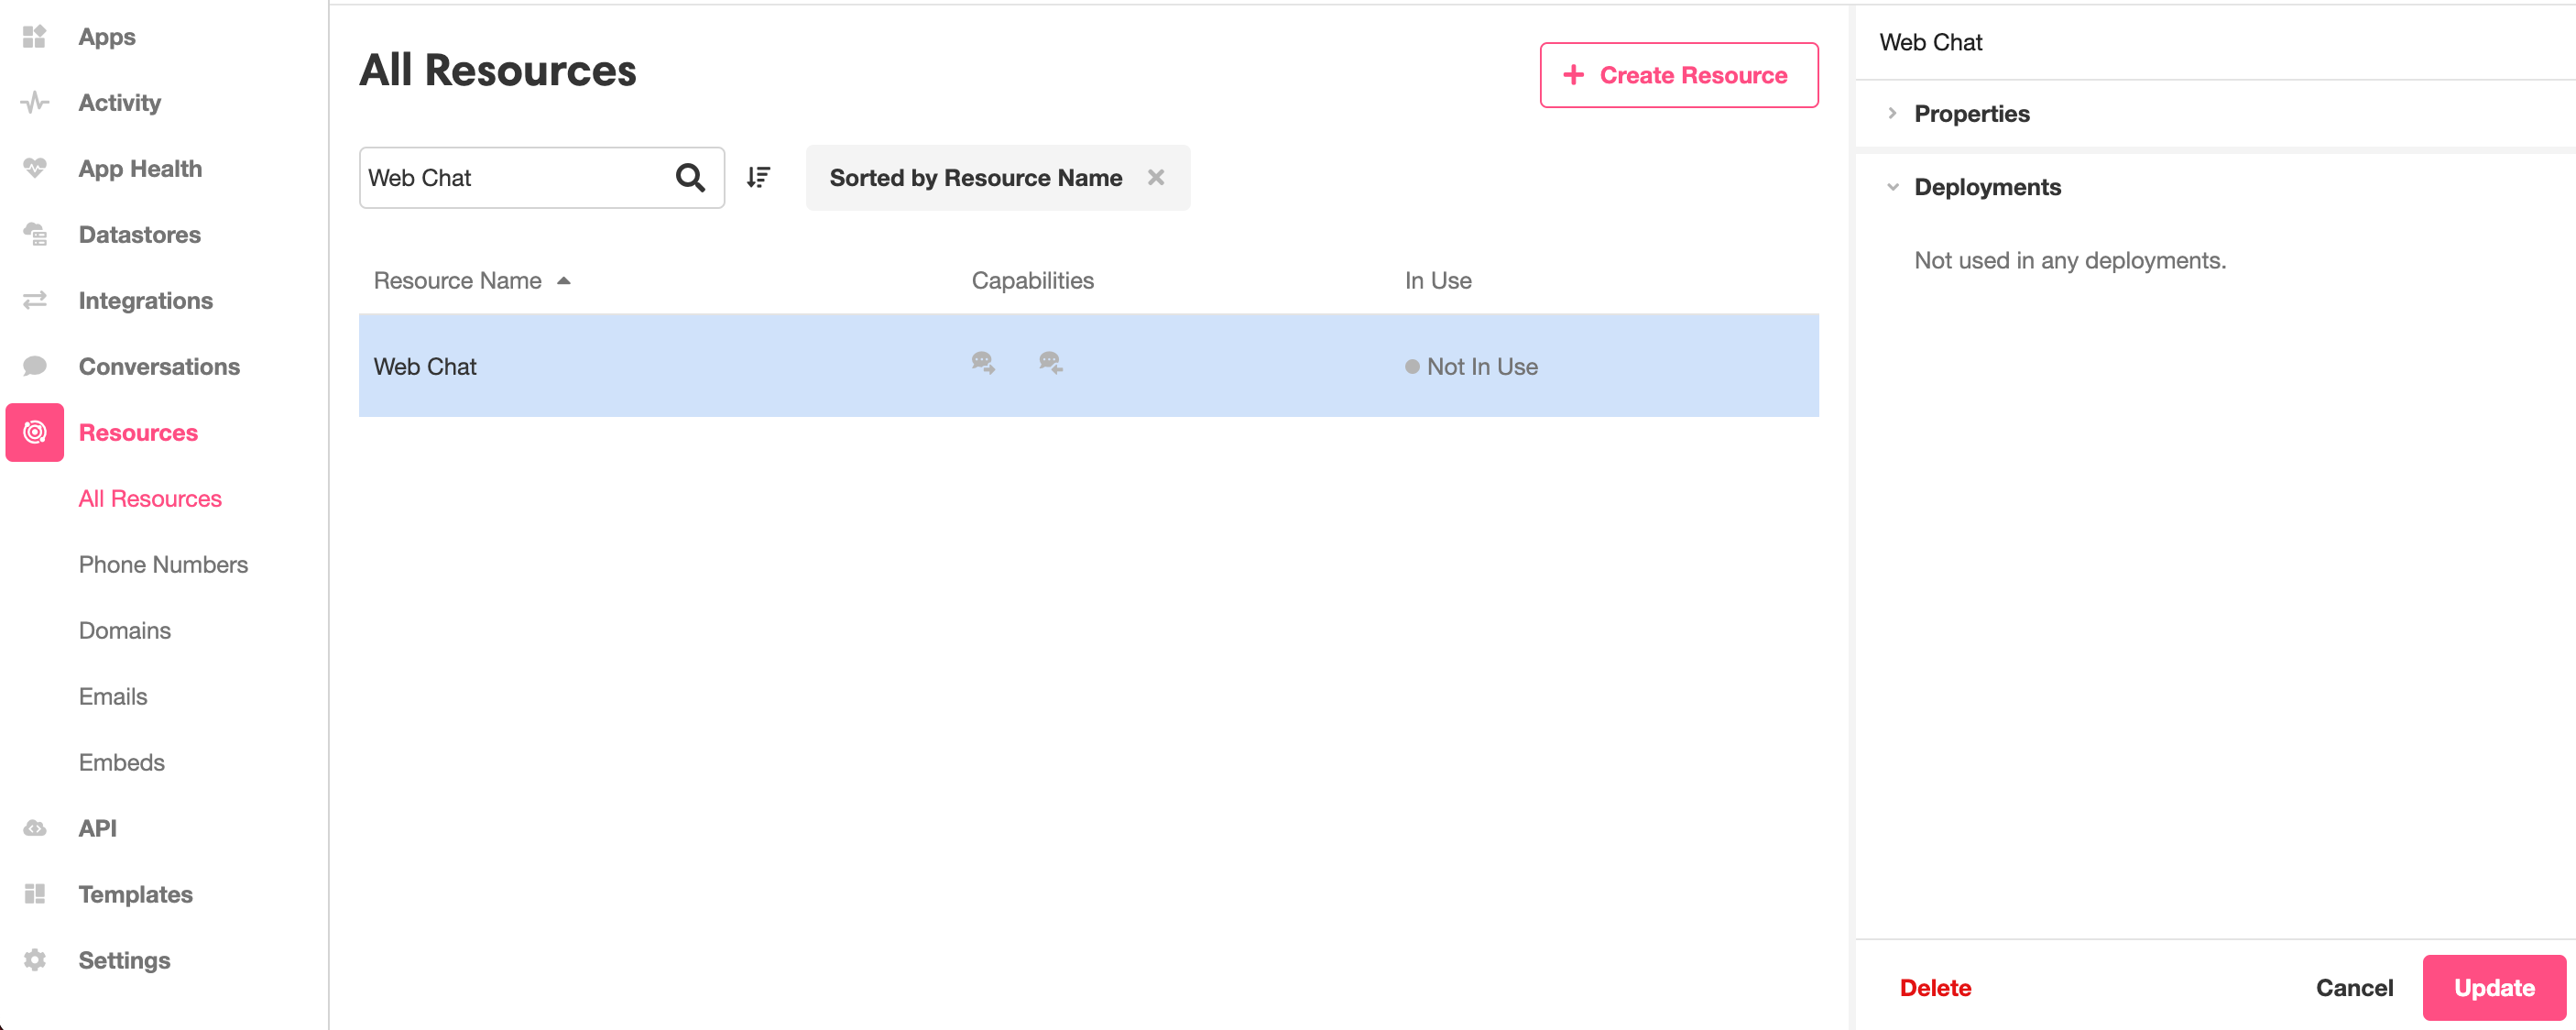
This should correspond to new Resource called "Web Chat", accessible in the Console, under Resources:
Configuring Conversation Hubs
Conversation Chat Bots are managed by Conversation Hubs, and so Conversation Hubs must be configured such that they can connect to all relevant channels. There are two relevant types of channels, here:
- Channel Resources - define the interfaces that end users can use to access the Conversation Chat Bot. These correspond directly to the SMS and Web Chat Resources discussed above.
- Routing Flows - establish connections to chat management systems. These define what system will be used to process incoming user messages and send replies. Routing Flows might point to Airkit applications that contain configured Answer Groups, or they might point to external systems, such as call centers, Salesforce, or Kustomer.
Creating and editing Conversation Hubs is done in the Console, under Conversations > Hubs. New Conversation Hubs can be creating by clicking on the 'Create Hub' button to the upper right, and established Conversation Hubs can be edited by selecting the relevant Conversation Hub from the Console Stage.
Channel Resources can be tied to a Conversation Hub by clicking on the '+' icon to the right of Channel Resources in the Inspector:
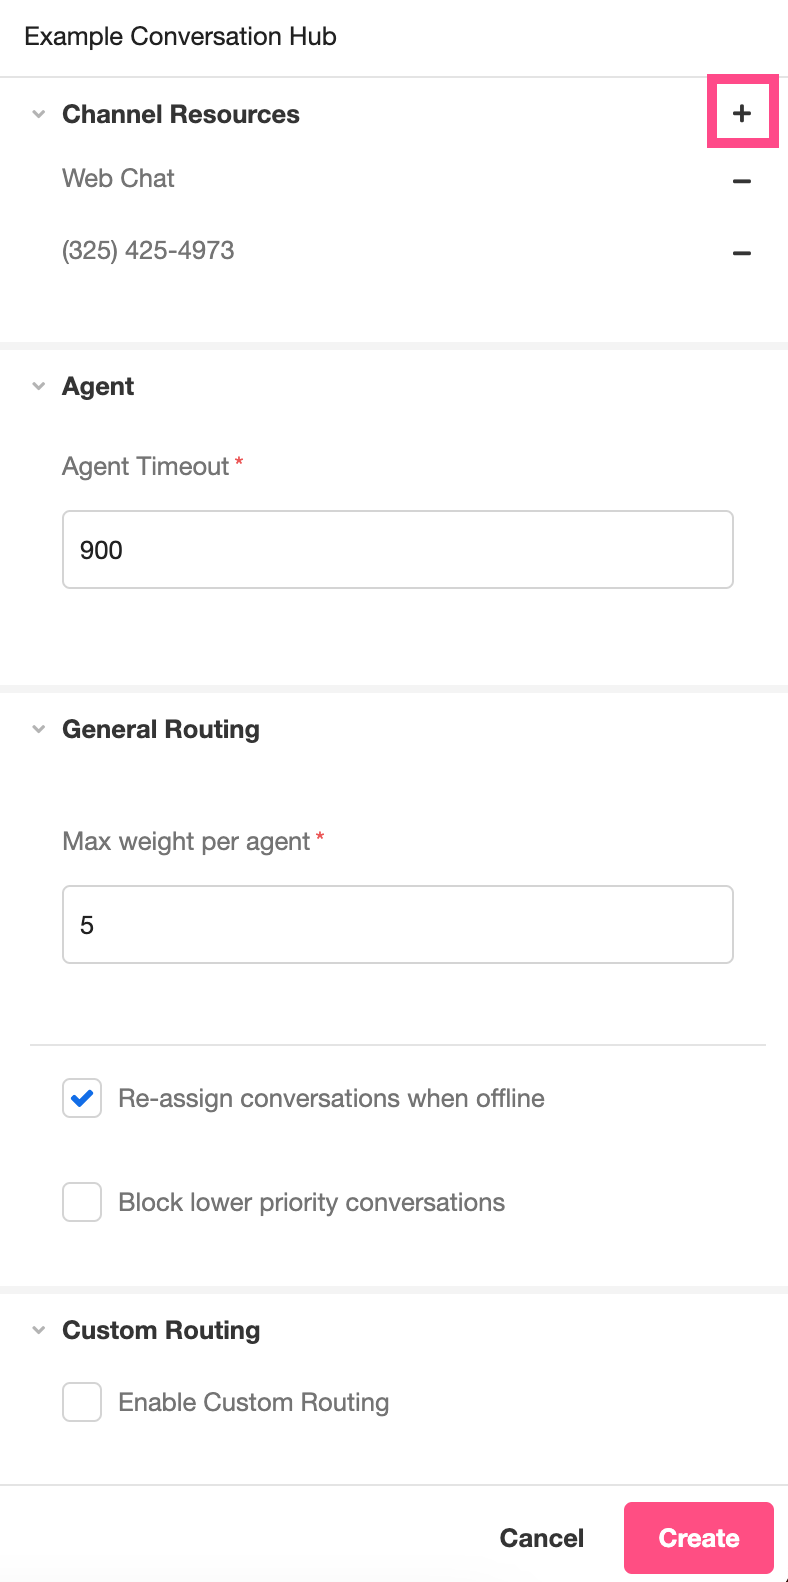
Assigning Channel Resources is the minimum that must be configured in order to create a viable Conversation Hub. For more on the Conversation Hub properties that can be edited in this part of the Console, see Conversations.
Routing Flows
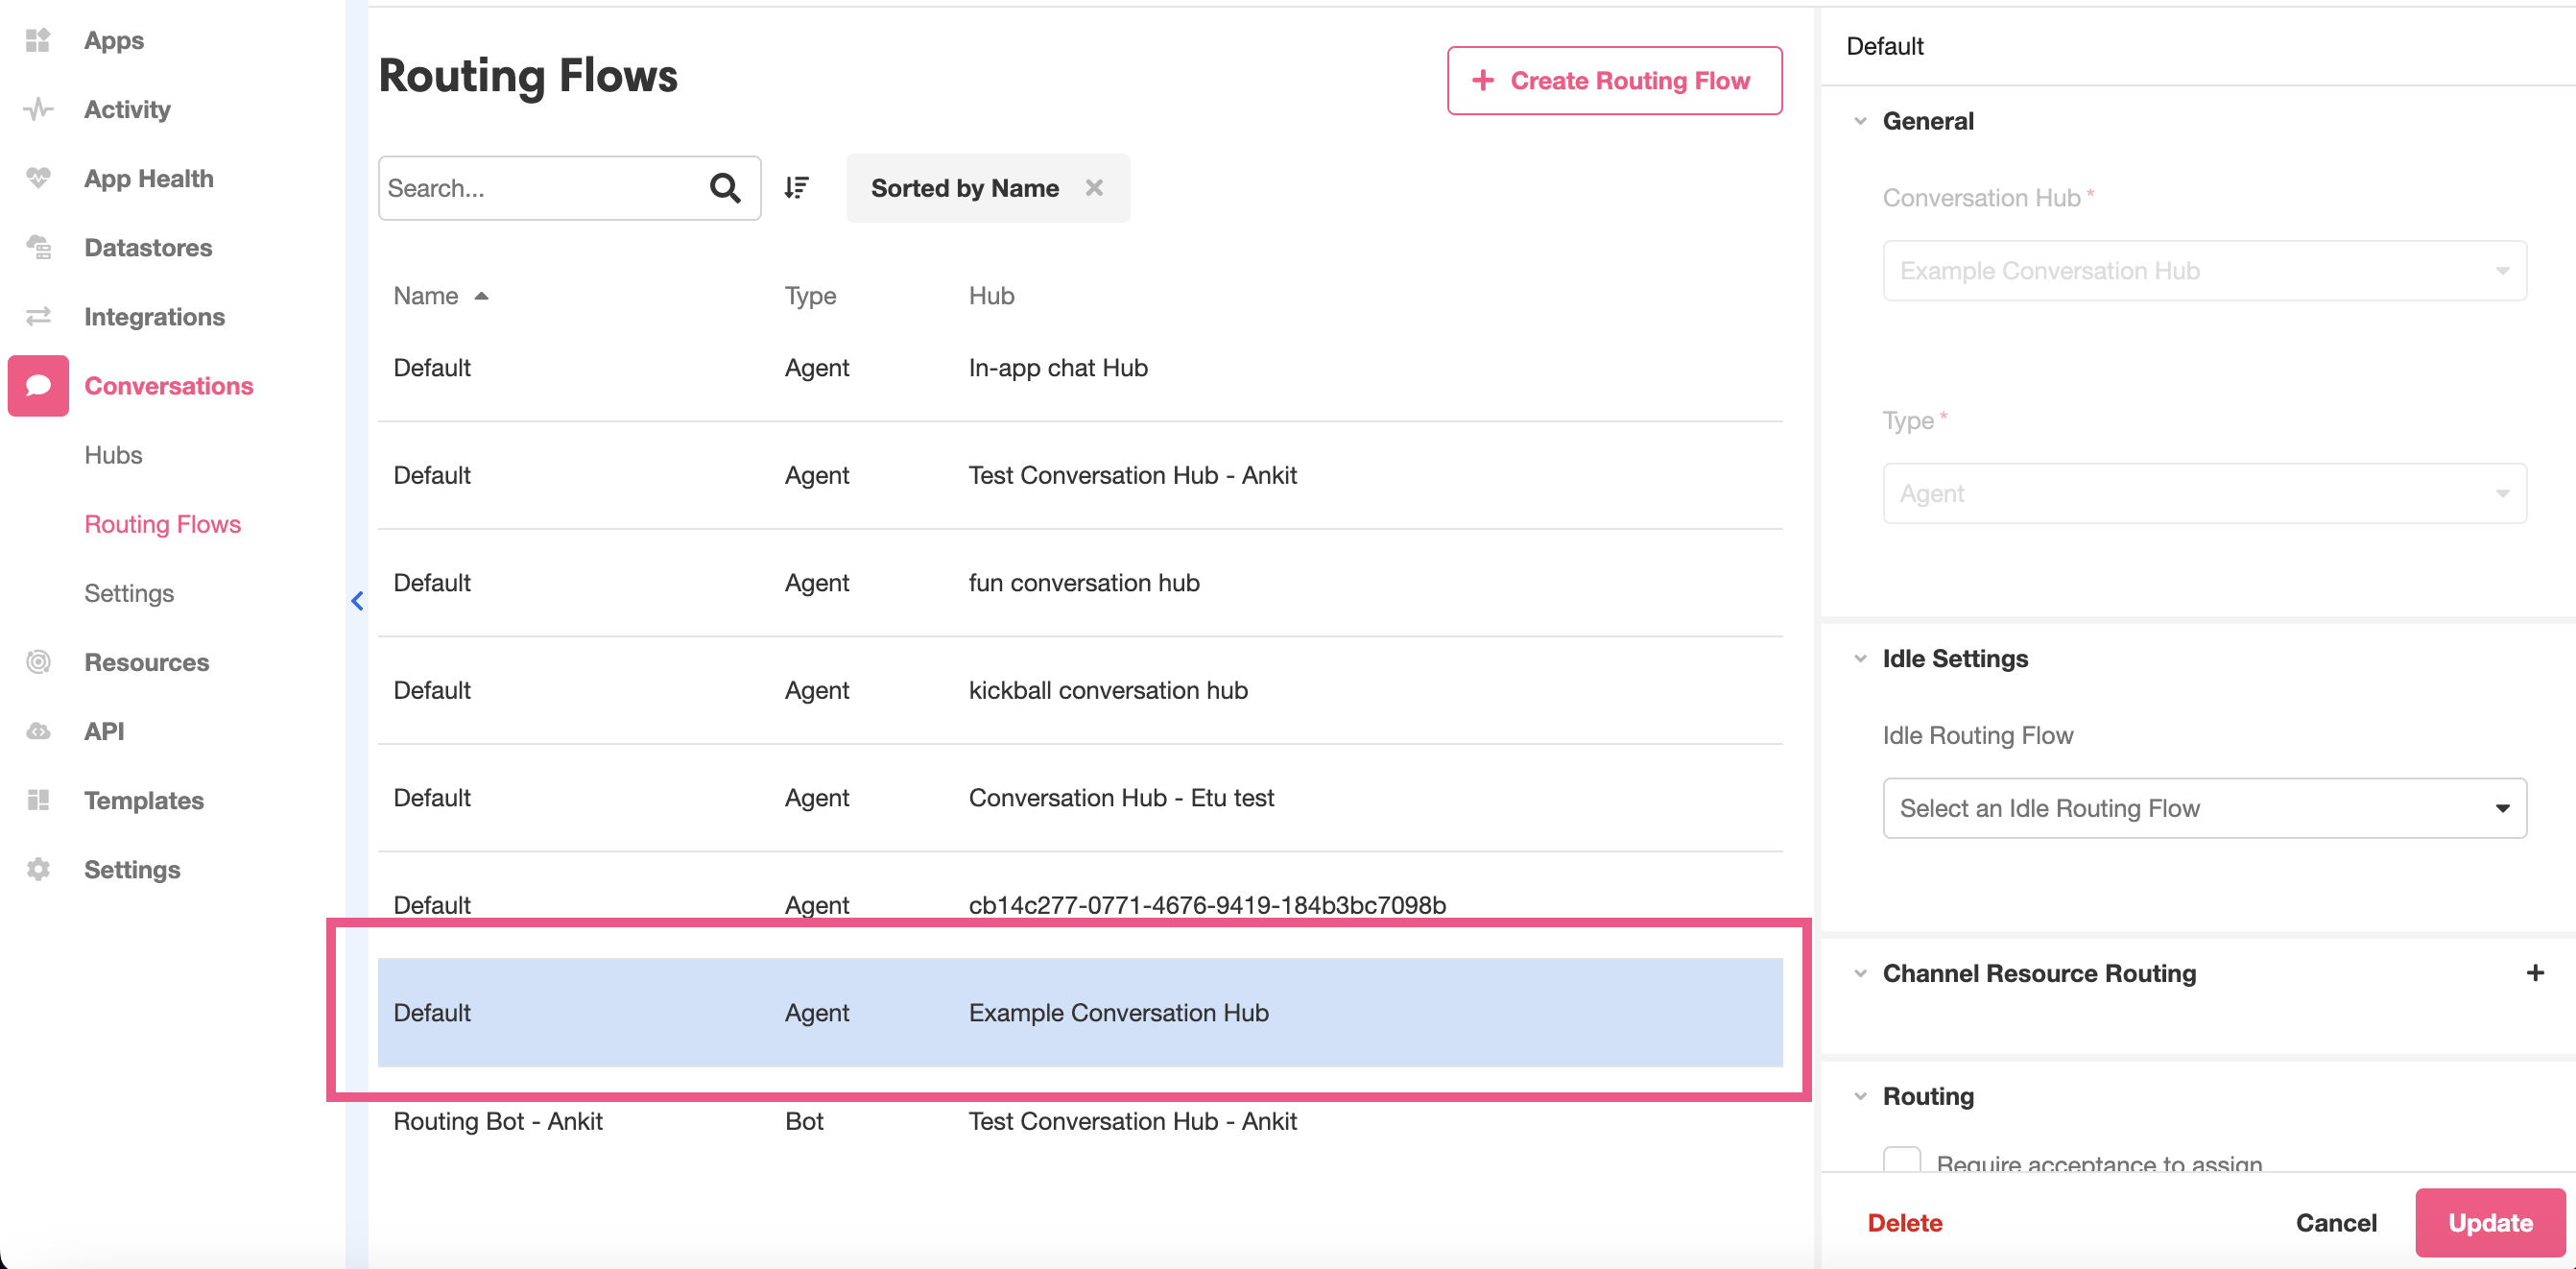
When a Conversation Hub is created, a single, default Routing Flow is automatically created. You can see this Routing Flow under Conversations > Routing Flows:
Routing Flows define where incoming user messages will be sent and how they will be responded to. There are three fundamental types of Routing Flows:
- Bots, which process user messages and send responses based on the automatic logic flow defined by Answer Groups
- Agents, which send user messages to human beings who work in a call center and allow them to craft custom responses
- Relays, which send user messages to be processed by external systems like Salesforce or Kustomer
Note that the default Routing Flow created here is an Agent. A Conversation Hub, however, can contain arbitrarily many Routing Flows of all three types.
Configuring Bots
Bot type Routing Flows are an important part of most Conversation Chat Bots, as they allow parts of the Conversation to be automated internally. Most Conversation Chats begin by sending the end user to a Bot type Routing Flow to handle the initial pleasantries and information-gathering.
A Bot type Routing Flow refers to an Airkit application, created in the Studio, in which an Answer Group has been configured. This Answer Group Management App should not have any UI components built into it, as those will not be accessible to the Conversation Hub. The Answer Group Management App should consist only of an Answer Group that defines Conversation Logic. For more on how to configure Answer Groups, see Setting Up Answer Groups.
This Answer Group Management App must be published before it can be used as a Bot type Routing Flow.
Configuring Agents
Agent type Routing Flows send Conversations to be managed by a a human agent. In practice, this means that they direct user messages to a phone number that the Agent can receive and send messages from.
Each Agent type Routing Flow is associated with a singe phone number, which must be bought from Twilio and then configured as a Resource. For more on associating Twilio numbers as Resources, see Connecting Twilio Numbers. Once a phone number is properly configured as a Resource, you will be able to select it under the Channel Resource Routing upon creating an Agent type Routing Flow.
The phone numbers used to define Agent type Routing Flows can NOT be the same as the phone numbers used to define the Channel Resources that interface with end users. The phone numbers associated with Agents define how agents can interact with the conversation, while the phone numbers associated with Channel Resources define how end users can interact with the conversation.
Configuring Relays
Relay Type Routing Flows send the conversation to an external chat management platform. There are two external chat management systems that Airkit currently supports: Salesforce and Kustomer. For more about what is required from your chat management platform of choice, see Salesforce Relays or Kustomer Relays as applicable.
Finalizing Routing Flows
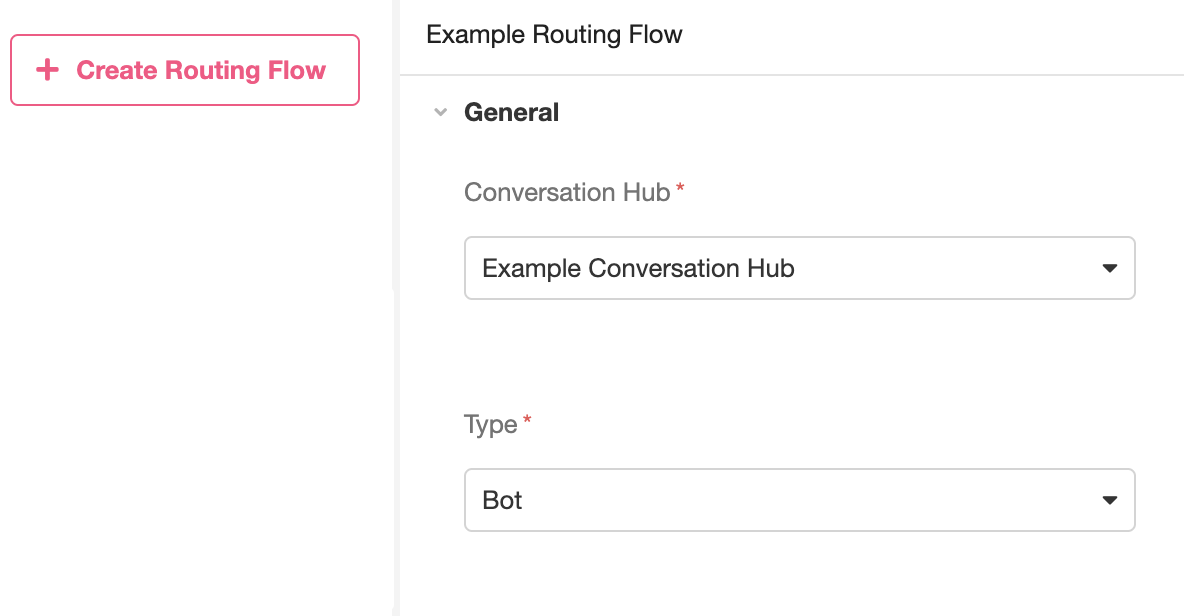
Once you have configured the resource you will be tying to your Bot, Agent, or Relay, you can use it to define a Routing Flow by navigating to Console >Conversations > Routing Flows and clicking on the '+ Create Routing Flow' Button. This will open up the interface to define a Routing Flow in the Console Inspector.
Routing Flows must be tied to a Conversation Hub upon creation. To tie a Routing Flow to a previously-created Conversation Hub, select the relevant Conversation Hub from the dropdown menu under General > Conversation Hub. You can then select the type of Routing Flow you want to create under General > Type and fill out the fields that become available from there.
Once all your Routing Flows have been configured, you will have finalized your Conversation Hub.
Conversation and Trigger Management App
Once your have a fully-configured Conversation Hub to manage your Conversation Chat Bots, you will need to tie that to an application that will handle Conversation Triggers and manage the interfaces that will be used to access the platform. This Conversation and Trigger Management app can NOT be the same as the Answer Group Management app. The systems behind Routing Flows must always be external to the Conversation and Trigger Management app.
To create a Conversation and Trigger Management App, create a new application and open it in the Studio. You will then construct this application such that:
- It is tied to the Conversation Hub.
- It has the relevant Answer Group Management App(s) configured as External Application Deployments.
- It fires the Start Chat Bot for Conversations Action when applicable.
- It manages the UI required for end users to interact with the Conversation Chat Bot.
Conversation Hub Implementation
Like all Resources, Conversation Hubs are are configured under Settings. You can configure a Conversation Hub, as well as its associated Routing Flows and Channel Resources, in the Settings section:
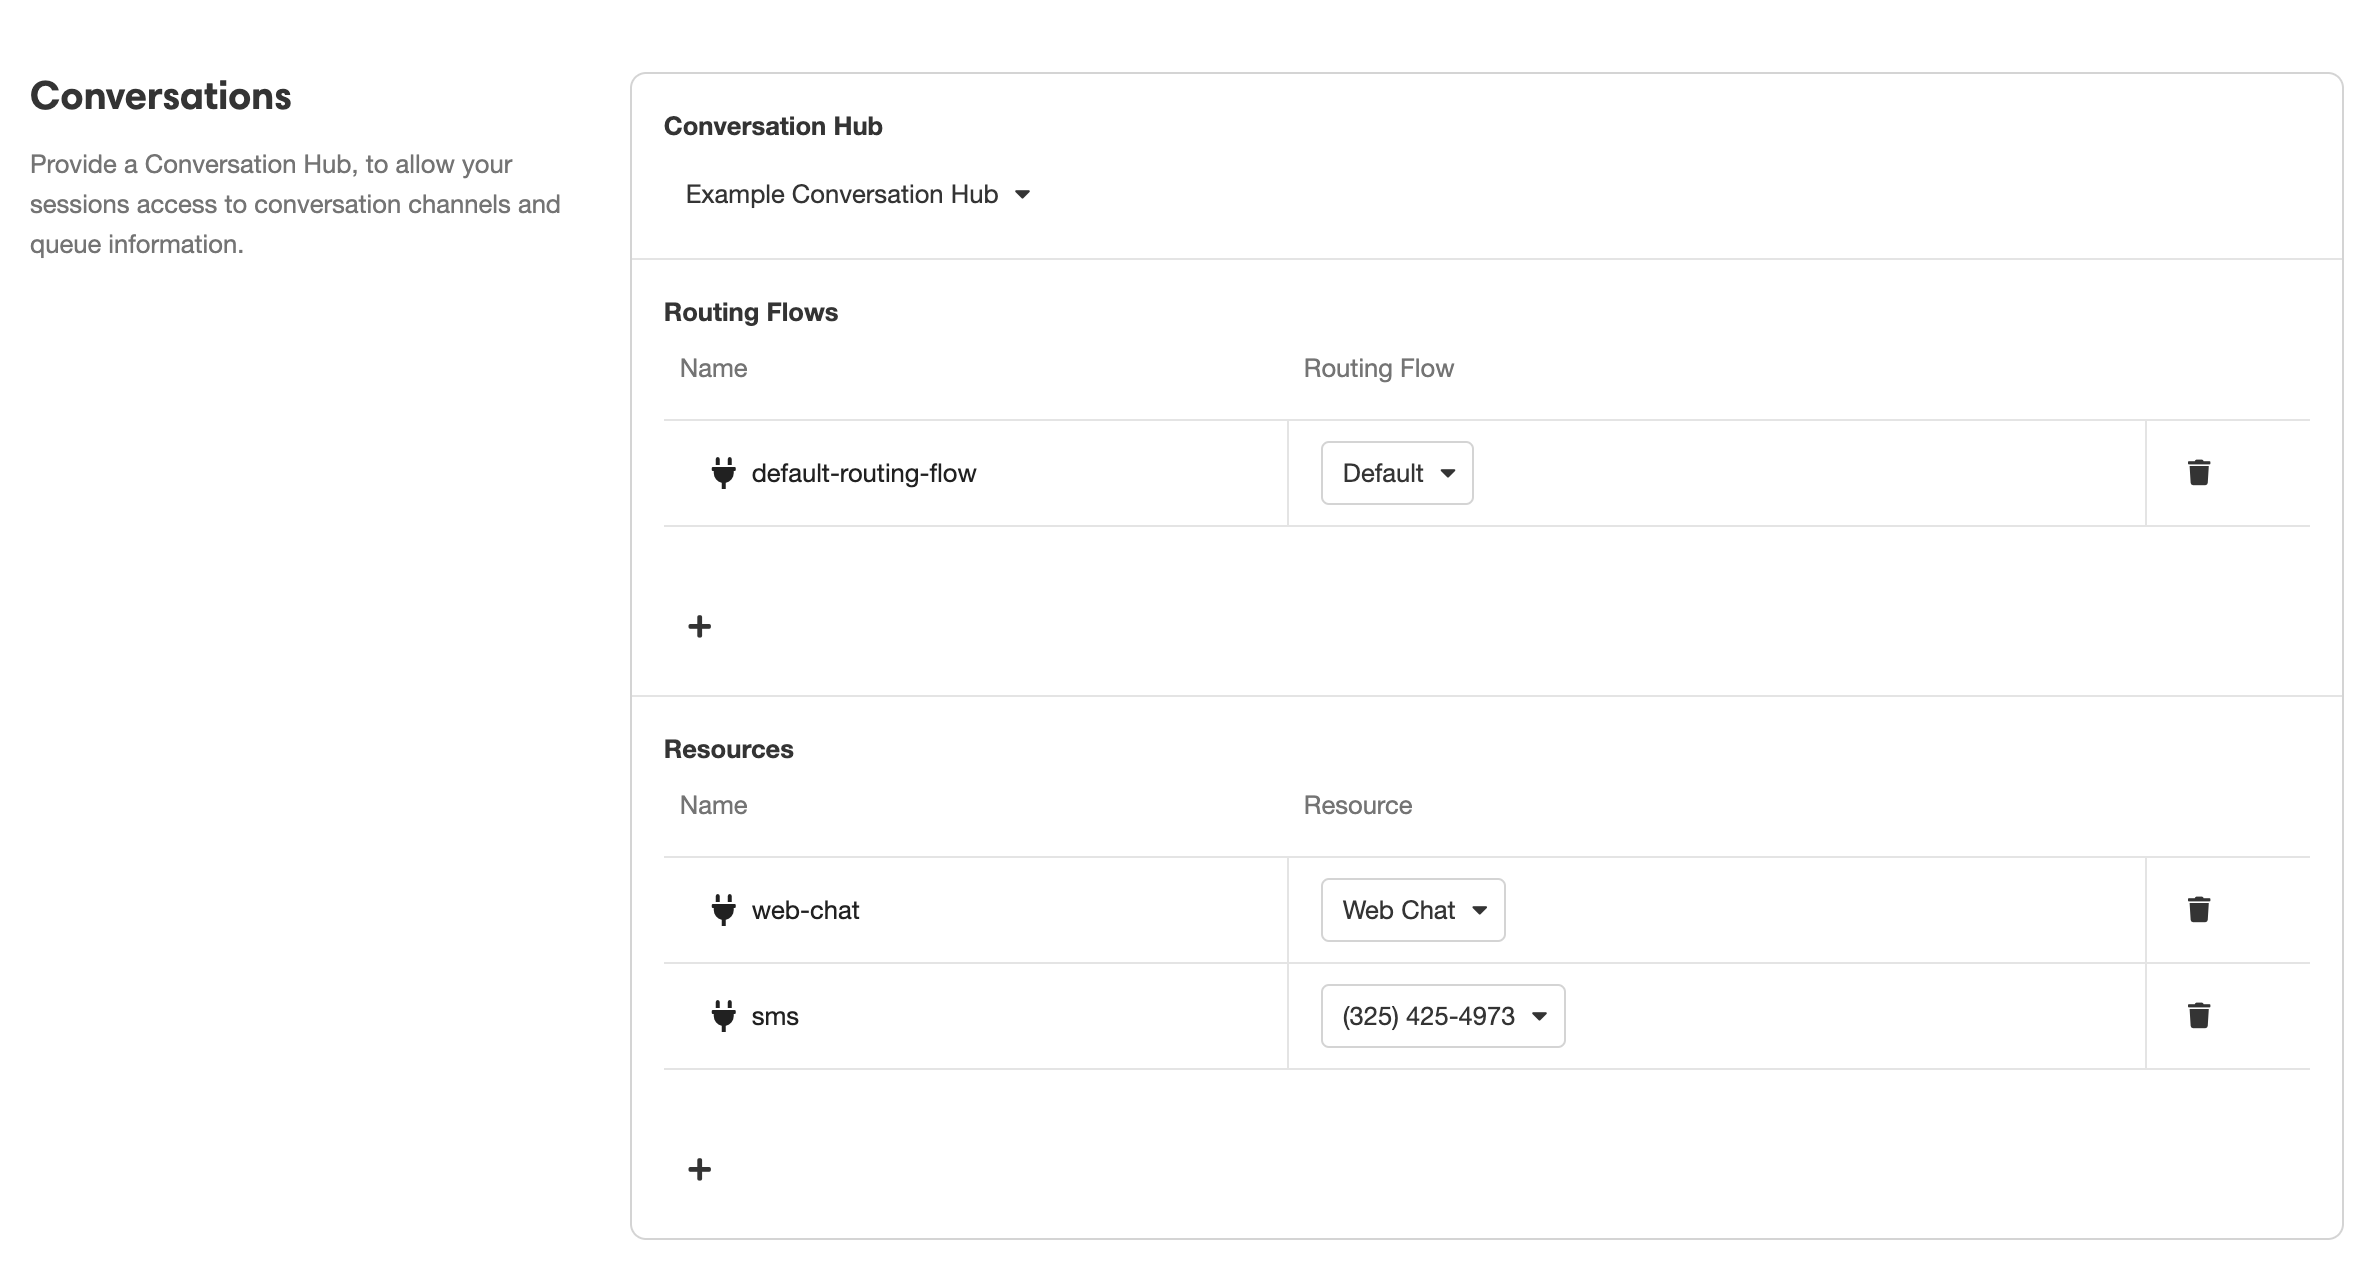
Once properly configured, the Channel Resources (defined here under "Resources") can be used to define the Resource ID when calling on the the Start Conversation Chat Bot Action.
External Application Deployments
When Configuring a Conversation Chat Bot that relies on the logic defined by Bots, you will need to configure the associated app(s) under Settings > External Application Deployments.
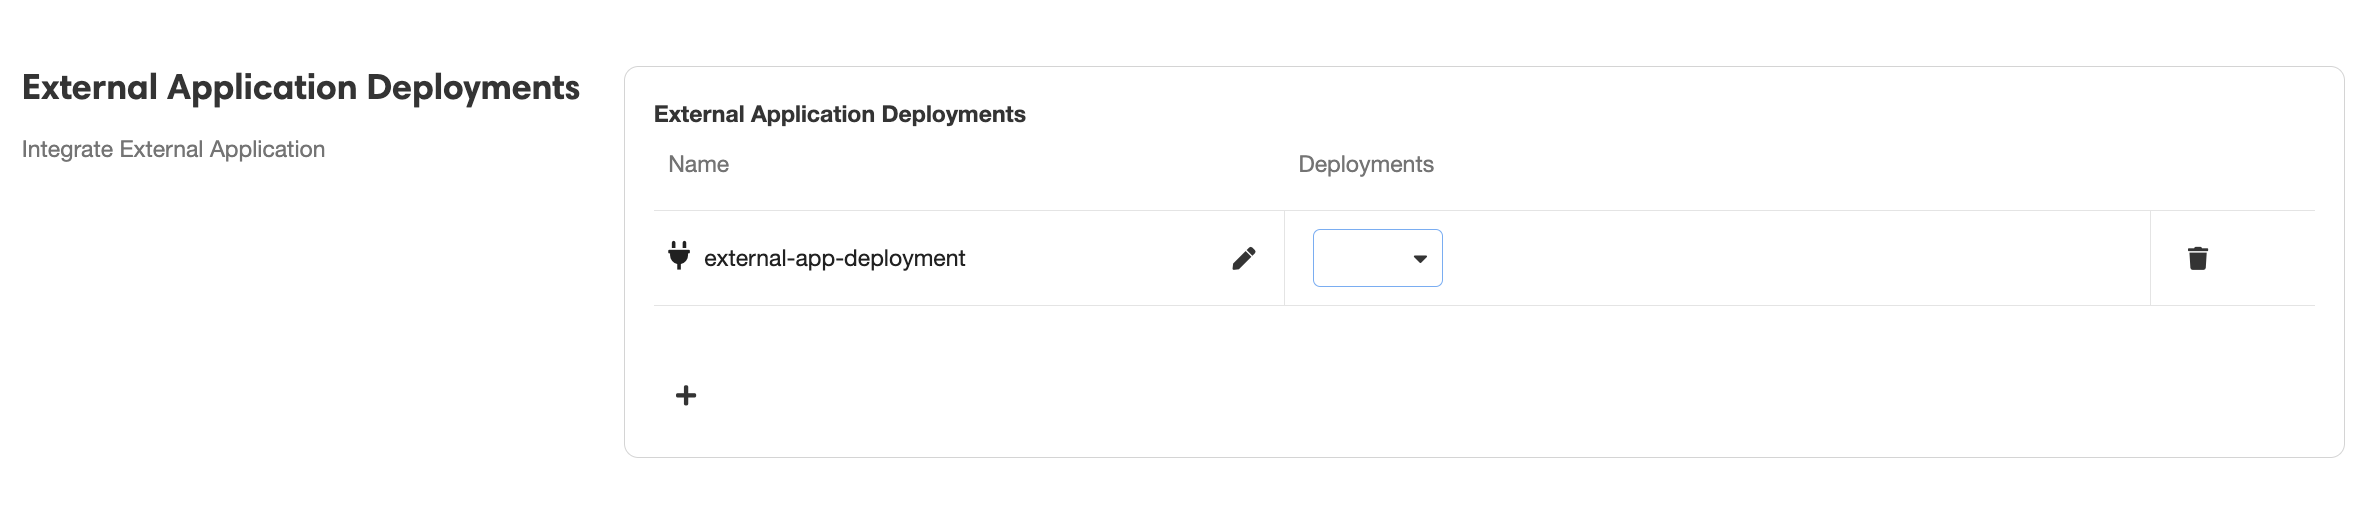
Answer Group Management Apps must be deployed before they will be available for selection here.
Start Conversation Chat Bot Action
A Conversation Chat Bot can be triggered from any point in an application by using the Start Conversation Chat Bot Action. The Deployment ID field should correspond with an External Application Deployment discussed above. The Bot described will be the Routing Flow that users are initially sent to upon triggering the Conversation Chat Bot.
Chat Web Control
If you want the Conversation Chat Bot to be accessible through a web app, the relevant Web Page must contain a Chat Web Control. This will serve as an interface for end users to interact with the Conversation.
Embedding Conversations into Existing Websites
If you want to embed the Conversation Chat Bot into an existing Web Page, your application must contain a Chat Web Control, and your application Triggers must be configured such that your application can be parsed by the AirkitWebSDK, the tool that streamlines the process of embedding your Airkit apps into your existing websites.
Updated 3 months ago