SAML Authentication
Configuring SAML for Airkit Apps
This article will cover how to configure SAML Authentication for end-user applications made in Airkit. This is a separate matter from configuring SAML Authentication to allow Builders to access the Console and Studio within your Organization. For more on configuring SAML authentication for Console and Studio Access, see SAML SSO for an Organization.
Configuring SAML in the Console
Establishing and Downloading the SAML Metadata File
In order to configure SAML access to Airkit applications, the SAML Assertion Metadata must be generated from the Identity Provider (IdP) of choice. It will be used to share configuration credentials between the IdP and the Service Provider (SP). The IdP metadata usually contains the IdP certificate, the entity ID, the redirect URL, and the logout URL.
Airkit requires the Metadata File to be formatted as an XML file with the following fields:
<md:SingleSignOnService Binding="urn:oasis:names:tc:SAML:2.0:bindings:HTTP-Redirect"and/or<md:SingleSignOnService Binding="urn:oasis:names:tc:SAML:2.0:bindings:HTTP-POST"<md:NameIDFormat>urn:oasis:names:tc:SAML:1.1:nameid-format:emailAddress</md:NameIDFormat>; email is ideal butuser_lookup_attributecan be used if the user’s email is on a different fieldmd:EntityDescriptortag withentityIDattributemd:IDPSSODescriptortagX509Certificatewith cert inside
Uploading the SAML Metadata File
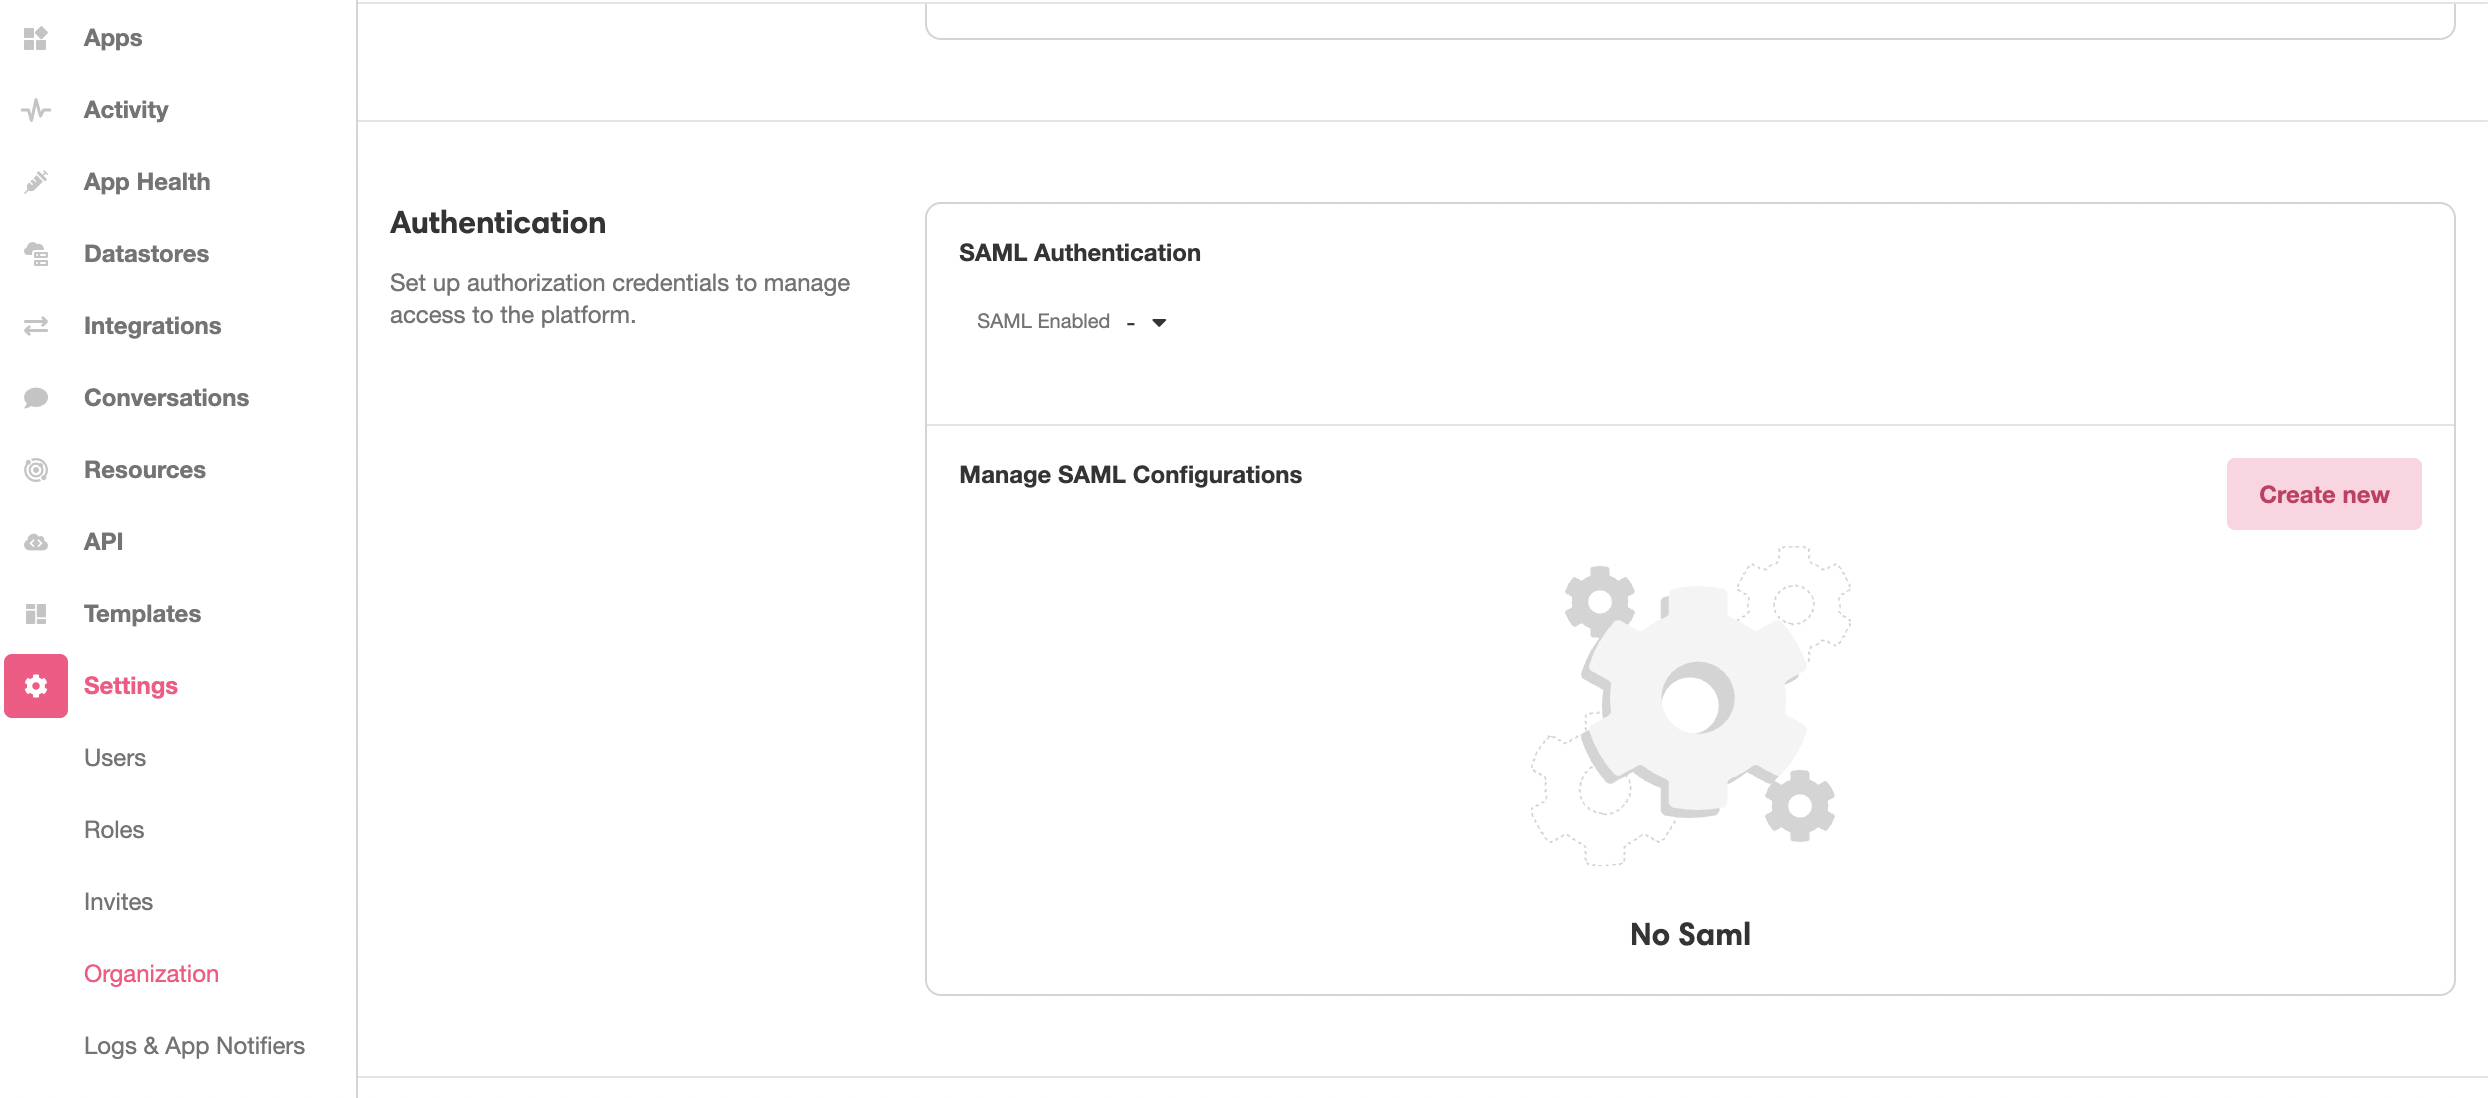
This SAML Metadata file needs to be uploaded into the Console in order to to define the IdP that will be receiving the SAML request. This is done under Console > Settings > Organization. In the Authentication section, click the Create new Button:
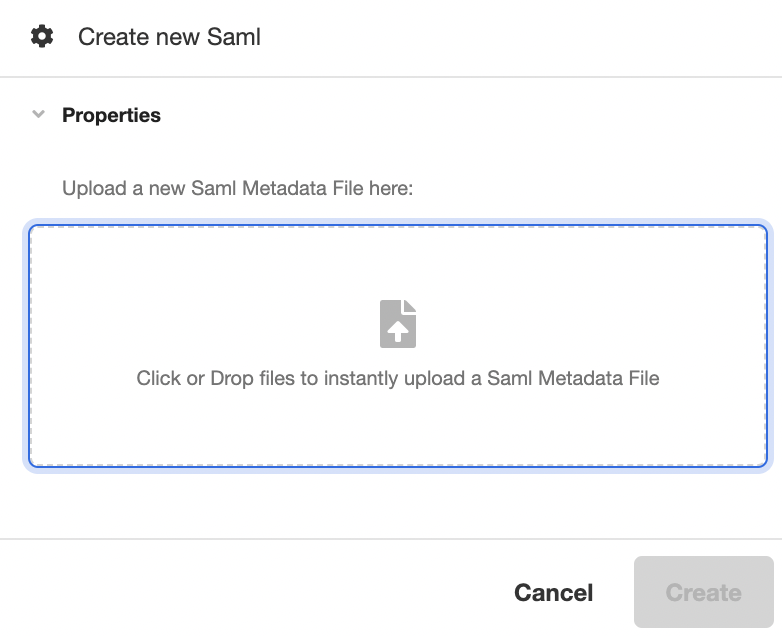
This will open the Inspector. Upload the SAML Metadata file in the space provided under Properties, and then click Create to generate a new SAML configuration out of the uploaded SAML Metadata file:
Configuring Your SAML Access
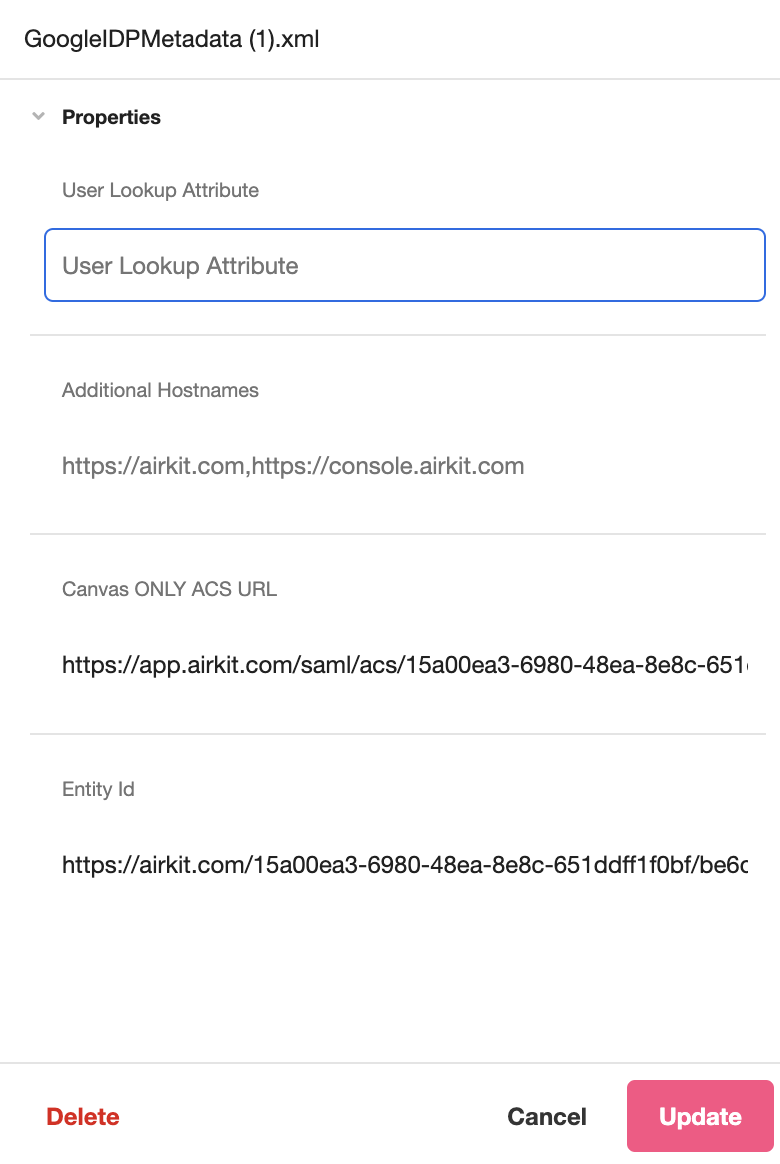
After uploading a Metadata File, you can view and configure properties associated with your SAML Authentication process.
- User Lookup Attribute (editable): This field is used when configuring SAML for Organization authentication. For more on configuring SAML authentication for Console and Studio Access, see SAML SSO for an Organization.
- Canvas only URL ACS (editable*): The Starting Link of the application that requires SAML authentication.
- ACS (static): The ACS (Assertion Consumer Service) URL that defines the endpoint where the IdP will redirect users after they are authenticated. This is defined in the SAML Metadata File and cannot be edited in the Inspector.
- Entity Id (static): The globally unique name for the SAML entity, i.e., your Identity Provider (IdP) or Service Provider (SP). This is defined in the SAML Metadata File and cannot be edited in the Inspector.
Configuring SAML within an Application
Connecting Your Application with the Metadata
To require SAML authentication in order to access an application, open the app in the Studio and toggle over to Settings. Under Global > App Authentication Type select Secure App, and make sure the Authentication Method is set to Custom. Finally, click the dropdown under SAML and select the relevant XML file.
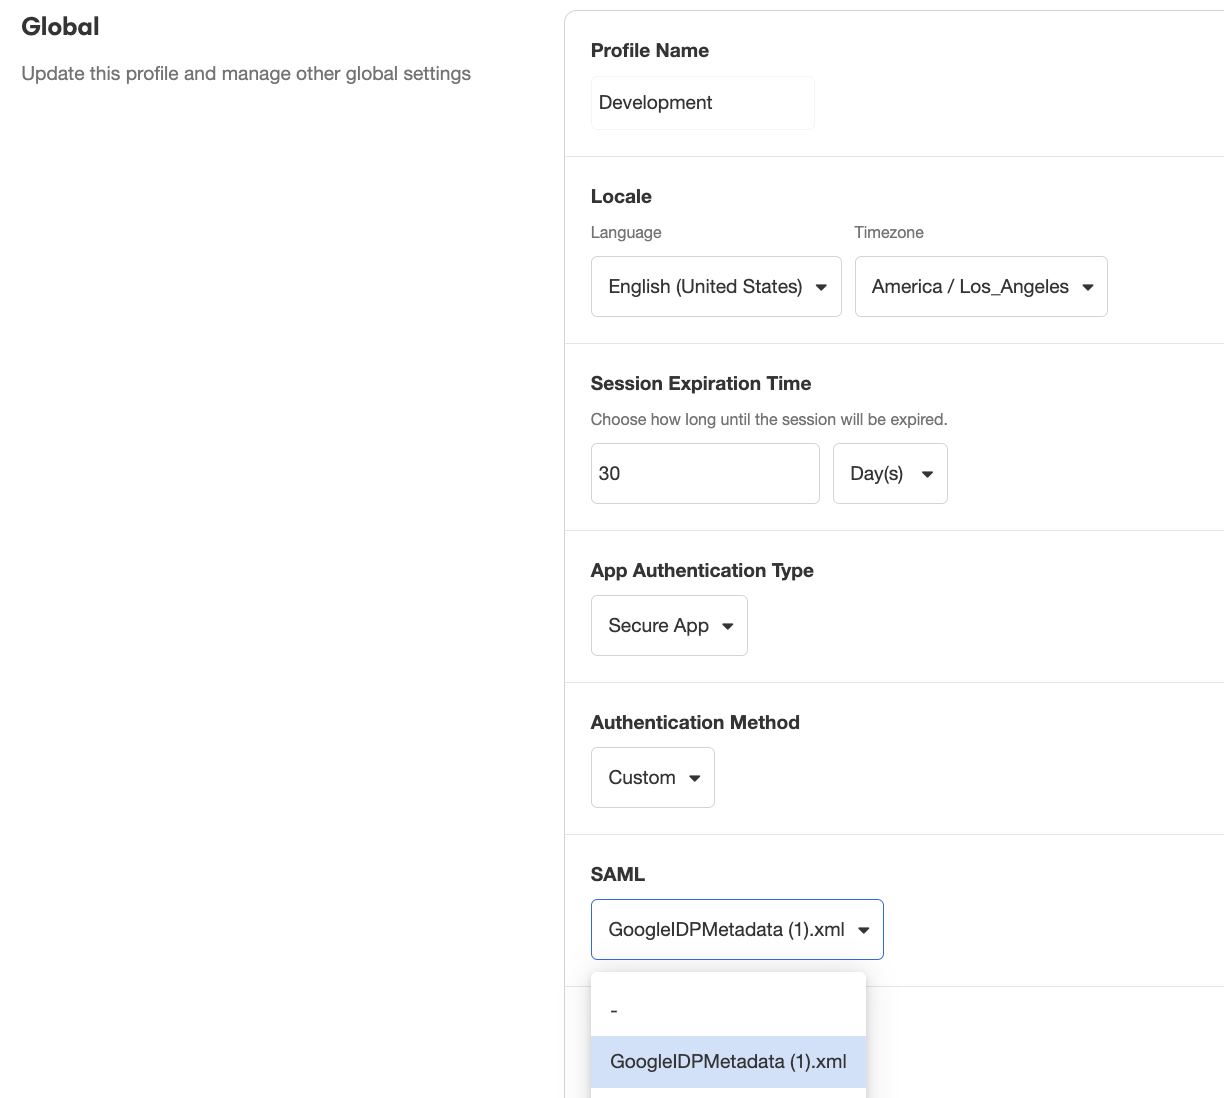
All SAML Metadata Files that have been configured in the Console will be available for selection.
Connecting the IdP to the Application
Once you have completed the content of the application, save your changes publish your application.
The Starting Link is the URL that your IdP should redirect users back to after they authenticate. The designation of this URL is different in each IdP. For instance, Okta calls it “Single Sign On URL,” Auth0 calls it the “Application Callback URL,” and OneLogin calls it the “ACS (Consumer) URL”. Please refer to the documentation and settings for your specific IdP for where to provide this URL.
After publishing your application and saving the URL to the IdP, users should be redirected to authenticate before using the application.
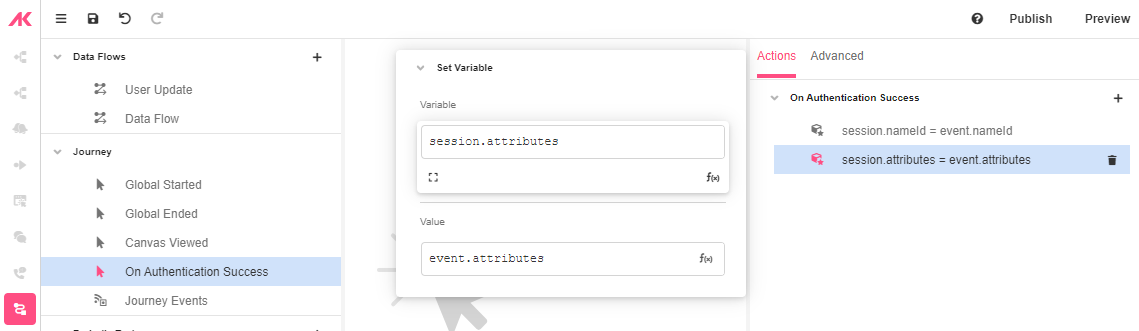
On Authentication Success
After setting up you OAuth authentication, go to Connections Builder and click on the On Authentication Success Event.
The “On Authentication Success” Event will run when the user is authenticated. On this Event, there is the event namespace where you can access data about the user.
For more on how to conceptualize Events, see Events.
Example SAML Authentication
Updated 3 months ago