Working with Custom Roles
In addition to providing out-of-the-box roles, Airkit also provides the tools to make Custom Roles. This allows access to data and editing permissions to be granted precisely and only to the people that require access to them. Here, we discuss how to create and manage Custom Roles. For more on why this is important and how you might use Custom Roles to ensure you are following security best practices, see Environmental Governance.
Enterprise FeatureThis feature requires an ENTERPRISE license. If you would like to enable this feature for your Airkit Organization, please contact your Airkit representative or contact [email protected].
Creating and Managing Custom Role Properties
Custom Roles are created in the Console, under Settings > Roles. A new Custom Role can be created by clicking on the Create new button on the top right:
This will open an interface to define a new Custom Role in the Inspector.
In addition to defining the individual permissions of the Custom Role, creating or managing a Custom Role requires defining the following properties:
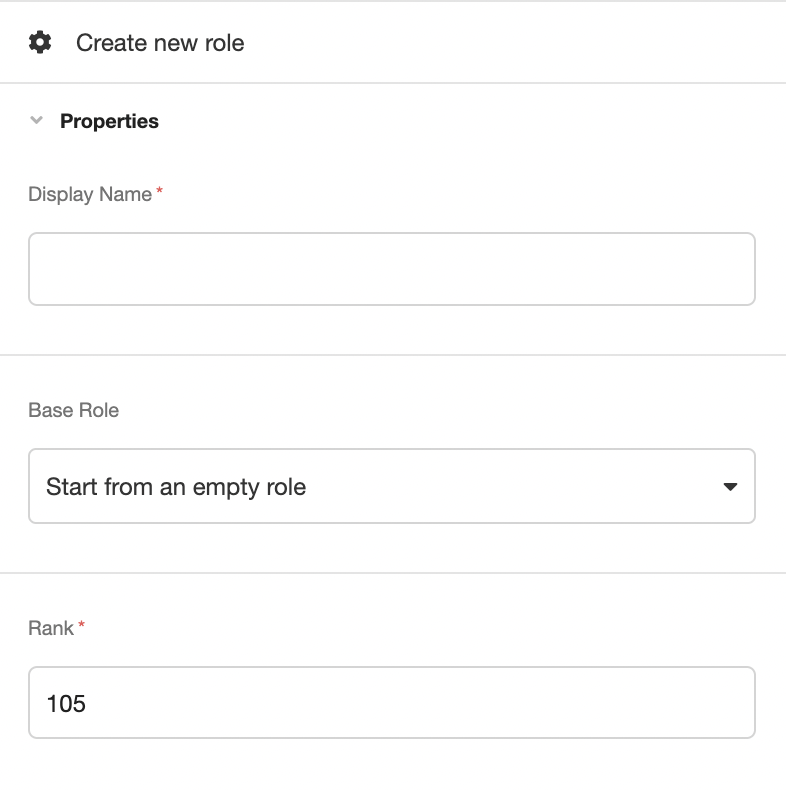
- Display Name (type:
string) - designates the name of the Custom Role. - Base Role (type:
string) - the base role that will be modified to create a Custom Role. - Rank (type:
integer) - the unique rank within the Org. If a rank has been assigned to an existing Custom Role, it cannot be reused. Lower numbers have higher priority in the case of multi-role conflict. Rank must be higher than 100.
Modifying the Base Role
When creating a new role, under the Base Role dropdown menu, you will have the option to select a base role. The options are:
- Start from an empty role
- Developer
- Agent

The base roles Developer and Agent have associated permissions. If one of these roles is selected, functionality can be removed to ensure the custom role only has the permissions required for the role. Functionality can only be REMOVED from a Developer or Agent role, not added to it. If a custom role requires functionality that the Developer or Agent role does not have access to, you will have to Start from an empty role
The base role Start from an empty role provides an entirely blank slate. This is the most versatile of the options, and it allows for the most granular customizations.
Extending Developers and Agents
Here is the functionality that is available for each role by default. Each listed functionality has the option to be removed from the base role to create a custom role:
| Developer | Agent | |
|---|---|---|
| **View App ** | ✅ | ✅ |
| Edit App | ✅ | ❌ |
| View Studio | ✅ | ❌ |
| View Console | ✅ | ❌ |
| View Organization | ❌ | ✅ |
| View Studio Portal | ❌ | ✅ |
| Export, import, and clone app | ✅ | ❌ |
| View Users | ❌ | ✅ |
| State Data | ✅ | ❌ |
When either Developer or Agent is selected as a base role, the permissions it has will auto-populate under the Permissions section of the Inspector. Removing the checkmark to the left of a permission will remove that permission from the custom role.
Starting from an Empty Role
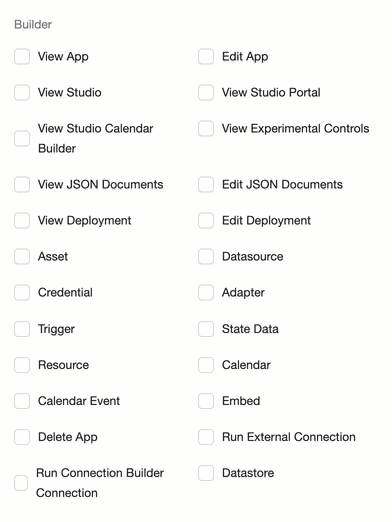
When Start from an Empty Role is selected as a base role, all possible permissions – include ones not encompassed by either the Developer or Agent role – will appear under the Permissions section of the Inspector. By default, none of these permissions are selected. To create your custom role, you will need to select each permission you want the custom role to have access to.
Permissions are clustered according to the type of access they allow. For instance, under Builder, you'll find the permissions associated with building in the Studio. Hovering your mouse over the blank area to the right of each permission cluster will make a button visible that will allow to to select (or unselect) all permissions in the cluster:
Permissions can have cascading effectsSome higher-level permissions have cascading effects, meaning that they grant other, lower-level permissions even if the role does not explicitly include them. The permissions that include cascading permissions are View Studio, View Console, Admin Agent Console, and View Agent Console.
View all cascading permissions
Permission Cascading Permissions View Studio View App
Edit App
View Studio Configuration Builder
View Studio App Builder
View Studio Connection Builder
Run External Connection
Run Connection Builder Connection
View Studio Theme Builder
View Studio Asset Builder
Asset
View Studio Data Builder
Object Store
Edit Objects
List Objects
Edit Object Values
Query Object Values
Import Objects
Datastore
View Studio Calendar Builder
Calendar
Calendar Event
View Kit
Edit Kit
View JSON Document
Edit JSON Document
View EnvironmentView Console View Console Settings
View Console Organization
Notifier
Encryption Key
Whitelabel
Edit Organization
View SAML Metadata
Edit SAML Metadata
Modify Certificates
Delete Org Certificates
View Users
Edit Users
View Console Users
Invite
View Console API
API Key
View API Key
Edit API Key
Webhook
Apphook
View Console Apps
Edit App
Delete App
View Deployment
View Console Activity
Reporting Event
View Console Reports
Deploy
View Deployment
Edit Deployment
Trigger
View Console Resources
Resource
Embed
Adapter
Credential
Datasource
Datastore
View Console Integrations
View Kit
Edit Kit
Edit App Profile
View Environment
View Environment ContentsAdmin Agent Console Conversation Admin
Conversation Interaction
Admin Custom Profile
View Customer Profile
Edit Customer ProfileView Agent Console Conversation Interaction
View Customer Profile
Viewing and Editing Custom Roles
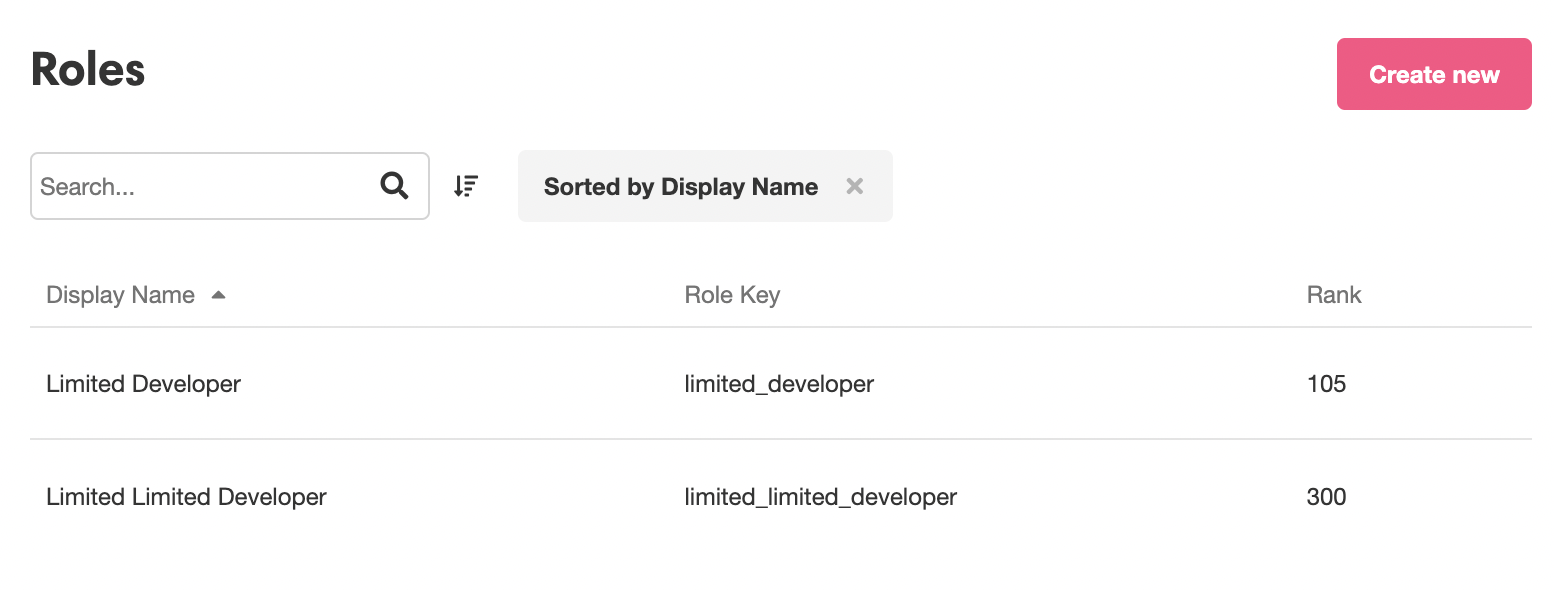
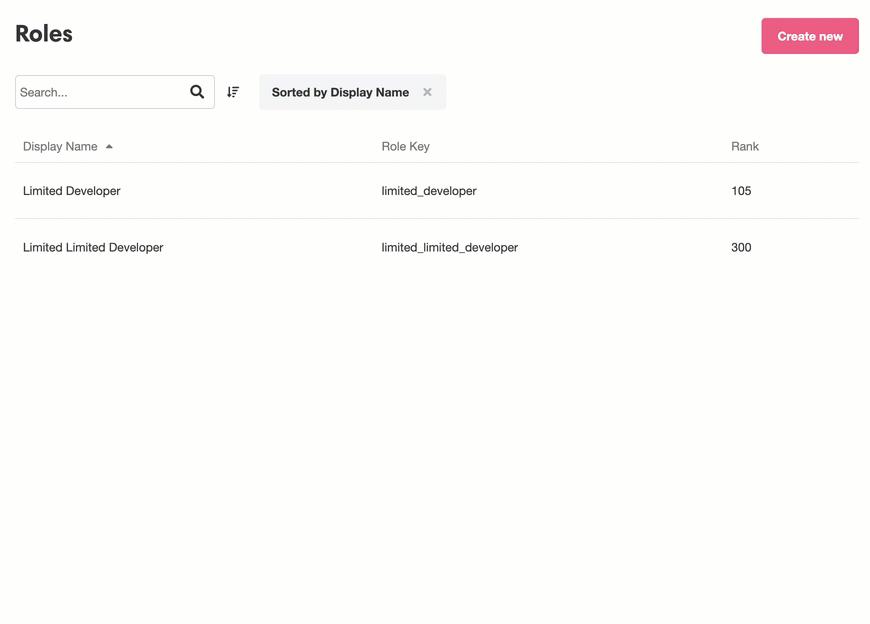
Once you have created a Custom Role, you'll see them displayed in the Console, under Settings > Roles
To edit an existing Custom Role, click where it appears in the Stage. This will open the Custom Role in the Inspector.
You can make changes to the Custom Role they same way you would create a Custom role from scratch. When you're done, click the Update button to save your changes.
Assigning User Roles
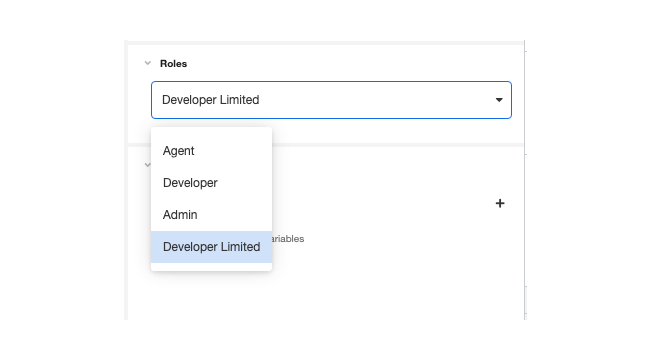
New users must be assigned a role upon creation. While creating a new role, under Role, select the relevant role for the new user from the associated dropdown menu. Any Custom Roles that have been created will also be available for selection. For instance, in the following example, the roles for selection include the three basic user roles ("Agent", "Developer", and "Admin") as well as a custom role ("Developer Limited"), which grants Developer permissions in only the Development and QA environments:
Viewing and Changing Assigned Roles
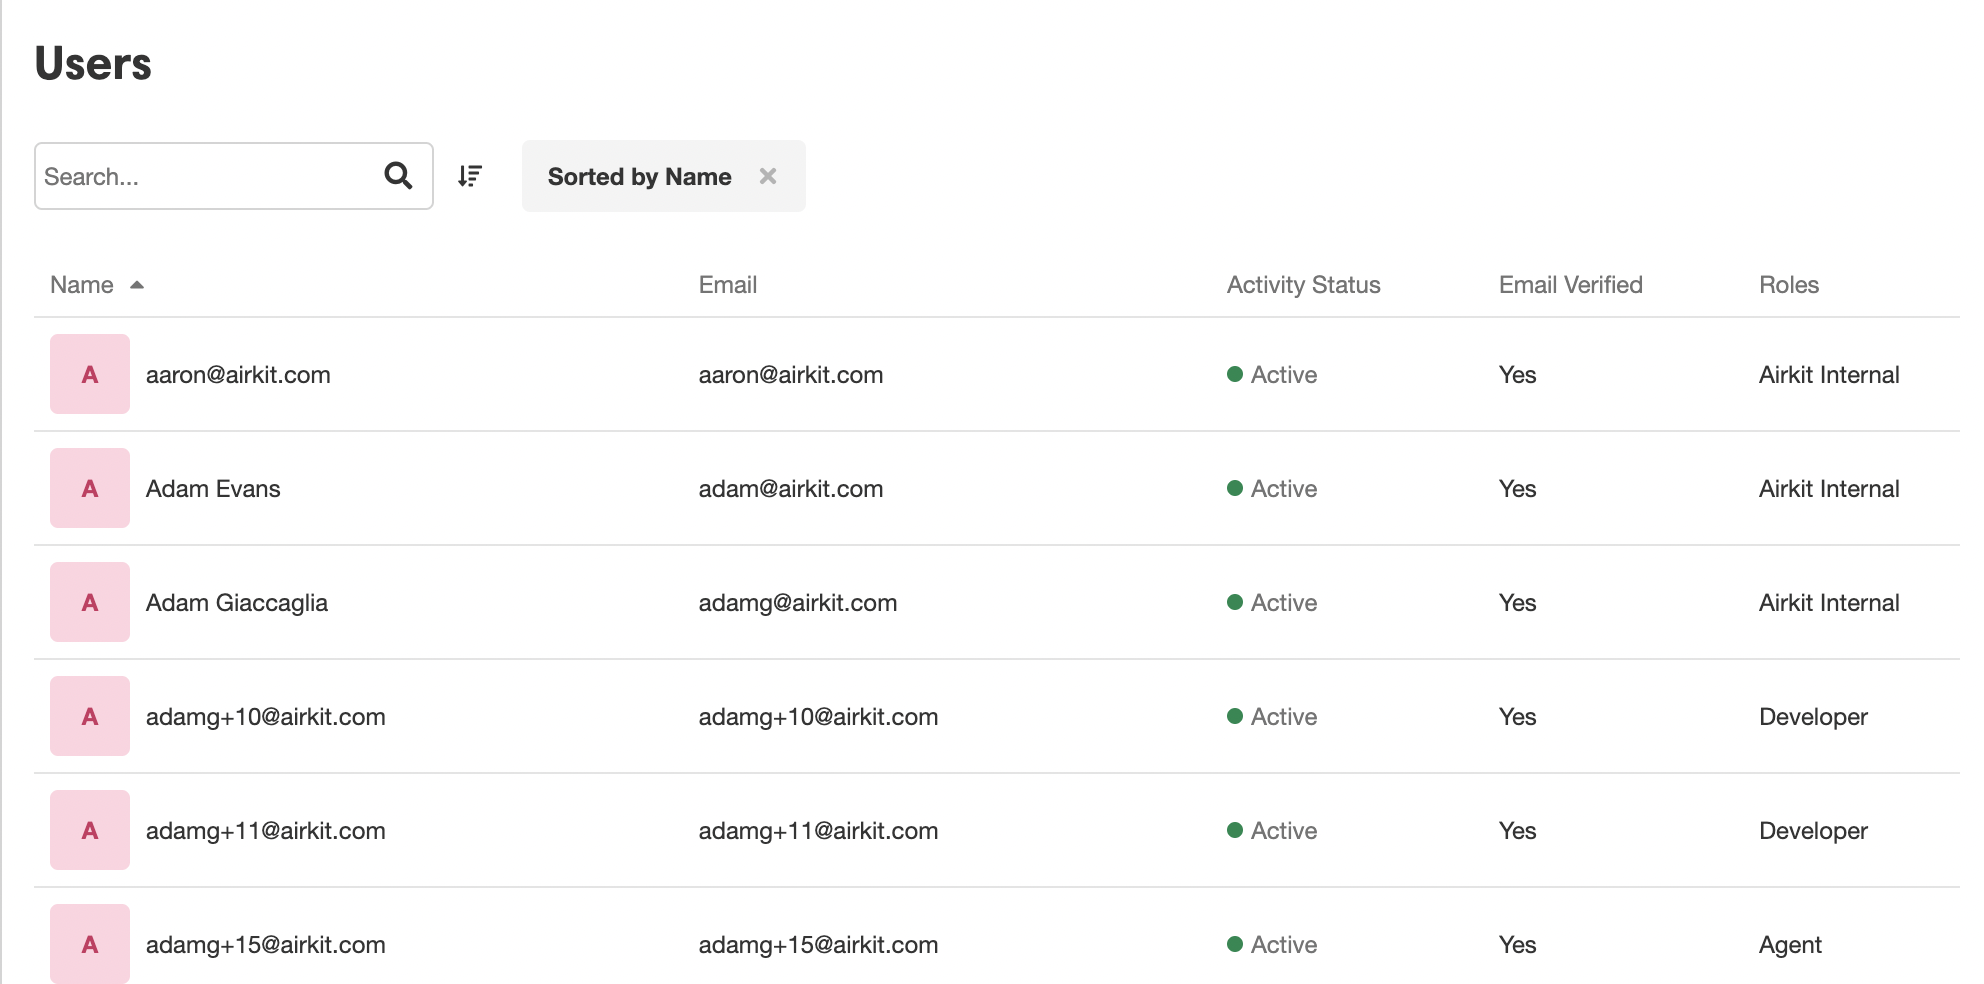
You can view the roles assigned to established users in the Console, under Settings > Users. Each user's role will be listed in the Roles column:
To assign a new role to a user, click on the relevant user to open their profile up for editing in the Inspector. Under Roles, select the new role you want to assign them from the dropdown menu. The available options will include all out-of-the-box roles as well as all Custom Roles that have been made. Once the new role has been selected, click the Update button.
This will update the role of the user and consequently update what the user has permission to access.
It is also possible to assign multiple roles to a single user, who will then be able to toggle between the different roles that they have been assigned. This makes it possible to share your screen without sharing sensitive information, as well as test Custom Roles and ensure that they are behaving as intended.
Assigning multiple roles to a single user
Assigning multiple roles to a user is part of changing their assigned role, which is done in the Console, under Settings > Users. To assign a new role to a user, click on the relevant user to open their profile up for editing in the Inspector. Under Roles, click on the '+' icon next to Assigned Roles to create an additional role:
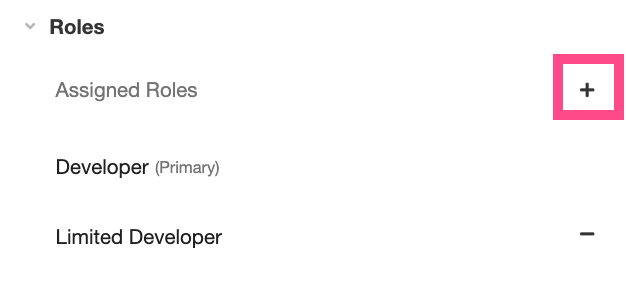
This will create a new role slot. Select the additional role you want to assign from the associated dropdown menu:
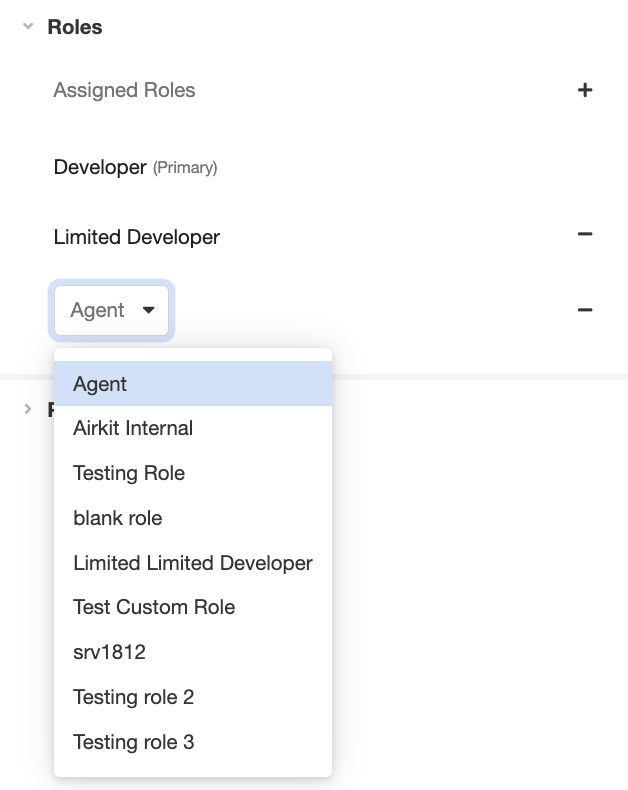
All available roles, both out-of-the-box and custom, will be available for selection.
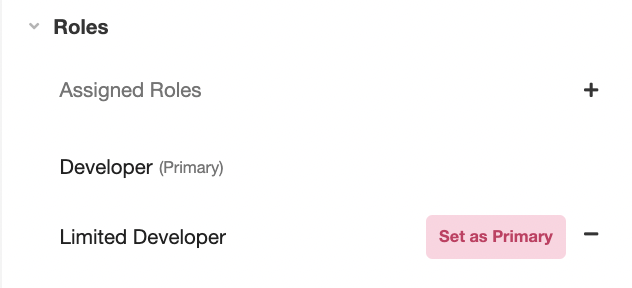
The Primary role is the role that the user will default to each time they log in. To set a new role as the Primary role, run your mouse over the desired role and click on the Set as Primary button that appears:
Once you've made your desired changes, click the Update button on the bottom right of the Inspector to ensure they are saved and applied.
Role Switcher
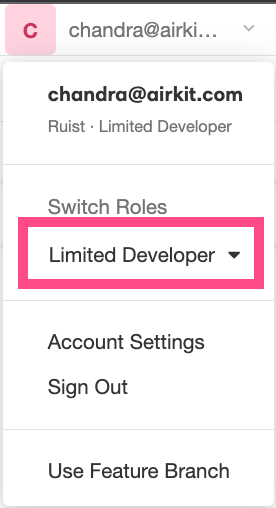
In the Console the profile menu is found at the upper right of the platform. In the Studio, the profile menu is found at the bottom left, immediately under the Builder Bar.
A user with multiple roles will be allowed to toggle between the different roles by expanding profile menu and selecting a different role from the dropdown menu under Switch Roles:
The role selected here will define the appearance and functionality of the Airkit platform. If, for instance, the Agent role is selected in the Role Switcher, you will not be shown the interface required to edit apps, even if you also have the role Admin. Toggling between different roles allows you to temporarily experience the Airkit platform as though you had fewer permissions than you usually do, which can be useful for both demonstration and testing purposes.
Updated 4 months ago