Activity
The Activity tab is where you can view all the activity that has occurred in published applications. The Stage displays a list of the Sessions that have been activated. If any errors occurred during the Session, they will be flagged in red.
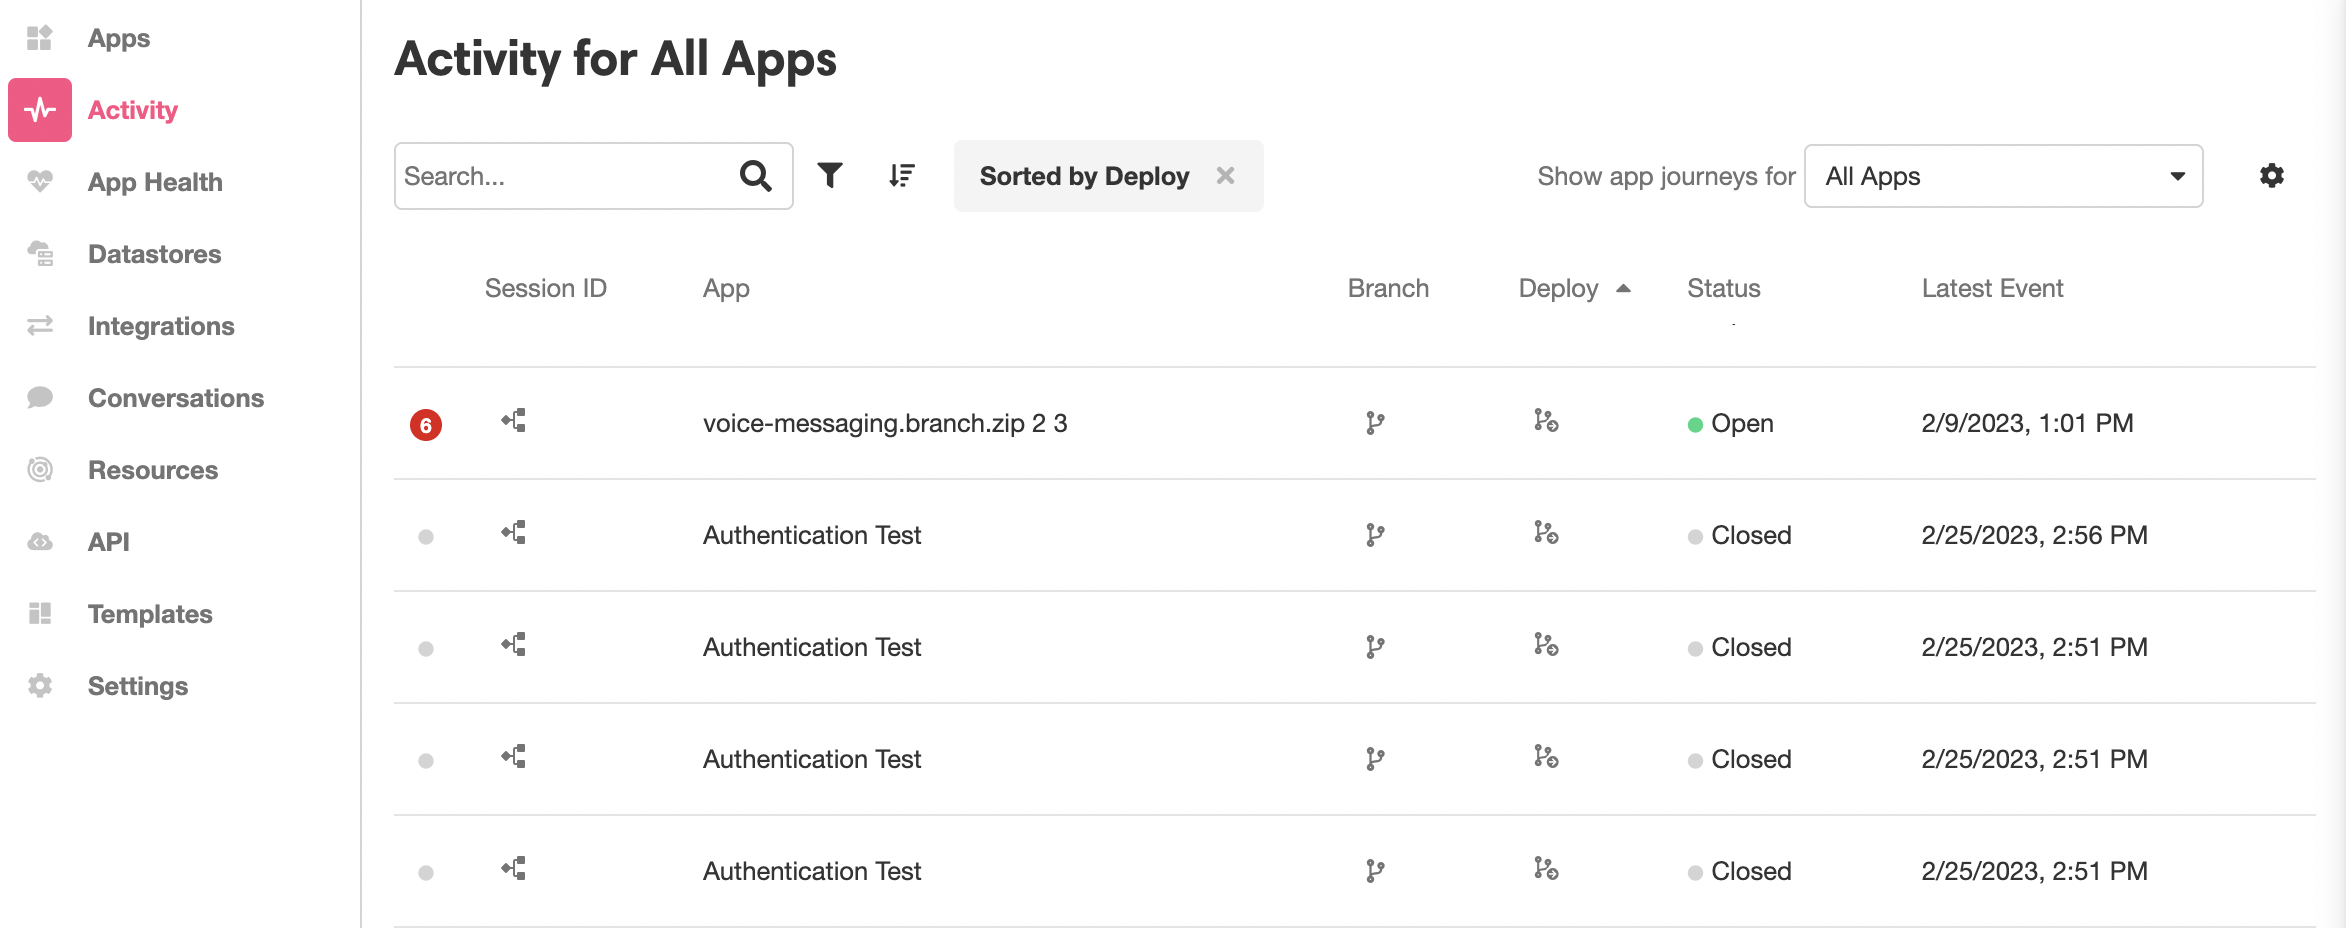
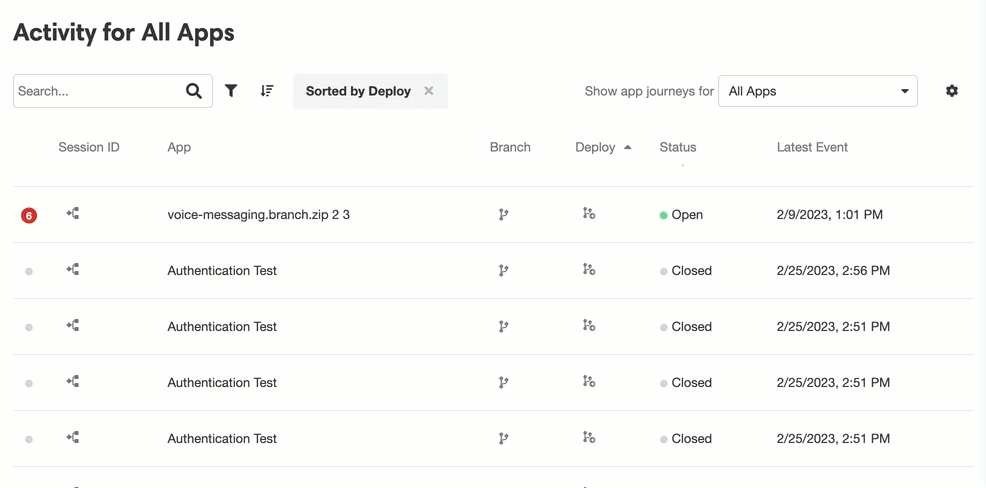
For instance, in the following example, a Session through voice-messaging.branch.zip 2 3 threw six errors:
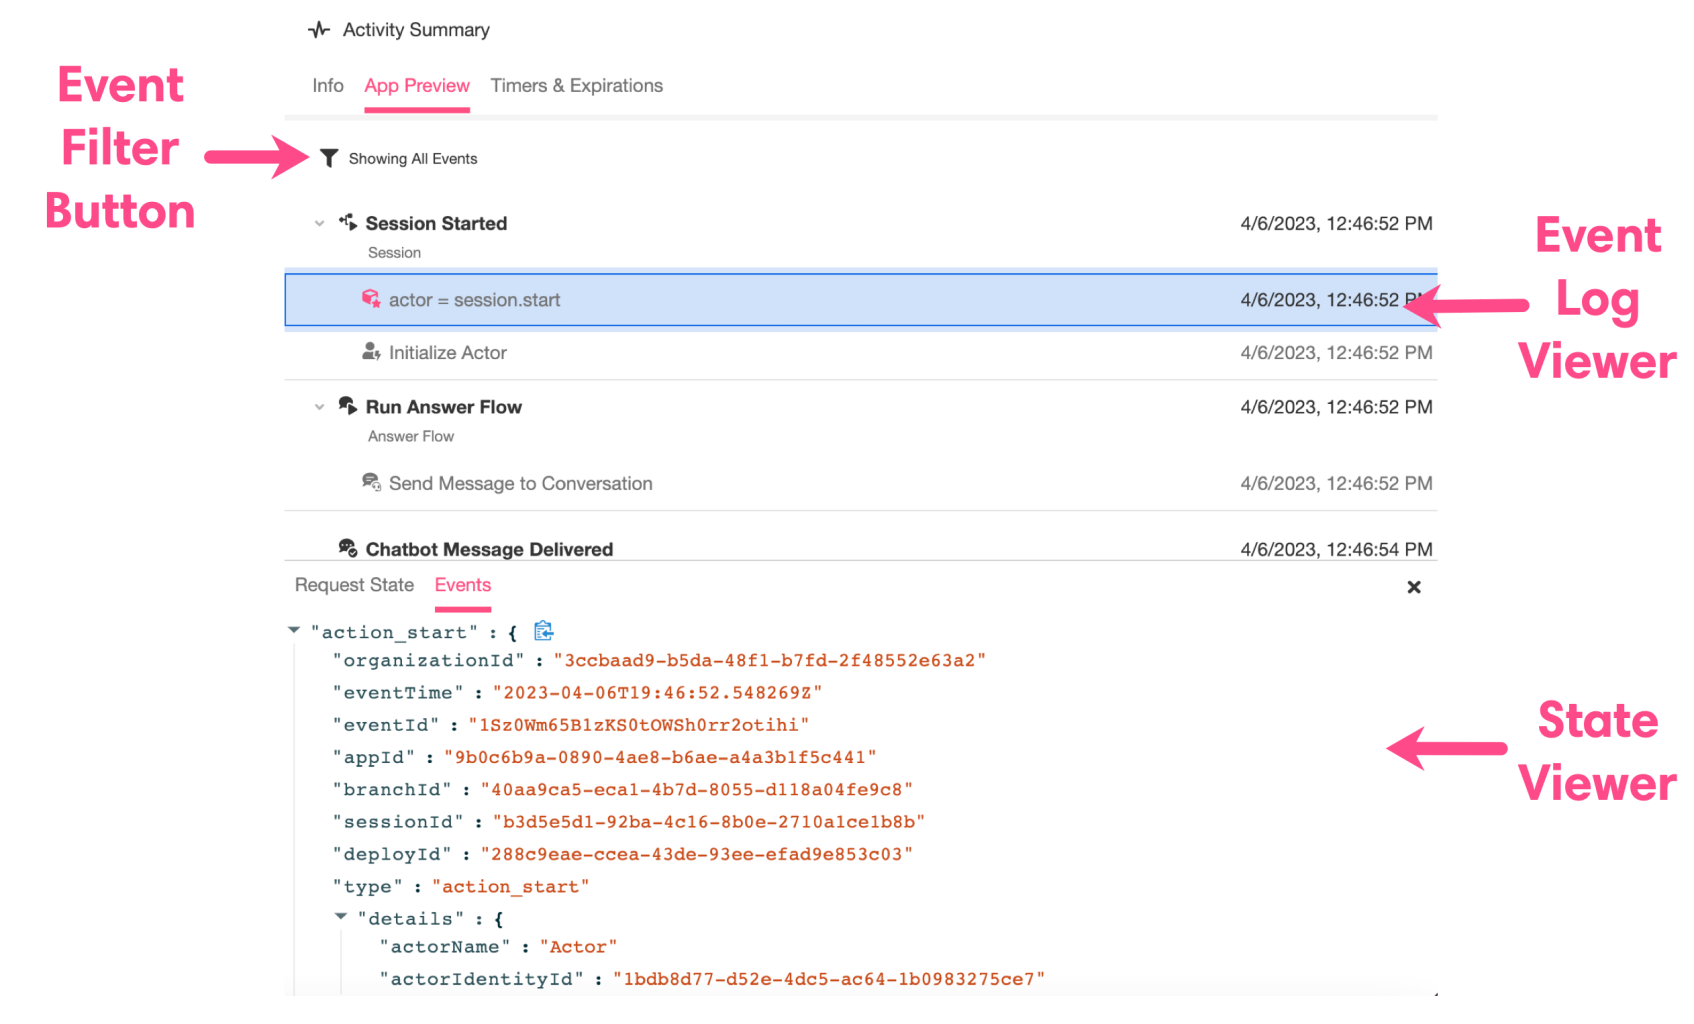
Clicking on an individual Session opens it in the Inspector, where you can view the Activity Summary to examine the Journey in more detail:
There is no Create New button under Activity. This section of the Console is not meant to be part of building directly; it is meant to display information regarding what has already been built.
Show App Journeys For
To the upper right of the Stage, you'll find the Show app journeys for dropdown menu. This allows you to select the application that you want to see the activity of. By default, the selected value is All Apps:
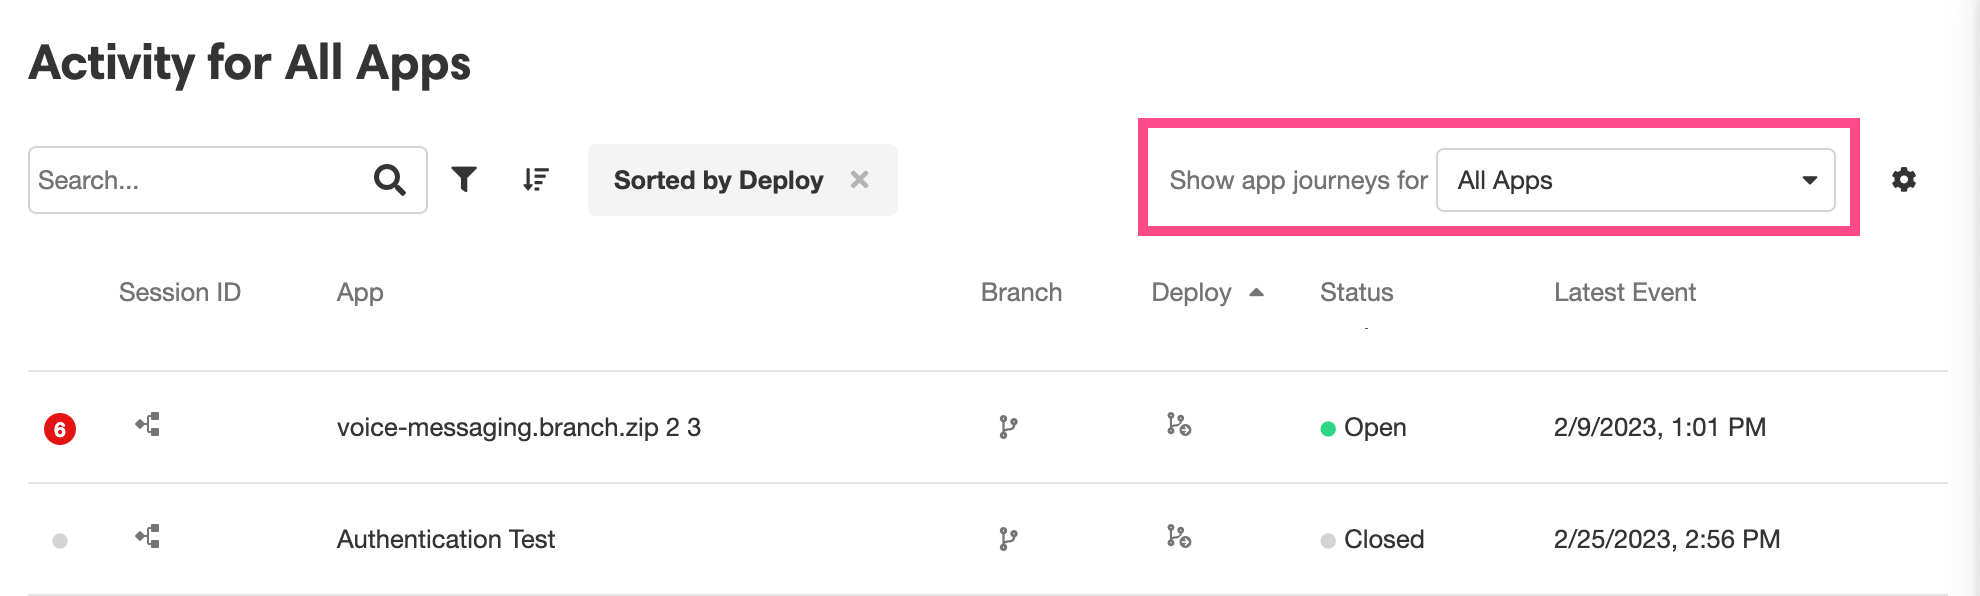
Clicking on the selected value opens a dropdown menu of applications to pick from. Selecting one of these values will filter the Session displayed in the Stage so that the only visible activities will be the ones that took place within the selected app. This makes it easier to find relevant information if you're using the Activity Tab to debug or examine one published application in particular.
Activity Summary
The Activity Summary is what opens in the Inspector upon clicking on a Session to Inspect. It consists of three tabs: Info, App Preview, and Timers and Expirations.
Info
The Info Tab contains a summary of the Session. This includes:
- How many errors were thrown
- The Journey ID
- Which branch and deployment of the application that triggered the Session
- Whether or not the Journey is still Session
- When the Session was triggered
- When the Session fired its last Event
- The browser, device, and IP addressed used to access the application
- What resources were used to access the application
App Preview
The App Preview Tab contains a chronological list of all the Events that occurred during the Session. Each Event is accompanied by a description and a time stamp. Depending on the nature of an Event, it might also contain an expansion toggle to indicate that the Event is really a combination of multiple steps.
To the top left of this list of Events, there is a Event Filter Button. This allows you to filtered the Events displayed in the Event Log Viewer by type. Depending on what aspect of an application flow you are trying to examine, this can help narrow down the Events you need to search through in order to find what you're looking for.
Selecting an Event will open it in the State Viewer, which will appear at the bottom of the Inspector.
The State Viewer has the following tabs:
- Issues - This tab appears if and only if a warning or error was thrown during the Session. No matter what Event is open in the State Viewer, the Issues Tab will display all errors and warnings that arose during the Session. Clicking on an error or warning will open the associated Event in the State Viewer.
- Error - This tab appears if and only if an error was associated with the Event. It displays the metadata associated with the error.
- Request State - This tab houses the Request State button, which can be used to request the full state of of the Session at the time of the Event. If full state information is pulled successfully, the Request State tab will be replaced with the following three tabs:
- Diff - This tab displays only the change in state that occurs between the selected Event and the previous; viewing the Diff tab cuts down on noise in cases when you are only interested in the state changes immediately associated with the selected Event.
- Current - This tab shows the state within the current context.
- Entire - This tab displays the entire application state at the time of the Event.
- Events - This tab displays the details of the fired Event.
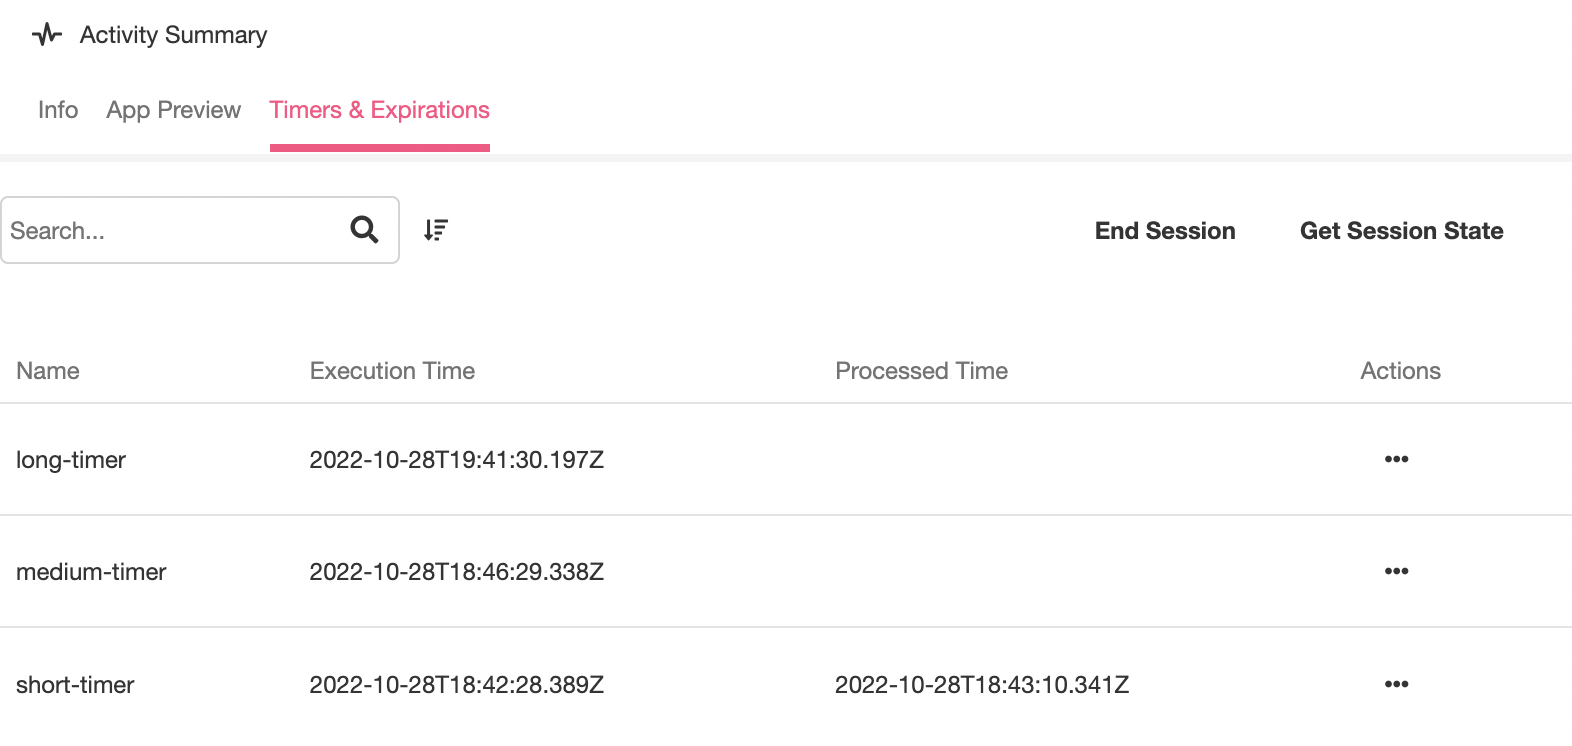
Timers and Expirations
The Timers and Expirations Tab lists all Timers that were started as part of the Session. Under Execution Time, it provides the timestamp indicating when the Timer was started. Under Processed Time, timestamp indicating when the Actions downstream of the Timer were fired; if the Timer has not finished yet, the Processed Time field will be left blank.
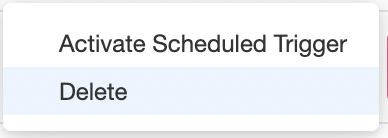
Clicking on the '...' icon under Actions provides the option to influence the timed behavior manually. Activate Schedule Trigger will fire the Actions downstream of the Timer immediately. Delete will delete the Timer and prevent any downstream Actions from being fired at all:
The Timers and Expirations Tab houses two other buttons to the top right: End Session and Get Session State. End Session ends the Session manually and immediately. Get Session State allows you to download the session state information as a JSON file.
Updated 4 months ago