Building an App API
This guide will walk through how to create an App API that triggers off a Journey and passes the data in the body of the POST request to session.start. This is a common use of App APIs that allows users to build endpoints that can be triggered from other systems to start an Airkit journey.
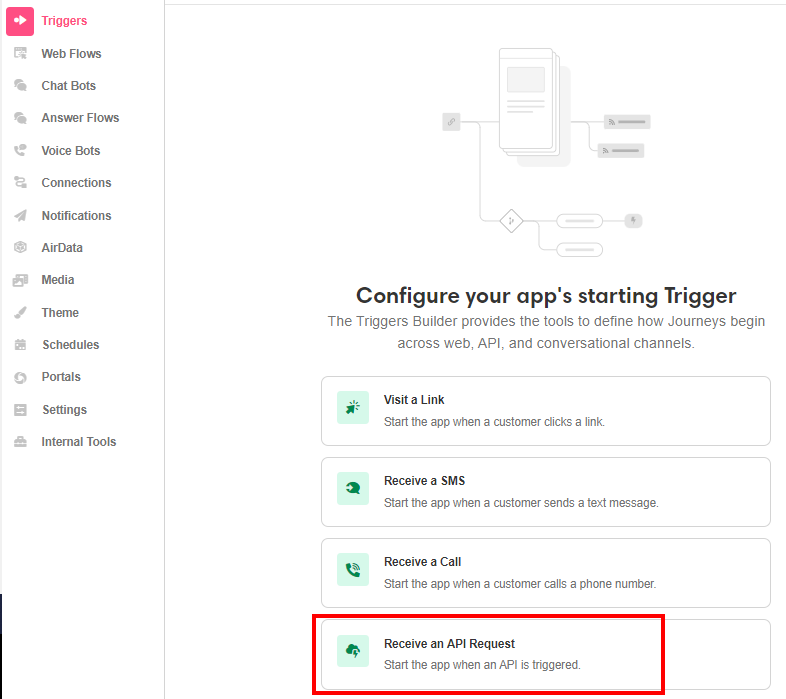
Initializing the App API
App APIs can be created in Triggers Builder by clicking on Receive an API Request.
Configuring the Base Domain
The base domain is the Base URL for your API endpoint. If your app does not have a base domain configured, go to Settings > Base Domain and select a base domain. You can also bring your own URL domain in the console. For more information, see Connecting Your Domain.

Configuring the URL Route
Once the base domain is configured in settings, you can either select an existing route or create a new URL route. The URL route is a combination of the Base domain and the route for the API endpoint. To create a new URL route, type the name of the route in the input and click on create. This will automatically create the URL route for you and can be found in the console under Resources.

Designing the API endpoint
Once your URL Route is configured, click on the nested endpoint in the tree under the App API. This is where you design the flow of your App API, similar to how you would design a Data Flow. This example will walk through creating a POST request to trigger an Airkit Journey.
Start by changing the request type to a POST request and adding a path.

You can also add Path Parameters and Query parameters to the input as well. To add a Path Parameter, surround a parameter name with curly braces, such as {paramName}. Path parameter values can then be accessed via payload.PathMapping.paramName.

Request Body
The Body input is where you can put a sample json object of what your endpoint is expecting. In the Body input, use the following sample data:
{
    "name":"Michael",
    "company":"Airkit",
    "dob":"08/23/73"
}
This data is what will be passed through to the journey as well as the userID from the path parameters.
Sample Payload
The sample payload provides a sample of how the data is structured and what you have access to. For example, if you wanted to parse the request body, that would be accessed through:
payload.body
Adding data operations
Once parameters and request body are configured, you can add any data operations as part of your App API.
Create a new object and format the dob value to be a formatted date object using the DATE_FROM_FORMAT airscript function. Add a Transform data operation and in the transform expression, add the following:
  {
     "name": payload.body.name,
     "company": payload.body.company,
     "dob": DATE_FROM_FORMAT(payload.body.dob, "MM/DD/YY")
 }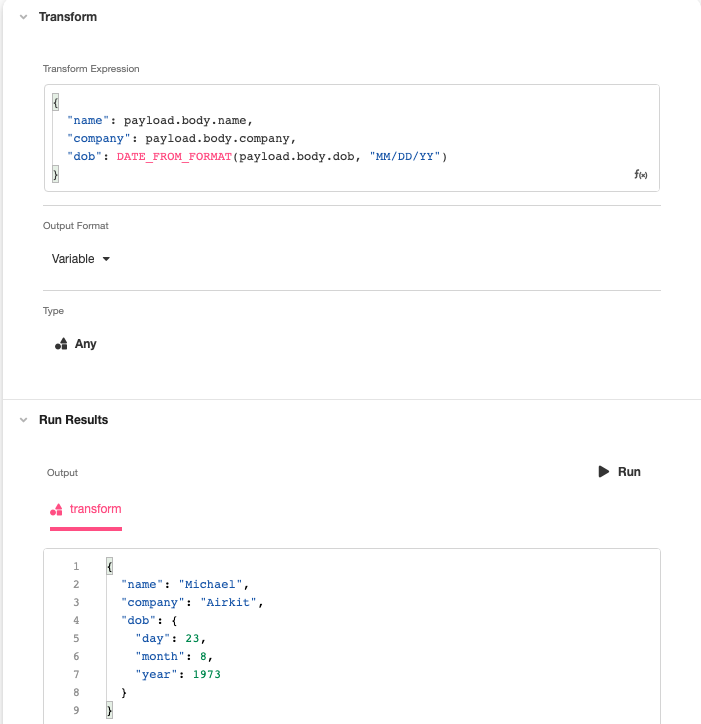
This will output a single object that can then be passed to the journey.
Validating the request
Before adding a data operation to trigger a Journey, you can add the Early Return data operation to validate the request. The Early Return data operation can be used to validate an expression and will exit the connection if returned false.
Add the Early Return data operation and use the following expression to check if any of the fields were empty.
ISNOTEMPTY(transform.name) AND ISNOTEMPTY(transform.company)
  AND ISNOTEMPTY(transform.dob)
  AND ISNOTEMPTY(payload.pathMapping.userId)
If any of the fields are empty, the expression will return false, which will provide the return value of the following:
{ "status": 400, "statusBody": "invalid payload" }
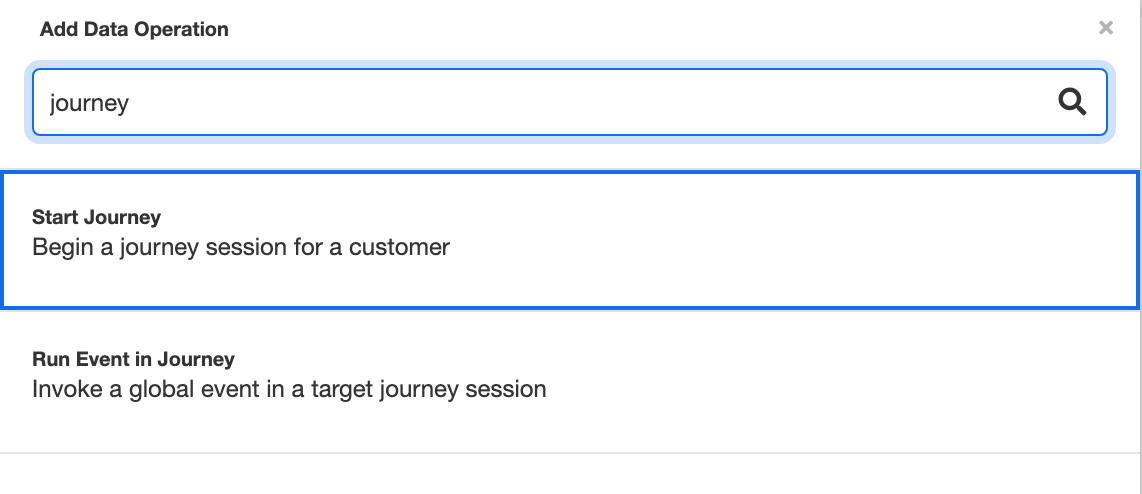
Triggering the Journey
To have your App API trigger a Journey, add the Journey Mapping data operation.
Under Start Parameters in the data operation, pass the transform variable, which is the result of the previous transform data operation.
If you wanted to also pass the userId to the start parameters, you can use the following expression:
MERGE_OBJECTS(transform, payload.pathMapping)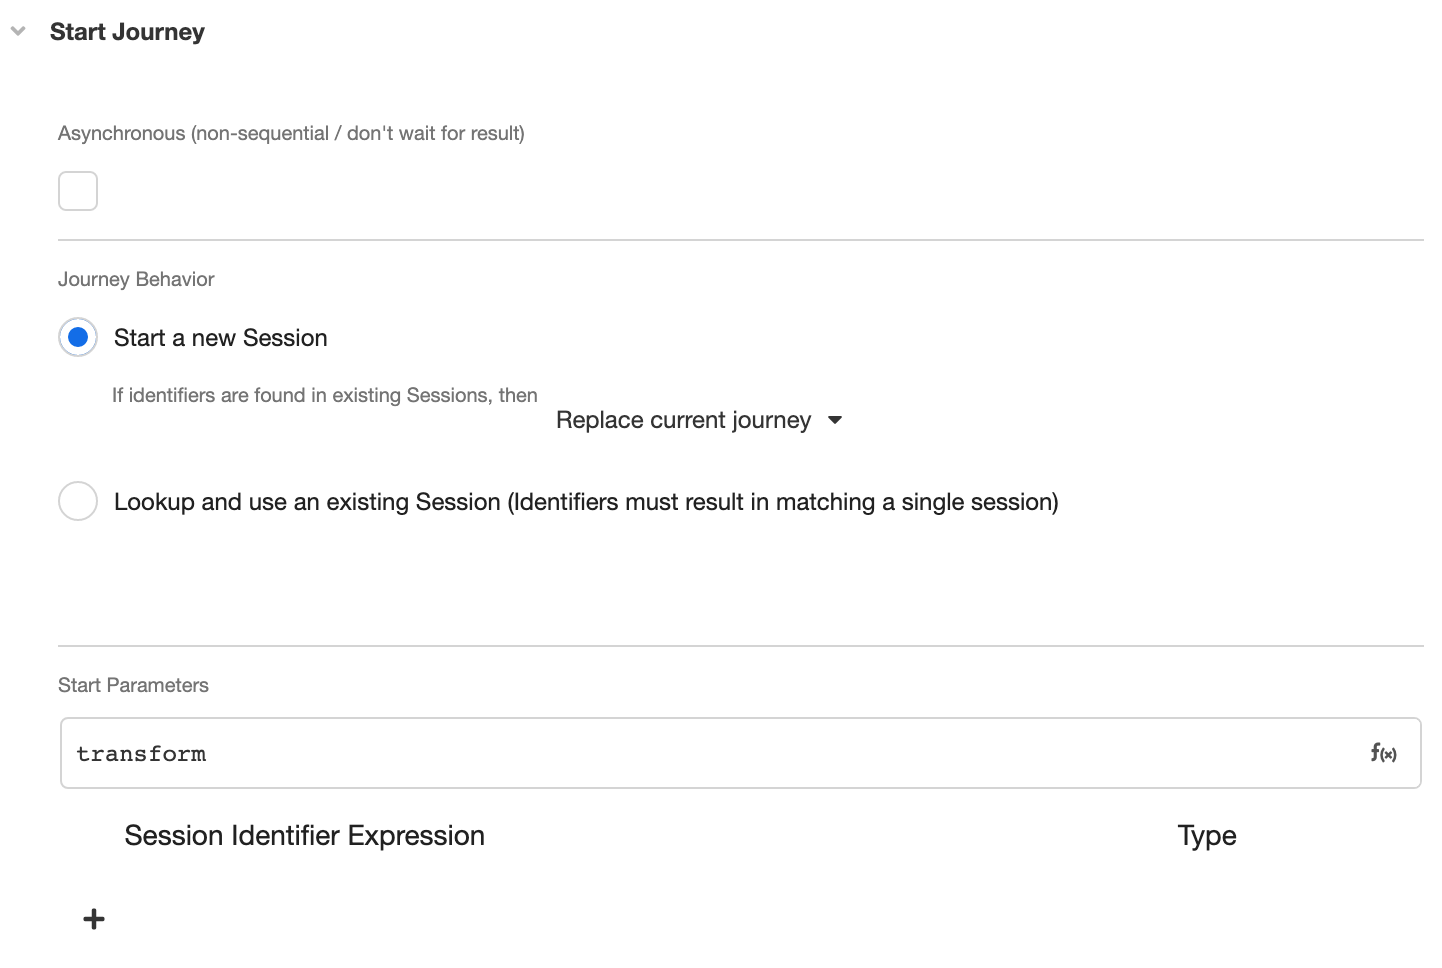
By running this Journey Mapping Data operation, you are able to get some metadata about the Journey that is being started.
To run an event on this Journey, add the Run Session Event data operation and pass the session id into the data operation.
journey.session_id
Creating a session event
Session Events are how you can run actions when a request is made to the API endpoint. To create a session event, go to Connections Builder > Session Events > '+'.

On this event, rename it to API Trigger Event and in the action chain in the inspector, add the Navigate To Web Flow action and navigate to a Web flow configured in the application.
Here is also where you can add a Send SMS Notification if you wanted to send an SMS to the end user when their journey starts. This would require having the user's phone number to pass into the start parameters.
Once the Session Event is configured, go back to Triggers Builder and select the Session event that was just created in the dropdown list.

Configuring the App API's response
The App API's response is what comes back as a response from the HTTP request when the API endpoint is hit.
Response Headers
This provides the ability to add an HTTP header in an HTTP response.
Response Status
This indicates whether a specific HTTP request has been successfully completed. The response status expects an HTTP response status code.
For more information on HTTP response status codes, see HTTP response status codes.
Using the output of the Early Return data operation, write an IF() statement to check to see what response status code to output. If the expression returns true (no fields missing), then return 200. If the expression returns false (fields are missing), return a 400.
IF(isValid, 200, 400)
Response Body
The response body is what is returned as a response to the HTTP Request.
In the response body input, return the details of the journey if the Early Return data operation returns true, or return the Return Value if Validation Fails value from the Early Return data operation, using the connection variable.

Testing the App API
Now that the App API is configured, you can test out the API endpoint by publishing the application and making a POST request to the endpoint. Save the app and then click on Publish.
If you are sending an SMS as part of the App API workflow, you will need to configure a phone number resource with the application. See Connecting Twilio Numbers for more information.
The endpoint based on the configuration in this example can look like the following with 123456789 as the userId configured as a path parameter:
https://app.airkit.com/api-example/trigger-journey/123456789You also need to include a request body with the POST request:
{
    "name":"John",
    "company":"Airkit",
    "dob":"04/14/88"
}
The response body based off of this should include the metadata of the session that was triggered, including the canvas_links, session_id, started_time, expiration_time, and more.
Updated 3 months ago