SDK Authentication
When an Airkit application requires authentication in order to be accessed within an existing web page, the authentication process should be handled server-side. This prevents you from exposing any secure information in the browser while allowing you to use your existing processes to handle authentication.
Out of the box, Airkit provides the infrastructure to quickly configure authentication processes handled by JWTs as well as reference information sent within the payload of incoming JWTs. If at all possible, this is the authentication method we recommend using. However, if you have another authentication method you would prefer to use, it is also possible to configure it manually.
Managing JWTs
If you've already created a JWT authentication process on your website, Airkit allows you to reuse that process for embedded experiences. You can also create a new JWT authentication process specifically to use in the context of the SDK. Either way, a prerequisite of this process is that JWT authentication should already be configured server-side.
Prepare the Application
Once JWT authentication is configured server-side, the associated public key will then need to be configured so that Airkit will be able to verify the validity of incoming JWTs. To do so, go to Console > Integrations > Connected Accounts and create a new Connected Account. Select Key Pair as the Integration Type, and then enter the public key into the Public Key field:
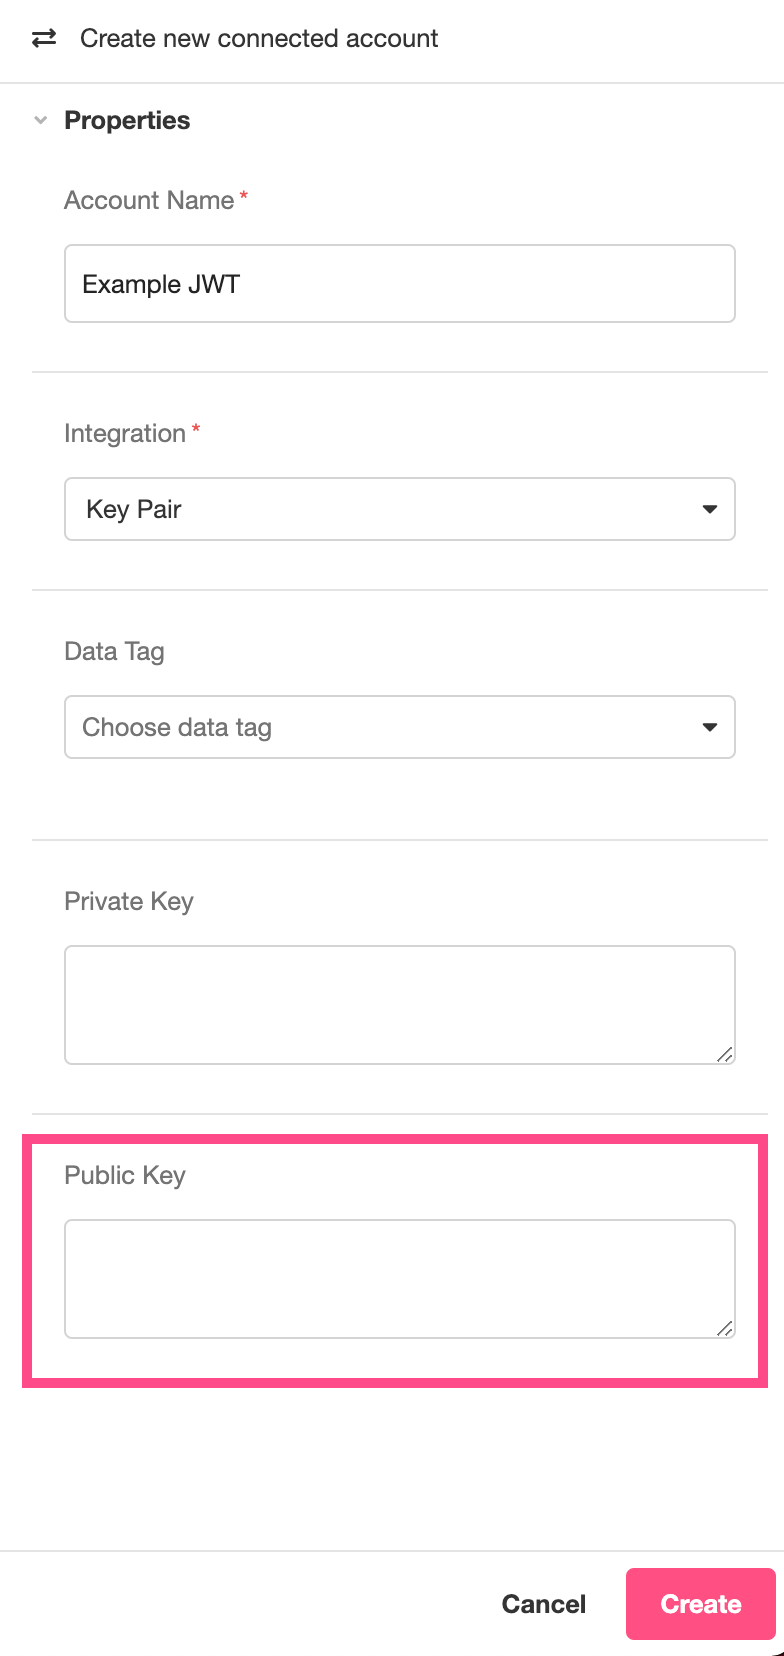
Upon clicking Create, the public key will be encrypted and stored so that it can be referenced securely within individual applications.
To reference it within a particular app, open that app in the Studio and then toggle over to Settings. Under Global > App Authentication Type, select "Secure App". Under Authentication Method, select "External Method", and under Public Key, select the Connected Account configured above:

Now this app can use the configured public key to validate JWTs created using the associated private key. When you attempt to navigate to a Starting Link via an SDK embed, the application will wait for the outer frame to send this authentication in, and the JWT will be required before the Session will be initialized.
Configure Your Website
Credentials need to be manually passed into the SDK in order for this authentication mechanism to work. Once you have generated a JWT server-side, pass it to the SDK via the bearerToken property.
For instance, say you have saved your JWT as the variable creds. Assuming SDK_API_URL corresponds to the SDK URL as described in the SDK Quickstart, the following block of HTML will embed your application into the website it is inserted into while requiring a valid JWT before initializing a Session:
<html>
  <head>
    <meta name="viewport" content="width=device-width, initial-scale=1">
    <meta charset="utf-8" />
    <title>Airkit web SDK</title>
  </head>
  <body>
    <div id="airkit-sdk"></div>
    <script src="https://client.airkit.com/websdk/1.0/airkit_sdk.js"></script>
    <script>
      const sdk = new window.AirkitWebSDK({ renderMode: "inline", bearerToken: creds })
      sdk.render({ url: SDK_API_URL })
    </script>
  </body>
</html>
Note that the only difference between this block of HTML and the block of HTML given in the SDK Quickstart is that bearerToken is explicitly defined to create credentials.
Reference Claims within the App
JWTs contain claims in their payloads. These claims are typically statements about the user or other data it might be useful to reference once the JWT has been verified and used to start a Session.
Information sent within the JWT can be accessed in the On Authentication Success Event(found under Connections > Session) as event.attributes. Should you want to reference this information outside of this Event, use the Set Variable Action to save the information to another variable, such as the global variable session.claims in the following example:
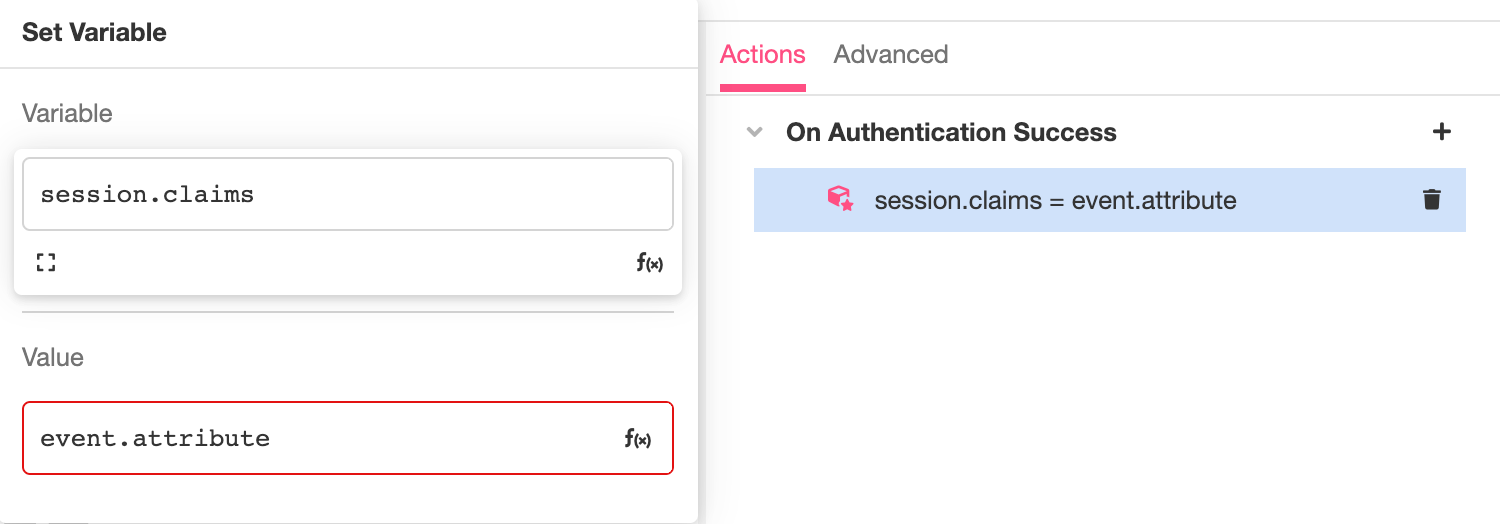
Once this is done, the claims in the JWT will be available for reference throughout the Session.
Other Authentication Methods
Airkit provides the infrastructure to quickly configure authentication processes handled by JWTs. If you prefer to handle authentication by another method, you need to make sure that that authentication process is still being handled server-side, and so whatever secret information you're sending to handle authentication, it should be handled by an App API endpoint. This is meaningfully separate from the SDK API endpoint you already configured. The App API endpoint serves as an intermediary, as it can pass Auth tokens without exposing them to the user's web browser.
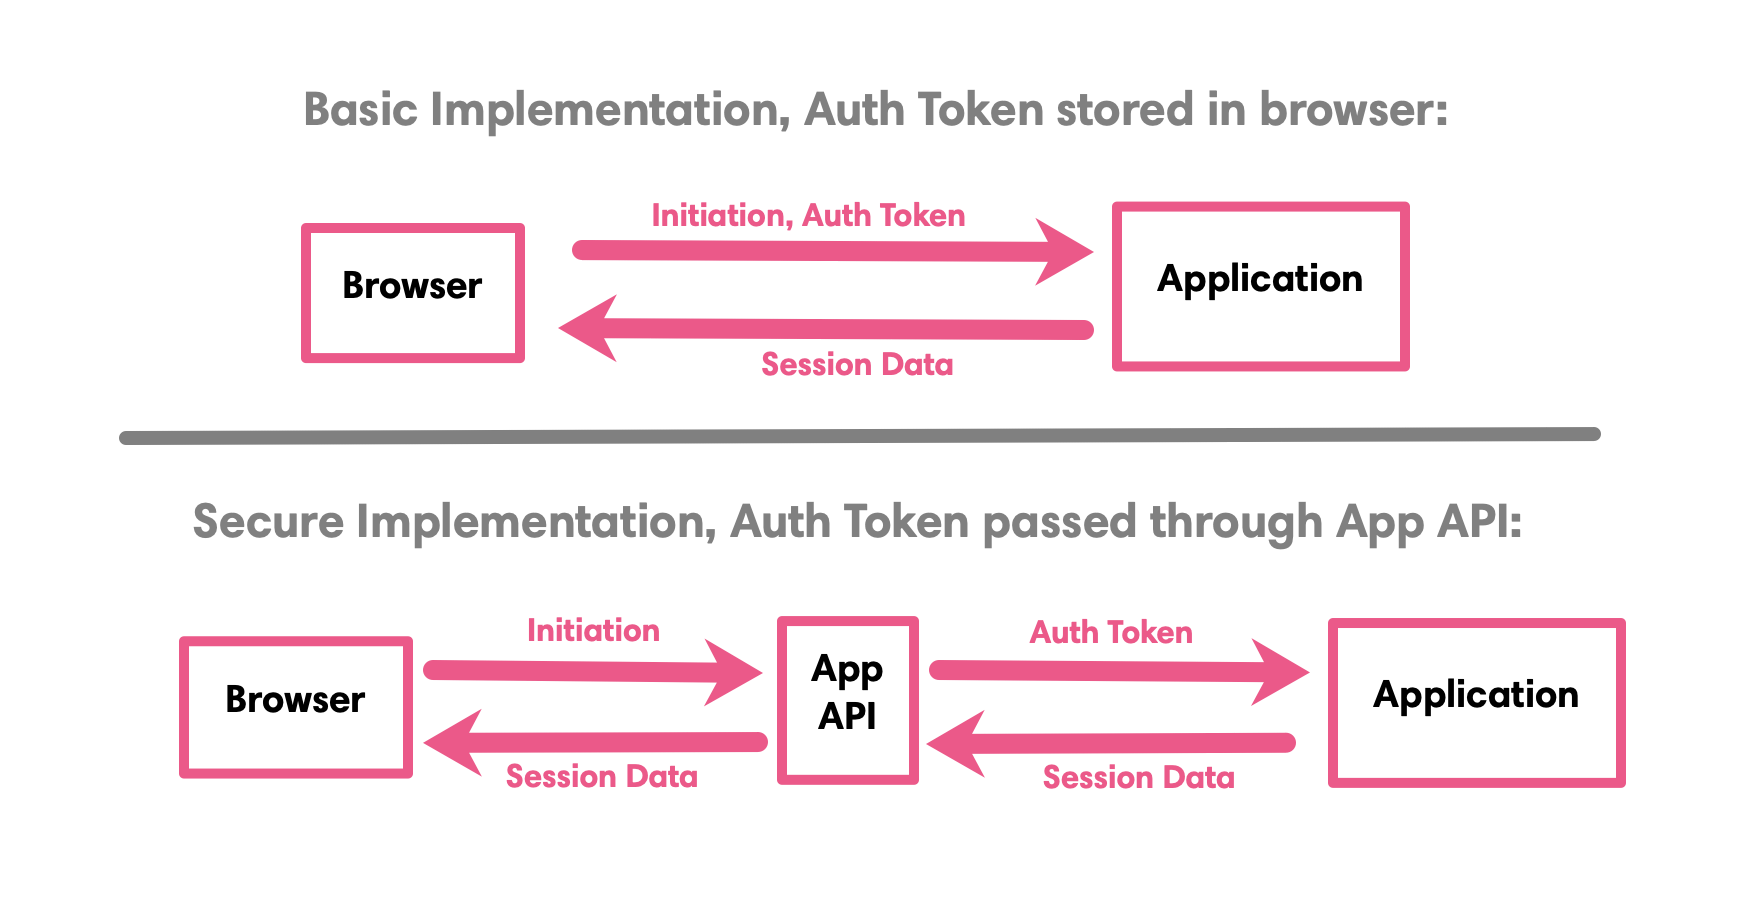
If the App API endpoint supports CORS for targeted host names and is given access to an Auth token, it can call on the SDK API endpoint via an HTTP Request after inserting the Auth token into the header. The SDK API endpoint will start a Session return a session_id and a url, corresponding to the Session ID and the Session Link respectively. This information can be used in two ways:
- The App API endpoint can return the
session_idandurlin the same format the SDK API endpoint did, effectively simulating an SDK API endpoint. - The App API endpoint can pass the
session_idandurlto the web browser which can itself use that information to define theLaunch trigger(see configuration documentation for more).
Code Examples
Use App API as direct SDK API Proxy
If an App API endpoint returns a payload formatted in the same way as a payload returned by an out-of-the-box SDK API endpoint, it simulates the behavior of an SDK API perfectly.
In such cases, the URL of the App API endpoint (APP_API_URL) can function as the SDK_API_URL in your web page, as in the following example:
<html>
  <head>
    <meta name="viewport" content="width=device-width, initial-scale=1">
    <meta charset="utf-8" />
    <title>Airkit web SDK</title>
  </head>
  <body>
    <div id="airkit-sdk"></div>
    <script src="https://client.airkit.com/websdk/1.0/airkit_sdk.js"></script>
    <script>
      const sdk = new window.AirkitWebSDK({ renderMode: "inline" })
      sdk.render({ url: APP_API_URL })
    </script>
  </body>
</html>
The App API endpoint is a proxy for the SDK API endpoint, so the SDK will handle the rest.
Define the Launch trigger in the Web Browser
The following example shows how an App API endpoint (APP_API_URL) that returns the session_id and url in the header as "x-airkit-session-id" and "x-airkit-session-url" can use them to define the Launch trigger:
<html>
  <head>
    <meta name="viewport" content="width=device-width, initial-scale=1">
    <meta charset="utf-8" />
    <title>Airkit web SDK</title>
  </head>
  <body>
    <div id="airkit-sdk"></div>
    <script src="https://client.airkit.com/websdk/1.0/airkit_sdk.js"></script>
    <script>
      const sdk = new window.AirkitWebSDK({ renderMode: "inline" })
      window
        .fetch(APP_API_URL, FETCH_OPTIONS)
        .then((response) => {
        	const sessionId = response.headers.get("x-airkit-session-id")
          const appURL = response.headers.get("x-airkit-session-url")
          sdk.render({ sessionId, appURL })
      	})
        .catch((error) => {
        // Log error
      }
    </script>
  </body>
</html>
Updated 4 months ago