Displaying Petfinder Data
Part III - Building the Display Pets Web Page
Creating the "Get Pet by Location" Data Flow
In Part II, we added a Zipcode Text Input field into our Home Web Page so that users can adopt a pet based on their location. Now we're going to build out a Data Flow that returns a list of pets based on the user's location.
-
Go to Connections Builder and create a new, blank Data Flow. We’ll call it “Get Pet by Location”.
-
Add the following type Text Inputs under the Start section of the Inspector, and give them plausible values of dummy values in the Start section of the Stage:
pet_type- example value: "dog"
gender- example value: "Female"
zipcode- example value: "90210"

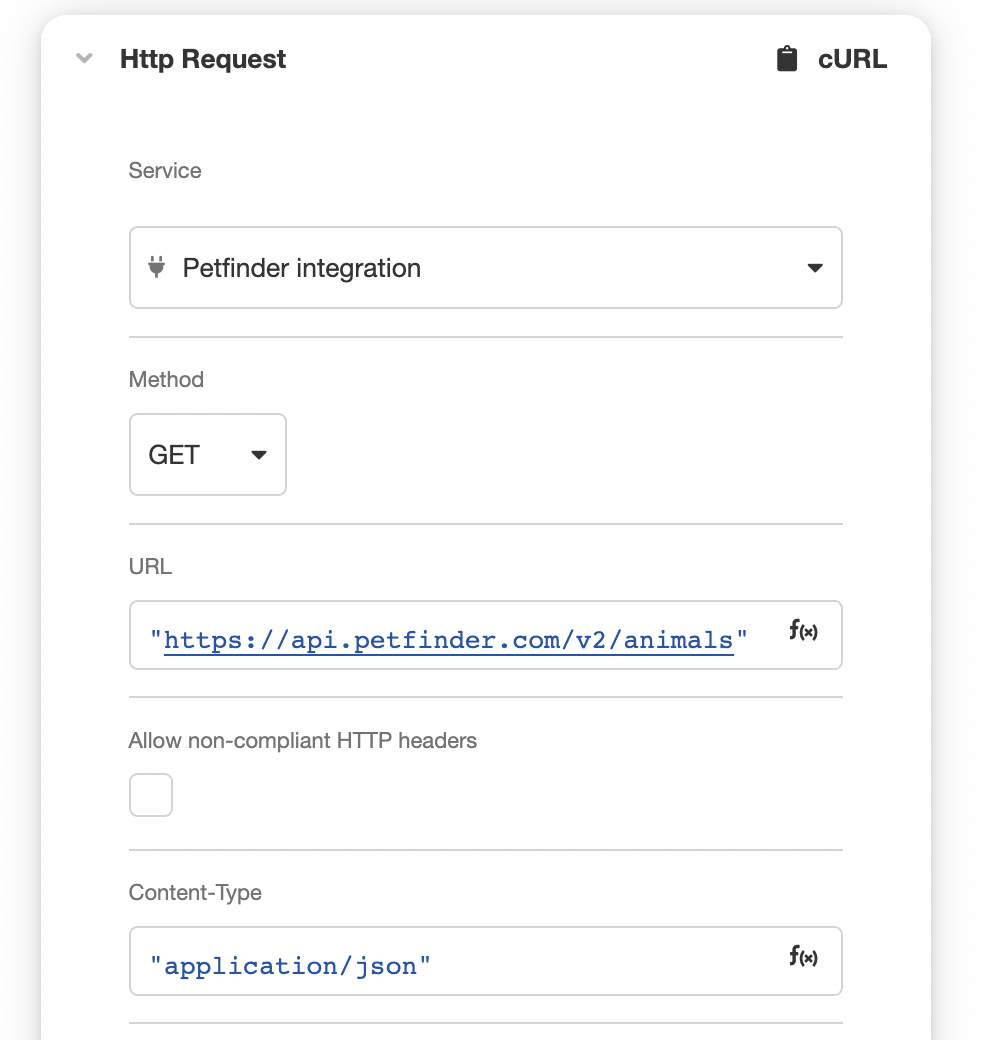
- Add an HTTP Request Data Operation under the Start section. Select the Petfinder Integration as the Source and GET as the Method. Enter https://api.petfinder.com/v2/animals as the URL.
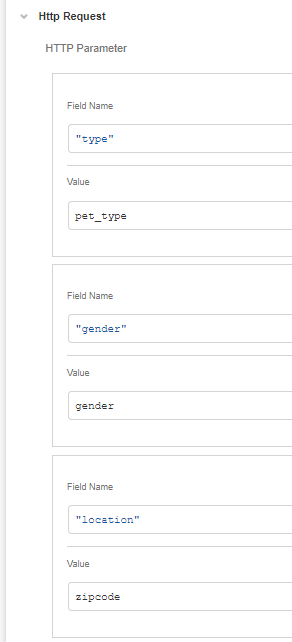
- Complete Query Parameters > HTTP Parameters as follows:
- Field name: “type”
- Value:
pet_type
- Value:
- Field name: “gender”
- Value:
gender
- Value:
- Field name: “location”
- Value:
zipcode
- Value:
- Under Run Results, press Run for the Data Flow to retrieve the list of relevant pets based on the dummy data given in the Start section.
- Add a Transform Data Operation by clicking on the ‘+’ icon below the HTTP Request. In the Transform Expression, enter:
result.animals
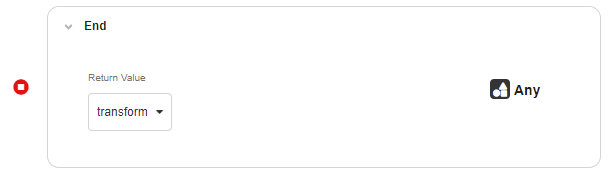
- In the End section, pass
transformas the output.
- Save the app.
Connecting the "Get Pets by Location" Data Flow
Now let’s run the "Get Pets by Location Data Flow" following these steps:
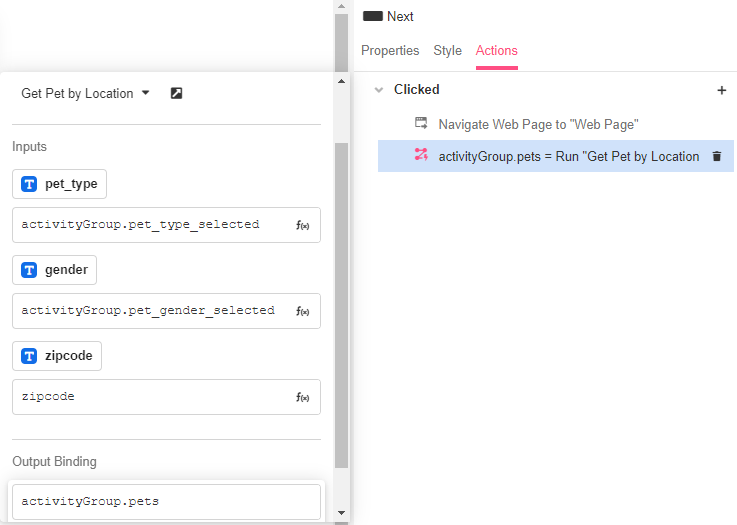
- Toggle back to the Web Flows Builder. Go to the Home Web Page and select the Next button. Go to the Inspector and, in Actions, add a Run Data Flow Action. Then pass the values for the pet_type, gender and zipcode Variables:
activityGroup.pet_type_selectedactivityGroup.pet_gender_selectedzipcode
- For the Output Binding, enter
activityGroup.pets
This way, when the Next button is pressed, the Data Flow will run as the user is taken to the next Web Page.
Building the Display Pets Web Page
In Chapter II, we added a second Web Page to the app. This Web Page will list all adoptable pets and allow the user to check the information on each one of them before adopting.
- In Web Flows Builder, rename the second Web Page to “Display Pets Web Page”. Add a Label to this Web Page, change its contents to “Adoptable Pets”, and select a header Variant.

- Then add a Container List Web Control. This Control will allow you to loop through a List of available pets and display relevant information on each one.

Uploading media to standardize UI
Many of the pets pulled from the Petfinder API have associated pictures, which we're going to display in the Repeater. However, not all pets will have associated pictures, and in such cases, we're going to display a generic filler image of a paw print:
Download the image here.
- Once you have your desired filler image saved to your computer, toggle over to the Media Library. Click on the Upload button and select the relevant file:

- Once the file is finished uploading, click on the checkbox that appears to the left of the newly-uploaded asset to access the asset details in the Inspector. Under Asset Details > URI, you'll find the URI that can be used to reference this asset within your application. For instance, in the following example, the URI is "asset://global:8e52c37f-4071-4dbb-8a98-d9096d9b69d2:35cbbeaf-a313-4058-81cb-bbdf978ae5db:bde49ba3-fc92-4bf8-8bc8-86c48620869f:0":

Save the URI of the image you just uploaded so that you'll be able to access it later. In code snippets, we will refer to this URL as {{FILLER_IMAGE_URI}}.
- Save your progress.
Configuring the Repeater
In order to test the Repeater as we build the UI, let’s add some sample data. We can get this sample data from the Get Pets by Location Data Flow in Connections Builder.
- Copy the transform results of the Transform Data Operation:
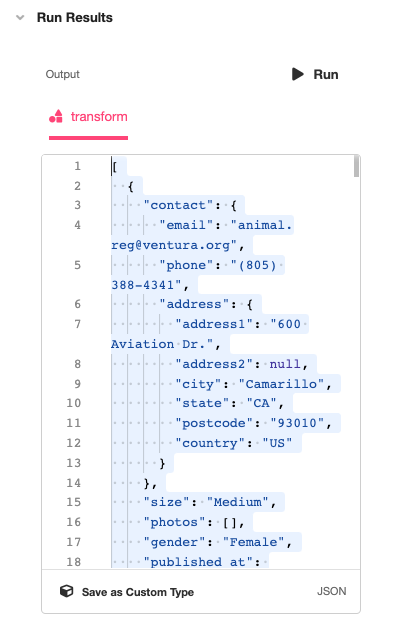
- In the Variable Tree, examine the Activity Group Variable
pets. The input box that appears to the right allows you to assign a dummy value to the associated variable. Paste the results of the Transform Data Operation here:

This will not influence the way the application will behave, either in production or while Previewing, but it will provide sample data to display in the Stage while we design our UI.
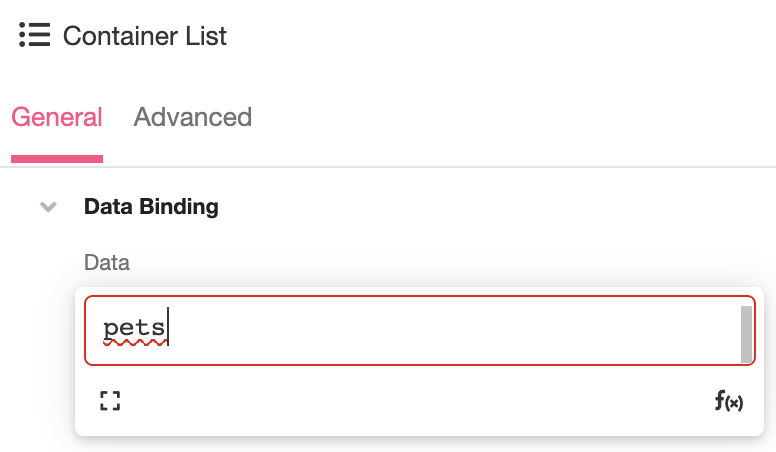
- Inspect the Container List. Under Data Binding > Data enter
pets.
- Add a Container to the Container List and then nest two other Containers inside of it. The first Container will broadcast data, so let’s name it "Data Container". The second Container will show the pictures of the pets, so rename it "Image Container".

Data Container
In this Container, we will add a block of details about each pet. The blocks will replicate for all the pets in the list.
- Add 4 pair of Labels to the Name Container. Under Control Properties > Text, designate the first Label "Name", the second Label
item.name, the third Label "Breed",and the fourth Labelitem.breeds.primary.

Note that some of the names pulled by the Petfinder API might only consist of identification sequences rather than full names.
- In order to make some room for the Web Controls in the Image Container, select Container nested immediately under the Container List, then turn your attention to the Inspector. Select Stack Horizontal in Distribute Children. This way, the Data Container and the Image Container will sit side by side.

- Under Override Styles > Border, create a separator by selecting a solid bottom border of 1 pixel. For a subtle gray color, choose borderSecondary from the Dropdown list of colors:

What is borderSecondary and where is it defined?
borderSecondary is a color Variant. Color Variants are used to establish a consistent color palette throughout an application flow.
Airkit comes out of the box with several color Variants (borderSecondary among them) pre-configured, though these pre-configured settings can be changed in the Theme Builder. Upon making such changes, all instances of that color Variant will change to reflect them. For more on how color Variants (and all other Variants) are defined, see Theme Builder.
Image Container
This Container will present the pictures of the pets and a button that will take the user to the selected pet’s Petfinder profile.
- Add a Hyperlink Text control to the Image Container.

- With the Hyperlink selected, turn your attention to the Inspector and set Control Properties > Href as
item.url. Nest an Image Web Control underneath the Hyperlink, and make sure you use the thumbnail Variant.

Inspect the Image. Under Control Properties > URL, define the image URL as follows, where {{FILLER_IMAGE_URI}} refers to the URI associated with the filler image you previously uploaded to the Media Library.
IF(
  ISEMPTY(
    item.photos[0]
  ),
  {{FILLER_IMAGE_URI}},
  item.photos[1].small
)
In the case of our example, the code appears as follows:
IF(
  ISEMPTY(
    item.photos[0]
  ),
  "asset://global:8e52c37f-4071-4dbb-8a98-d9096d9b69d2:35cbbeaf-a313-4058-81cb-bbdf978ae5db:bde49ba3-fc92-4bf8-8bc8-86c48620869f:0",
  item.photos[1].small
)
This Airscript expression uses the IF function in tandem with the ISEMPTY function to display pictures of each pet if applicable and the filler image in cases where no pictures of the pet are available.
- Add another Container to the Image Container. Inside of it, add a Hyperlink control. Rename the Container to Select Container. Nest a Hyperlink underneath it and rename it Select Hyperlink.

Then with the Select Hyperlink selected, turn your attention to the Inspector and set Control Properties > Href as item.url.

Nest a Button Web Control underneath the Hyperlink, and change the text in the button to "Select".

- Inspect the Image Container and change the Variant to page, for spacing:

- Under Distribute Children, select Stack Vertical and Center:

Previewing the Display Pets Web Page
Click the Preview Button to check that the Display Pets Web Page of your app is running smoothly. Scroll down to see all adoptable pets and click on Select to move forward.

Congratulations! You have now completed building an app that facilitates pet adoption through a custom Petfinder integration.

Updated 3 months ago