Studio
Airkit Studio is the interface in which your Airkit apps can be created and edited. This document goes over the basic structure of the Studio, as well as the placement and functionality of some of its most important buttons.

General Structure
The Builder Bar provides a way to toggle between Airkit's many Builders, the interfaces that allow you to construct and edit different components of your apps.
Tree
The Tree, if applicable, is where you'll find an expandable and collapsible breakdown of the components examinable within the Builder. The Tree is a part of the Builder: different Trees belong to different Builders, and you can remind yourself which Builder you're working in at any given time by looking at which Builder is highlighted in pink on the Builder Bar.
Not all Builders have a Tree; the Settings and Media Library, for instance, do not have Trees because their components do not nest.
Example: In the Web Flows Builder, Navigator tab within the Tree contains three main sections: Web Flows, Page Layouts, and Custom Controls. You want to make a small tweak to the UI of one of your Web Pages, so you expand the Web Flow section. This provides a list of the Web Flows that make up your web application, and you can expand each Web Flow to access particular Web Pages. From there, you can inspect individual Web Controls. Still working within the Tree, you click on the specific Web Control you want to edit; all editable properties of that Web Control appear in the Inspector (see below).
Stage
The Stage displays a visual representation of the aspect of the app you're modifying, allowing you to see the results of your changes in real time. Exactly what is displayed in the Stage varies from Builder to Builder, to better communicate the type of modifications each Builder facilitates.
Example: As you use the Web Flows Builder to edit the UI of your web app, the Stage showcases what those changes will look like to the end user. You can also click on a Web Control as it's displayed in the Stage in order to open up the interface to make edits to it in the Inspector (see below). To change the color of a particular Button, you click on said Button as it appears in the Stage, then make your desired stylistic changes. You can see the changes as you make them, so if you find your initial changes clash with the UI of the broader Web Page, you can iterate until you find a look you love.
Inspector
The Inspector is where you can examine and modify individual elements pertinent to a Builder. Like the Tree, the Inspector is a part of the Builder: different Inspectors belong to different Builders, and you can remind yourself which Builder you're working in at any given time by looking at which Builder icon is highlighted in pink on the Builder Bar. However, unlike the Tree, the display in the Inspector does not remain consistent as long as you are working within the same Builder; the information within the Inspector – and even the format through which that information is presented – varies depending on what element is being inspected.
Not all Builders have an Inspector; the Settings and Media Library, for instance, do not have Inspectors because all relevant information is displayed and editable within the Stage.
Example: You're using the Inspector to examine a particular Button. To make a stylistic change to the Button, you go to theStyle Tab and expand the contents under Override Styles. You want to change the background color of the button, so you turn your attention to the Background subsection. The dropdown menu that appears allows you to to modify the color of the Button, or even use a picture to fill in the button's Background.
Errors Panel
The Errors Panel provides a way to identify an apps's errors, warnings, and information. From of the displayed errors or warnings, you can jump to the location of the conflict.
The Variable Tree provides a way to manage all Variables available within your Session. It allows you to toggle between Variables, add new ones, delete the ones that are no longer needed, and assign them sample data so render in the Stage for testing purposes.
Airscript Console
The Airscript Console is found near the bottom of the Studio, to the immediate right of the Variable Tree. It evaluates Airscript expressions and displays a record of what previous expressions have returned. The Airscript Console has access to all Airscript functions and operators as well as local variables. For testing purposes, it will evaluate local variables as if they have the value assigned to them in the Variable Tree. In the following example, for instance, session.example was evaluated as though it had the value "Hello, world!":
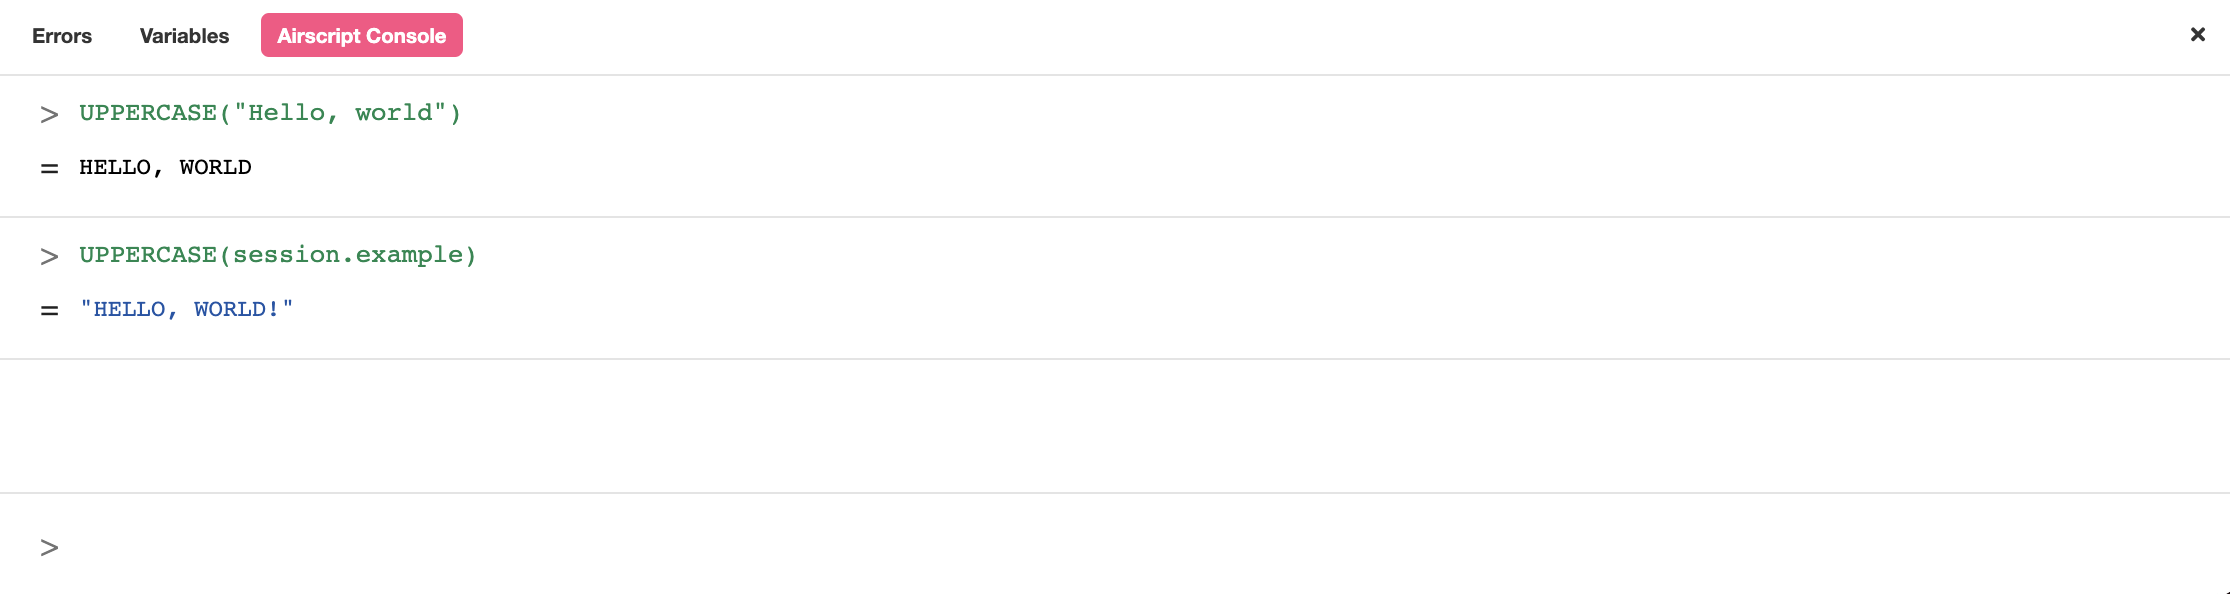
Additional expressions can be tested by entering them to the right of the '>' icon at the bottom of the interface and pressing enter.
Key Buttons in the Studio
While there are many different buttons associated with the different Builders, as well as their Trees and Inspectors, there are a few buttons in the Studio that will always be available to you. These are located at the top of the Studio interface, as well as in the Builder Bar.
Builders in the Builder Bar
No matter what Builder you're working within, you'll aways have access to the same Builder Bar, which is what allows you to toggle between different Builders while working on your app. For a more detailed discussion on what each Builder is, see Builder Bar.
The Preview button allows you to run and test your Airkit apps without needing to publish them. By emulating a user's Session through your app, you can check to make sure everything functions as intended.
Return to Console
This button takes you back to the Console, where, among other things, you can access every application you have saved within your Organization.
Publish
Click on the Publish Button when you want to publish your app.
Environment Selection
This dropdown menu allows you to toggle between the different publishing environments that your application might be deployed in. Different environments can be associated with different resources (configured in Settings) as well as different Datastores, allowing you to test your application in separate sandbox environments. For more, see Profiles and Deployment Settings.
Save
Save your work frequently, so you don't have to worry about losing progress by accident! In lieu of clicking the Save button, the usual keyboard shortcuts also work: CMD + S or CTRL + S will save your work equally well.
Undo
Airkit's Undo button functions like every other Undo button: if you make a change you don't want to keep, press the Undo button to undo the last thing you did.
Redo
Airkit's Redo button functions like every other Redo button: if you pressed the Undo button and don't like the results, use the Redo button to redo what you undid.
Updated 4 months ago