Journey Builder
The Journey Builder is the Builder that you'll be taken to automatically each time you create a new application. It provides a big-picture view of the application flow, conceptualized as a funnel that users go through.
The Journey Builder can be used to outline the intended flow of the application. Plotting out the flow of a Journey in Steps lays the groundwork to treat the flow of an application as multiple parts, or “Steps,” which can be assigned correlated actions directly within the Journey Builder.
While plotting out the flow of a Journey in multiple Steps is not a required part of app creation, building out Step 1 is. This is where the first Web Flow of a Journey is defined. The Web Flow associated with Step 1 is the Web Flow that will be displayed with the user first uses the web channel to access the application.
The Journey Builder is structured with the Tree to the immediate right of the Builder Bar with the Stage to the immediate right of that:

Tree
The Tree provides a selection menu of all the interactions available to be dragged-and-dropped directly into the funnel displayed in the Stage. These interactions are split into two categories: Triggers, which initiate the start of a Journey, and Notifications which fire off outgoing messages to the app user.
Triggers
Triggers initiate the start of a Journey. A single app might have multiple Triggers: one app might provide the option, for instance, for a user start their Journey either by sending a text or making a phone call.
Triggers are further separated into three categories:
- User Interactions - Triggered directly by users when they navigate to the relevant link, or text or call the phone number tied to the application.
- API - Triggered by calls to custom API endpoints associated directly with the application. For more on these, see Application APIs.
- Cloud Events - Triggered by subscriptions to external APIs. For more on how to work with these, see Inbound Requests.
The details of each Trigger is defined in the Triggers Builder. The Triggers Builder is also where new Triggers can be created.
Notifications
Notifications are outgoing messages that do not require a response through the same channel they were sent. They can be tied directly to a Journey Step as an action, in which case the Notification will be sent after the user reaches that step in their Journey.
In order for Notifications that are sent from a Journey Step be TCPA-compliant, theactor.regionandactor.time_zonemust be set before initializing the Actor. This will automatically initialize acalendarRestrictionproperty on the Actor, which will resolve to the correct TCPA calendar to use for the user. For more information, see How To enforce TCPA.
Notifications are created in the Notifications Builder. There are two types of Notifications:
- SMS Notifications - Sent via text message.
- Email Notifications - Sent via email.
In order to send text messages and emails to users, the relevant contact information must be collected and properly saved. For more on how this is done, see Conversations with Actors.
Stage
The Stage displays a big-picture view of the application flow, conceptualized as a funnel that users travel down. The funnel is editable directly in the Stage.
Triggers
While the details of Triggers are edited in the Trigger Builder, they are incorporated into an application in the Journey Builder by dragging them from the the Tree to the Triggers section of the Stage.
Journey Steps
The Journey Steps define the flow of an application after it is triggered. This section is further split into three parts: Start, Steps, and End.
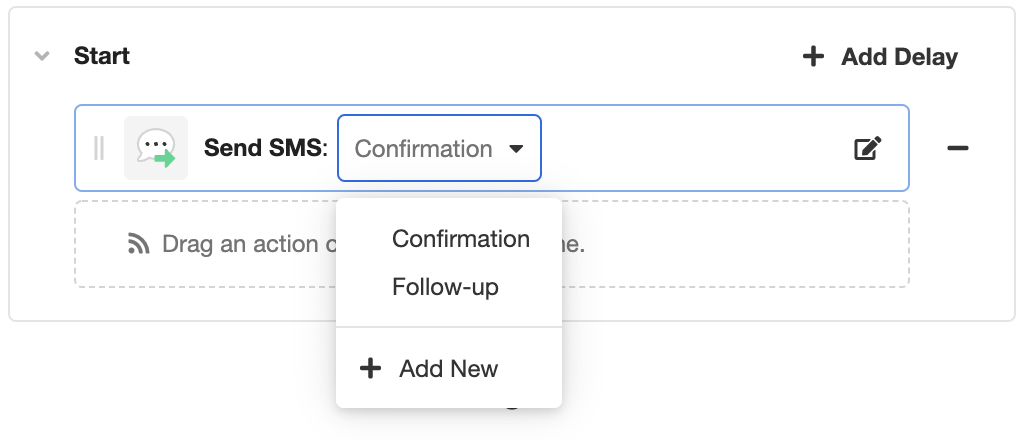
Each Step, including Start and End, provide the option to add Notifications. To add a Notification to a Step, drag and drop the applicable type of Notification (SMS or Email) from the Notifications section in the Tree, or click the box that reads Drag an action or click here to add one. From there, you can select the Notification you want to send from the dropdown menu that appears in the newly-added Notification. Notifications available for selection here are created and edited in the Notifications Builder:
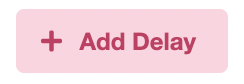
Any number of Notifications can be associated with a Step. By default, Notifications are sent as soon a Step begins, although for all steps but End, it is also possible to delay sending Notifications by clicking on the Add Delay button:
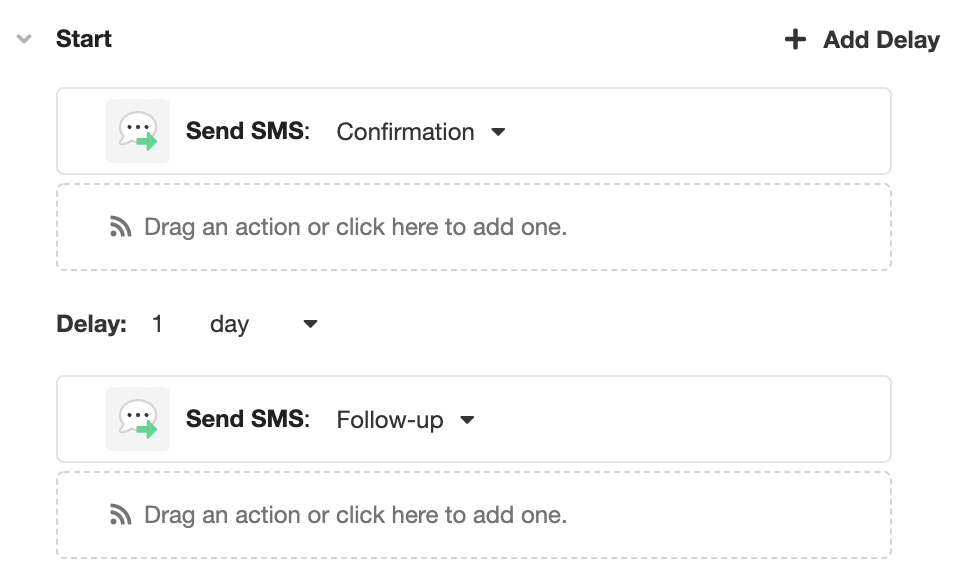
Any number of Notification delays can be added to a Step, and any number of Notifications can be nested under each delay. The following example shows a Starting Step in which a Confirmation SMS Notification is sent as soon as a Journey Begins, and a Follow-up SMS Notification is sent one day later. You can modify the time units of the delay by selecting a different unit from the associated dropdown menu, and you can change the number of time units by entering in different numbers:
Start
The Start Step provides the means to send Notifications as a Journey begins, or schedule a Notification to be sent some time after a Journey begins.
For instance, in cases where an app is used for call deflection, it might be advantageous to immediately respond to an incoming all by sending an SMS Notification containing a Journey Link that redirects the user to a Web Flow.
Steps
Steps are subsections of an application flow.
While each Step must begin with a new Web Flow, Web Flows and Journey Steps are distinctly different things: Journey Steps can contain any number of Web Flows. Web Flows are typically built around a specific purpose, such as filling out an individual form or making a single appointment. Meanwhile, Journey Steps conceptualize a broader perspective focused on funnel milestones. Filling out a form and making an appointment are done in different Web Flows, but they could very well be part of the same Journey Step depending on the nature of the application.
The first non-Start Step in every Journey designates the Web Flow users will first see when first navigating to the web portion of the application. In some cases, this might be the only non-Start Step in the Journey.
If a multi-Step Journey has been created in the Journey Builder, users are guided from one Step to another using the Go to Next Journey Step Action. In practice, this Action is used in place of a Navigate To Web Flow Action when navigating to the next Web Flow corresponds with starting a new Step.
Creating a New Step
Insert a new Step into a Journey by clicking on the '+' icon in the Stage placed where you want the Step to go. Upon creation, the Journey Step can be renamed in the text box to the immediate right of the Step Number:

For the Journey Step to work as intended, a Web Flow must be designated to begin the Step; this is the Web Flow that users will navigated to when they first begin this Step. To designate a starting Web Flow, select one from the dropdown menu to the immediate right of Web Flow Starts:

The Web Flows that appear in this dropdown menu are Web Flows that have already been created in the Web Flows Builder. If none are applicable, the dropdown menu also provides the option to create a new Web Flow. This Web Flow is blank upon creation, and editing it must be done in the Web Flow Builder.
End
The End section provides the ability to send Notifications when a Journey ends.
For instance, Notifications might be sent to thank users for completing the application flow, or to share some important insights gathered from their Journey.
Updated 3 months ago